Last Updated on February 8, 2026
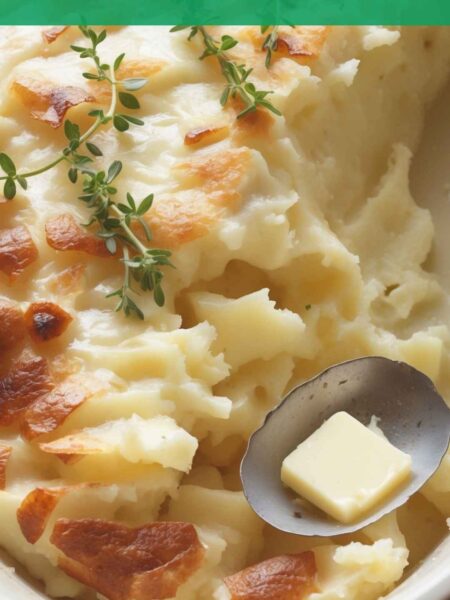
A warm basket of freshly baked rolls is the ultimate comfort when you sit down for dinner. Picture this: you’ve just heated up a rich, hearty soup or maybe a steaming plate of pasta. As you pull out the breadmaker rolls, golden and puffed, your mouth waters.
There’s nothing quite like tearing into a soft, warm roll, slathering it with butter, and soaking up that delicious broth. Or maybe you prefer them simply dunked into a plate of marinara sauce—either way, these rolls will elevate your meal and make your family gather around the table just a little bit closer.

Today, I’m excited to share with you my go-to recipe for breadmaker rolls. These rolls are simple, yet incredibly satisfying. The beauty of using a bread machine is that it takes away much of the hard work, leaving you with the joy of freshly baked bread without the fuss.
Whether it’s a casual dinner or a holiday feast, these rolls will surely have everyone coming back for more.
What is breadmaker rolls recipe?
Breadmaker rolls are delightful, fluffy rolls made with basic ingredients that come together effortlessly in your bread machine. Think of them as the perfect blend of convenience and homemade goodness. With just a few pantry staples, you can create rolls that are wonderful for soaking up sauces or perfect on their own.
Why This Recipe Works?
This recipe works because it harnesses the power of your breadmaker to develop dough that’s both light and airy. The yeast does its magic while you go about your day, and the end result is a batch of rolls that rise beautifully. With the right balance of ingredients and a little time, you’ll achieve rolls that are golden on the outside and soft on the inside.
How Does It Taste Like?
The moment you take a bite, you’ll be greeted by a tender crumb and a hint of sweetness. The rich flavor of butter melds beautifully with the subtle sweetness from the sugar, creating a comforting roll that practically melts in your mouth. They are deliciously versatile—equally good served with butter or alongside soups and salads.
What sets this recipe apart from other breadmaker rolls recipe variations?
What makes this recipe stand out from others is the unique combination of flavors that elevates the rolls from just basic bread. I’ve included a touch of garlic powder and fresh herbs to enhance the flavor profile, allowing the rolls to shine as a feature rather than just a side kick on your dinner table. Plus, the breadmaker does all the hard work, ensuring a perfect dough every time.
The Ingredients

Here’s what you’ll need for these delightful rolls:
– 1 1/4 cup milk (you can use plant-based milk if desired)
– 3 cups bread flour (for a soft, chewy texture)
– 2 tablespoons butter, melted (adds richness)
– 3 tablespoons sugar (a touch of sweetness)
– 1 teaspoon salt (to balance flavors)
– 2 1/4 teaspoons active dry yeast (one package)
– 1 teaspoon garlic powder (for an extra kick)
– 2 teaspoons dried Italian herbs (to enhance flavor)
Ingredients From : brooklynfarmgirl.com
You Might Like These Recipes!
Swedish Crispbread Rye Seed Crackers Recipe
Swedish Meatballs (Köttbullar) Recipe
How to make breadmaker rolls recipe?
Making these rolls is so simple; you can almost do it with your eyes closed. With just a few steps, you’ll have your dough ready to rise and bake. Let’s get rolling—literally!
Instructions
Step 1: Combine Ingredients

Start by gathering your ingredients. Pour your milk into the pan of your bread machine first. This is important because it helps to create a warm environment for the yeast to activate. Next, add the bread flour, followed by the sugar and salt. Then, make a small well in the center and add the yeast—all of this contributes to the rising process. Finally, drizzle in the melted butter, garlic powder, and dried herbs.
Step 2: Start the Dough Cycle

Place the pan into your bread machine and ensure it’s securely in place. Set your machine to the Dough cycle and press Start. As the machine kneads the dough, you can do a little happy dance! About 50 minutes later, you’ll have a beautifully risen, soft dough ready for the next step.
Step 3: Shape the Rolls

Once the dough cycle finishes, it’s time to get hands-on. Remove the dough from the pan and place it on a floured surface. Gently press down on the dough, deflating it slightly. Divide the dough into 16 equal portions—eyeball it or use a scale if you’re feeling precise. Roll each piece into a ball, tucking the edges underneath for a smooth appearance.
Step 4: Let them Rise

Spray a 13×9 inch baking pan with nonstick spray. Place the round dough balls in the pan, making sure they sit pretty close together. This helps them rise up instead of spread out. Cover them with a clean kitchen towel and let them rise for about 60 minutes until they’ve almost doubled in size.
Step 5: Preheat and Bake

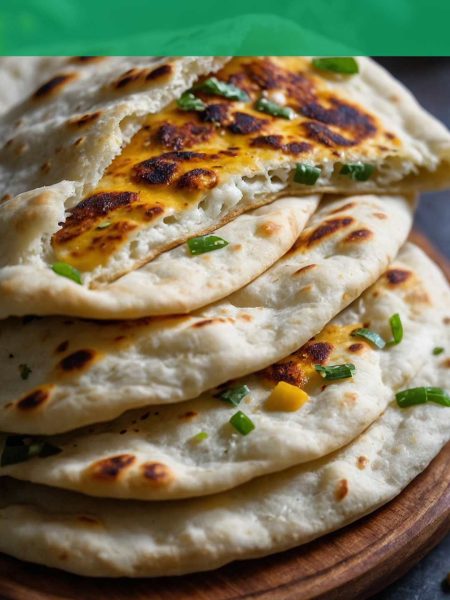
While your rolls are on their final rise, preheat your oven to 350°F (175°C). Once the rolls are puffed and fluffy, pop the baking pan in the oven. Bake for about 16 to 18 minutes, or until they’re golden brown and irresistible.
Step 6: Cool and Serve

After removing the pan from the oven, let the rolls cool for a few minutes. I recommend brushing a little melted butter on top for that gorgeous, glossy finish. Serve them warm, and watch them disappear!
Notes
– Use Fresh Yeast: Always check the expiration date on your yeast to ensure it’s active for the best rise.
– Room Temperature Ingredients: If possible, bring your milk and butter to room temperature before adding them to the bread machine.
– Add Cheese: Consider adding shredded cheese to the dough for a cheesy twist!
– Herb Variations: Feel free to switch up the dried herbs based on your preference—fresh herbs can give a lovely flavor, too!
– Dough Texture: If the dough feels too sticky, you can add a little more flour, a tablespoon at a time.
How Do You Store This breadmaker rolls recipe?
Once your rolls are cool, store them in an airtight container at room temperature. They should remain fresh for 2-3 days. If you feel they won’t be eaten that quickly, consider freezing them. Just place them in a resealable bag or container with parchment paper in between layers to prevent sticking.
Sides For breadmaker rolls recipe
– Tomato Soup: The classic combo! These rolls are perfect for dipping into a rich, creamy tomato soup.
– Caesar Salad: Crisp greens with a creamy dressing balance the softness of the rolls—great for a lighter meal.
– Stew: A hearty beef or vegetable stew pairs perfectly, soaking up all those amazing flavors.
– Pasta: Serve them alongside any pasta dish, as they’ll complement the flavors and provide a satisfying texture.
– Grilled Veggies: Enhance your meal with a side of grilled vegetables, allowing the rolls to soak up those smoky, grilled flavors.
What alternatives can you use for the ingredients if they are not present in your kitchen?
– Milk: Use any plant-based milk, such as almond or oat, to make these dairy-free.
– Bread Flour: All-purpose flour can be used in a pinch, although it may yield a slightly less chewy texture.
– Butter: Coconut oil can substitute for butter for a dairy-free option.
– Sugar: Honey or maple syrup can act as natural sweeteners in place of refined sugar.
– Yeast: If you only have instant yeast, you can use that instead; just adjust the addition method slightly by mixing it with the dry ingredients instead of adding it in the well.
Conclusion
These breadmaker rolls are not just a recipe; they’re an invitation to gather around the table and enjoy a delicious meal together. With minimal effort and maximum flavor, you’ll find they complement nearly any dish. So go ahead, give them a try! I promise, once you whip these up in your breadmaker, they’ll become a staple in your recipe collection. Happy baking!
You Might Also Like These Latest Recipes!

Breadmaker Rolls Recipe – Easy Meal Recipe
Description
Today, I’m excited to share with you my go-to recipe for breadmaker rolls. These rolls are simple, yet incredibly satisfying. The beauty of using a bread machine is that it takes away much of the hard work, leaving you with the joy of freshly baked bread without the fuss.
Ingredients
Instructions
Step 1: Combine Ingredients
-
Start by gathering your ingredients. Pour your milk into the pan of your bread machine first. This is important because it helps to create a warm environment for the yeast to activate. Next, add the bread flour, followed by the sugar and salt. Then, make a small well in the center and add the yeast—all of this contributes to the rising process. Finally, drizzle in the melted butter, garlic powder, and dried herbs.
Step 2: Start the Dough Cycle
-
Place the pan into your bread machine and ensure it’s securely in place. Set your machine to the Dough cycle and press Start. As the machine kneads the dough, you can do a little happy dance! About 50 minutes later, you’ll have a beautifully risen, soft dough ready for the next step.
Step 3: Shape the Rolls
-
Once the dough cycle finishes, it's time to get hands-on. Remove the dough from the pan and place it on a floured surface. Gently press down on the dough, deflating it slightly. Divide the dough into 16 equal portions—eyeball it or use a scale if you're feeling precise. Roll each piece into a ball, tucking the edges underneath for a smooth appearance.
Step 4: Let them Rise
-
Spray a 13x9 inch baking pan with nonstick spray. Place the round dough balls in the pan, making sure they sit pretty close together. This helps them rise up instead of spread out. Cover them with a clean kitchen towel and let them rise for about 60 minutes until they’ve almost doubled in size.
Step 5: Preheat and Bake
-
While your rolls are on their final rise, preheat your oven to 350°F (175°C). Once the rolls are puffed and fluffy, pop the baking pan in the oven. Bake for about 16 to 18 minutes, or until they’re golden brown and irresistible.
Step 6: Cool and Serve
-
After removing the pan from the oven, let the rolls cool for a few minutes. I recommend brushing a little melted butter on top for that gorgeous, glossy finish. Serve them warm, and watch them disappear!
Nutrition Facts
Servings 16
- Amount Per Serving
- Calories 120kcal
Note
- Use Fresh Yeast: Always check the expiration date on your yeast to ensure it’s active for the best rise.
- Room Temperature Ingredients: If possible, bring your milk and butter to room temperature before adding them to the bread machine.
- Add Cheese: Consider adding shredded cheese to the dough for a cheesy twist!
- Herb Variations: Feel free to switch up the dried herbs based on your preference—fresh herbs can give a lovely flavor, too!
- Dough Texture: If the dough feels too sticky, you can add a little more flour, a tablespoon at a time.
Frequently Asked Questions
1. How can I tell if my yeast is still good?
To test if your yeast is active, mix a teaspoon of sugar in 1/4 cup of warm water (about 110°F). Stir in 2 teaspoons of yeast and wait for 5-10 minutes. If it foams up, your yeast is good to go!
2. Can I make the dough ahead of time?
Absolutely! You can prepare the dough, let it rise, then refrigerate it for up to 24 hours. Just allow it to come back to room temperature before shapi
3. Can I freeze the rolls?
Yes! Bake the rolls, cool completely, and then freeze them in an airtight container. To reheat, bake from frozen at 350°F for about 10-15 minutes.
4. What is the difference between bread flour and all-purpose flour?
Bread flour has a higher protein content compared to all-purpose flour, resulting in a chewier texture that’s ideal for yeast breads.
5. Can I add mix-ins to the dough?
Definitely! Feel free to fold in ingredients like cheese, olives, or sun-dried tomatoes before shaping the rolls for added flavor and texture.