9×9 Brownie Recipe
Last Updated on July 2, 2026
This post contains affiliate links. As an Amazon Associate I earn from qualifying purchases.
I’ll never forget the first time my grandmother pulled a tray of brownies from her kitchen—they were shiny on top, with that perfect paper-thin crackle, and when I bit into one, it melted like velvet. But here’s the honest truth: for years, my brownies came out either dry and cakey or underbaked and gloppy in the middle. Sound familiar? I watched countless batches disappoint me until I understood the real science behind what separates a mediocre brownie from one that makes people close their eyes when they take a bite. Today, I’m sharing the exact method I’ve refined through my registered dietitian background and years of kitchen testing—a 9×9 brownie recipe that delivers those bakery-level results every single time.
Why Your Brownies Never Turn Out Right (And How to Fix It)
Let me be real with you: most brownie recipes fail because they treat brownies like cake. They mix ingredients carelessly, overstir the batter, and bake with the wrong temperature balance. As a registered dietitian who grew up watching my family transform simple ingredients into magic, I learned that understanding the why behind each step is what separates disaster from triumph. The good news? Once you know the secrets, you’ll never make a disappointing brownie again.
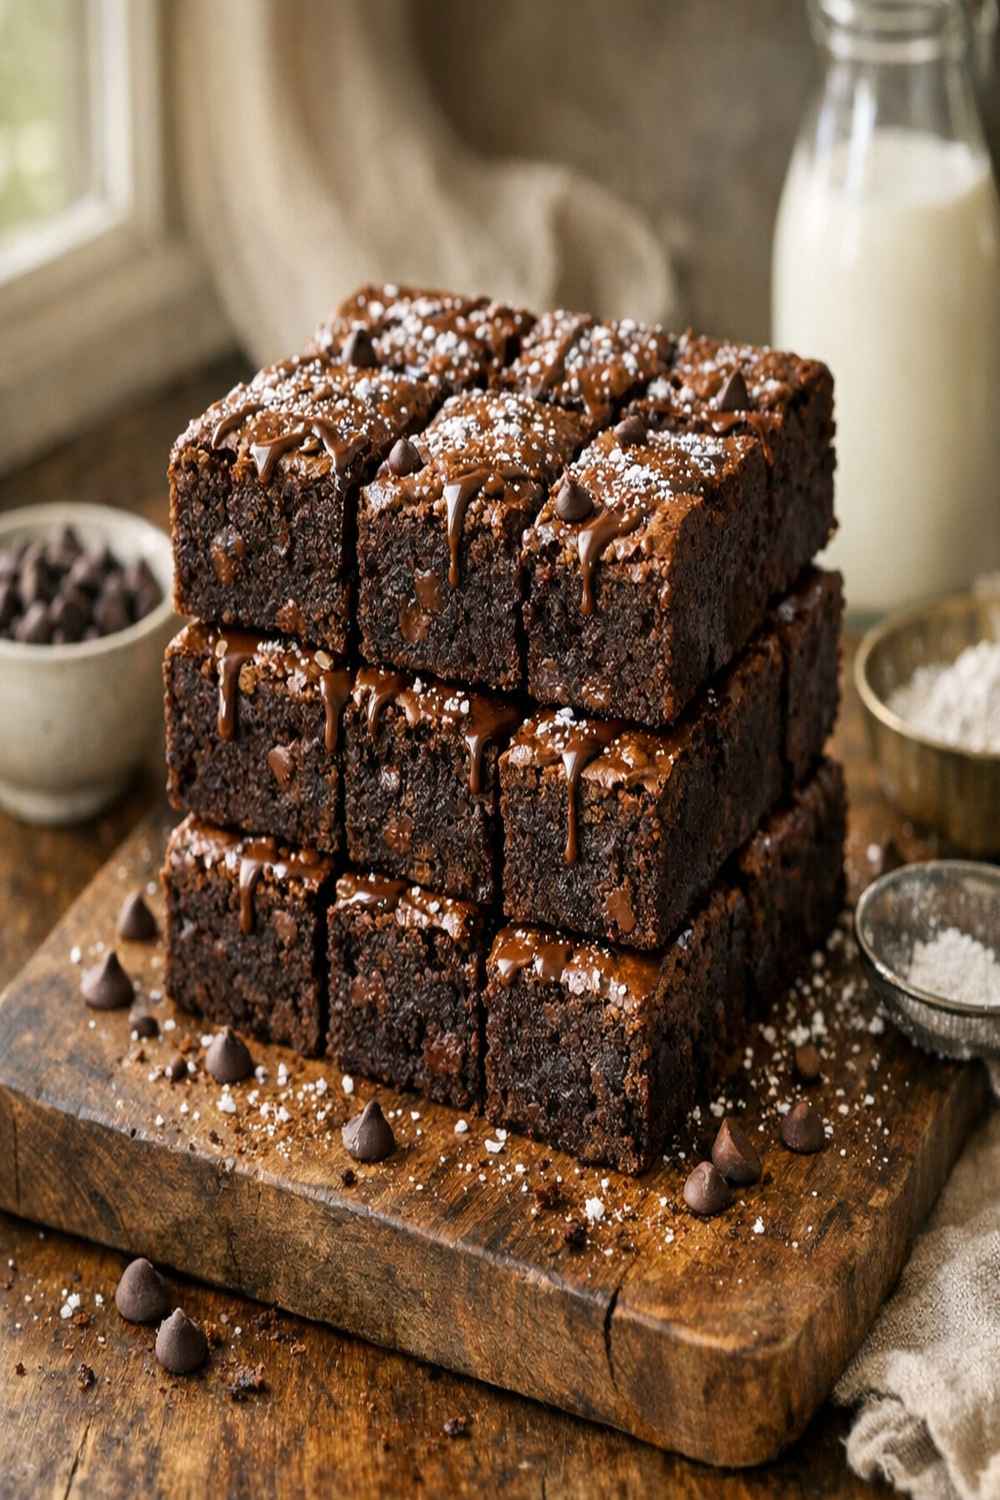
What Makes This 9×9 Brownie Recipe Different?
This recipe uses a two-stage butter-and-oil combination that creates the perfect fudgy crumb structure. Here’s the science: butter provides rich flavor and helps create that shiny, crackled top, while a small amount of oil keeps the brownie moist and tender without the greasiness that comes from using all butter. The espresso powder isn’t about coffee flavor—it’s a secret weapon that amplifies the chocolate without adding bitterness. And the technique of whisking warm butter into beaten eggs creates an emulsion that distributes moisture evenly throughout the brownie, preventing dry edges and gummy centers.
Most importantly, this recipe respects the golden rule I learned from my family: minimal mixing after dry ingredients are added. Overstirring develops gluten, turning your brownie into cake. We’re stopping the moment the last trace of flour disappears—that’s it.
Before You Start: What You Need to Know
Two critical insights will transform your brownie game, and most recipes skip right over them:
- Temperature control is everything – The warm butter mixture tempers your eggs gently, creating a silky batter instead of scrambled eggs. Add it too fast or too cold, and your structure falls apart before it even hits the oven.
- Room temperature matters more than you think – Room temperature eggs and a properly melted (but not too hot) butter mixture ensure smooth emulsification. Cold ingredients make lumpy batter; overheated butter cooks the eggs. Both ruin your result.
The Ingredients
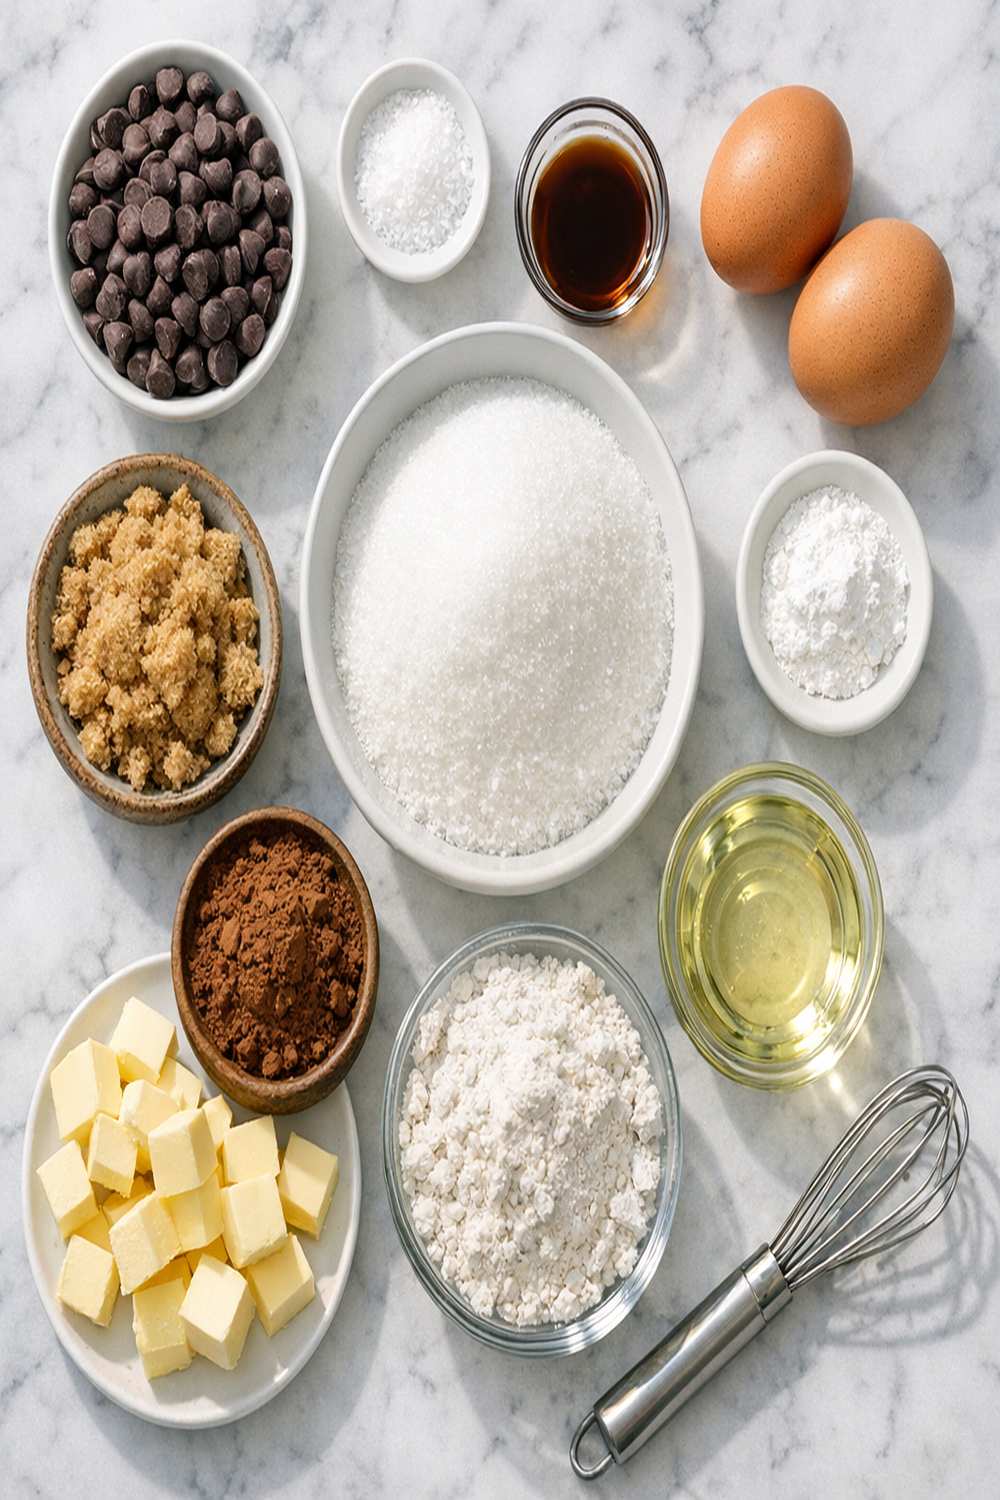
I’ve chosen each ingredient specifically to create that fudgy, dense crumb while keeping the bake foolproof. This recipe yields nine 3×3-inch brownies—perfect for single servings or sharing. Here’s exactly what you need and why:
- ¾ cup (170g) unsalted butter (the foundation of rich chocolate flavor and moisture)
- 2 large eggs plus 1 large egg yolk (the yolk adds richness; eggs at room temperature prevent lumps)
- 2 teaspoons pure vanilla extract (enhances chocolate complexity)
- ½ cup (43g) unsweetened cocoa powder (pure chocolate intensity, not the sweetened stuff)
- 1⅓ cups (265g) granulated sugar, divided (⅓ cup melted with butter, rest whisked with eggs)
- ¾ cup (128g) chocolate chips, semi-sweet or dark (adds pockets of melted chocolate joy)
- 1 cup (120g) all-purpose flour, spooned and leveled (never packed, or you’ll add too much)
- 2 tablespoons (28ml) neutral oil like canola or vegetable (adds tenderness without heaviness)
- ½ teaspoon fine salt (brightens chocolate flavor and balances sweetness)
- 1 teaspoon espresso powder, optional (deepens chocolate notes without coffee taste)
- Non-stick baking spray and parchment paper (prevents sticking and makes cleanup easy)
- ½ teaspoon baking powder (creates just enough rise to prevent a dense, fudgy center from becoming gummy)
Step-by-Step: How to Make 9×9 Brownie Recipe Without Fail
I’m going to walk you through this with absolute confidence-building detail. You’ve got this—I’m right here with you every step.
Step 1: Prep Your Pan and Preheat
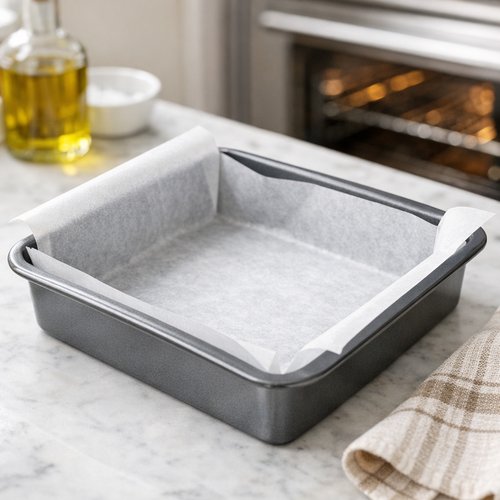
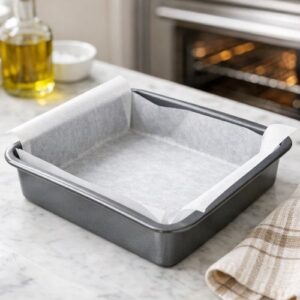
Start by preheating your oven to 350°F (175°C). Line a 9×9-inch baking pan with parchment paper, letting the edges hang slightly over the sides—this makes removal and slicing so much easier. Lightly spray the parchment with non-stick baking spray. Why this matters: parchment prevents sticking while maintaining the brownie’s edges, and the slight overhang means you can lift the entire slab out whole. Set your pan aside.
Step 2: Combine Your Dry Ingredients
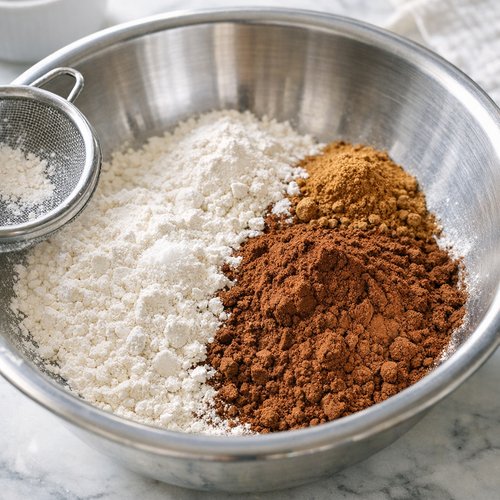
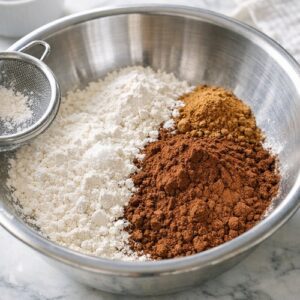
In a large mixing bowl, sift together the all-purpose flour, baking powder, fine salt, unsweetened cocoa powder, and espresso powder if you’re using it. Sift this mixture—don’t just stir it. Sifting aerates the cocoa and removes lumps, which ensures smooth, even chocolate distribution throughout your brownies. This is one of those steps that feels fussy but makes a real difference. Set this bowl aside—you’ll need it in just a moment.
Step 3: Create Your Butter Base
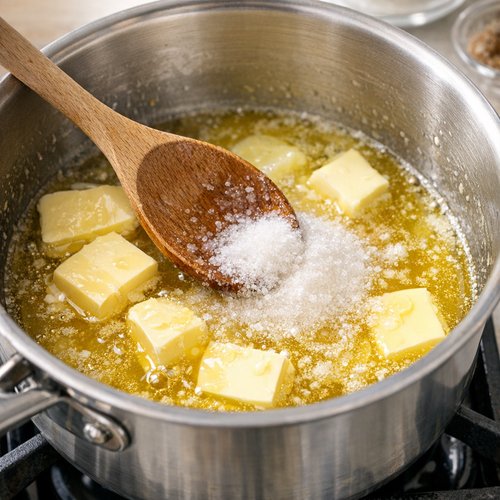
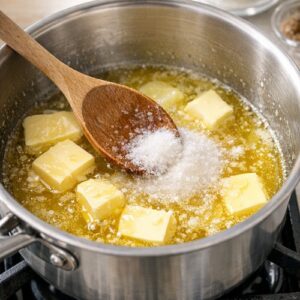
In a medium saucepan, combine the unsalted butter, neutral oil, and ⅓ cup of the granulated sugar. Place this over medium heat and stir frequently until the butter melts completely and the mixture is smooth. This should take about 3-4 minutes. Don’t let it bubble or get too hot—you want it warm enough to create steam, but not so hot it will cook your eggs when you add them. Remove from heat immediately once the butter is melted and the sugar slightly dissolves.
Step 4: Whisk Your Egg Mixture
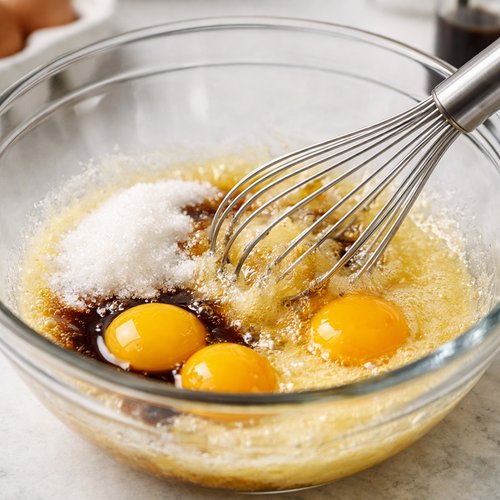
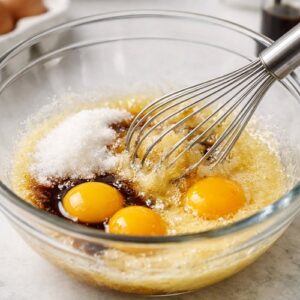
In another large mixing bowl, combine your two room-temperature eggs, one egg yolk, the remaining 1 cup of sugar, and pure vanilla extract. Using a whisk, beat this mixture for about 30 seconds until it’s well combined and slightly pale. You’re not trying to whip air into it like you would for a cake—just combine everything thoroughly. This is a key moment: room temperature eggs whisk smoothly and incorporate the warm butter mixture without curdling.
Step 5: The Critical Butter-to-Egg Combination
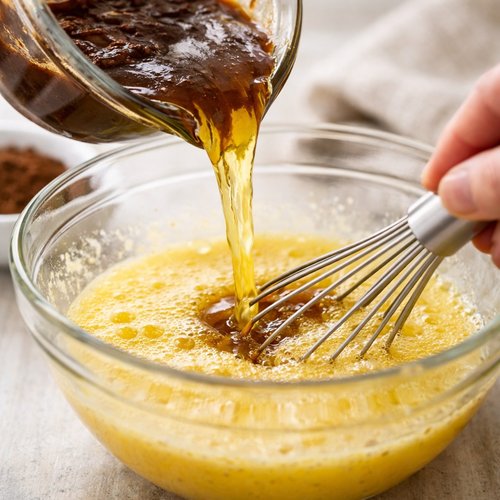
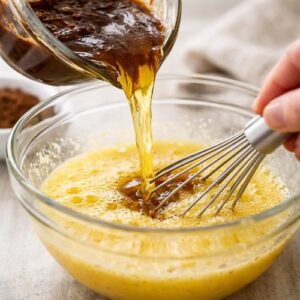
Now comes the moment that determines your success: slowly pouring the warm butter mixture into the egg mixture while whisking constantly. This is not a step to rush. Pour just a tiny bit—maybe a tablespoon—of the warm butter into your eggs while whisking vigorously. Once that’s combined, add another small splash and whisk again. Keep going, adding the butter gradually in small amounts and whisking constantly, until it’s fully incorporated. This slow combination creates a stable emulsion that gives you that signature fudgy texture. If you dump it all in at once, you’ll either scramble the eggs or create a broken, separated batter.
Step 6: Fold in Dry Ingredients and Chocolate
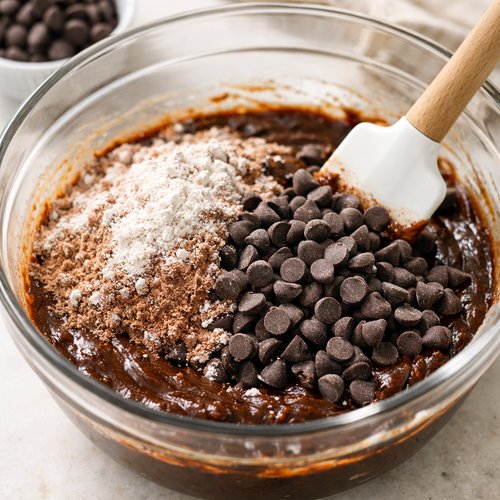
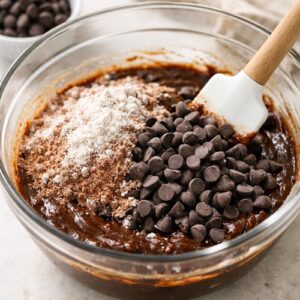
Once your butter and egg mixture is completely combined and smooth, add your sifted dry ingredients and chocolate chips to the bowl. Using a rubber spatula, slowly stir until just combined. This is critical: stop the moment you see the last trace of dry flour disappear. Do not keep stirring. Do not make extra passes with your spatula. Overmixing develops gluten, which turns your brownies from fudgy to cakey. I know it’s tempting to make sure everything is perfectly blended, but resist that urge. A few faint streaks of flour are infinitely better than overmixed batter.
Step 7: Transfer and Smooth
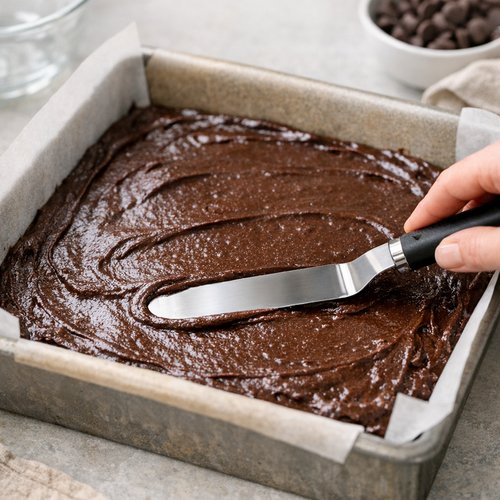
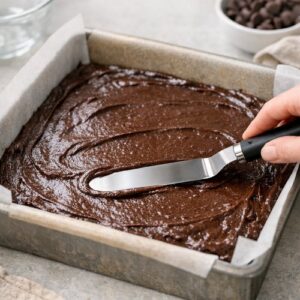
Scrape every bit of batter into your prepared 9×9-inch pan. Using the same rubber spatula or an offset spatula, gently smooth the top. Don’t press down hard—let the batter settle naturally. You want an even surface, but you’re not compacting the batter.
Step 8: Bake to Perfection
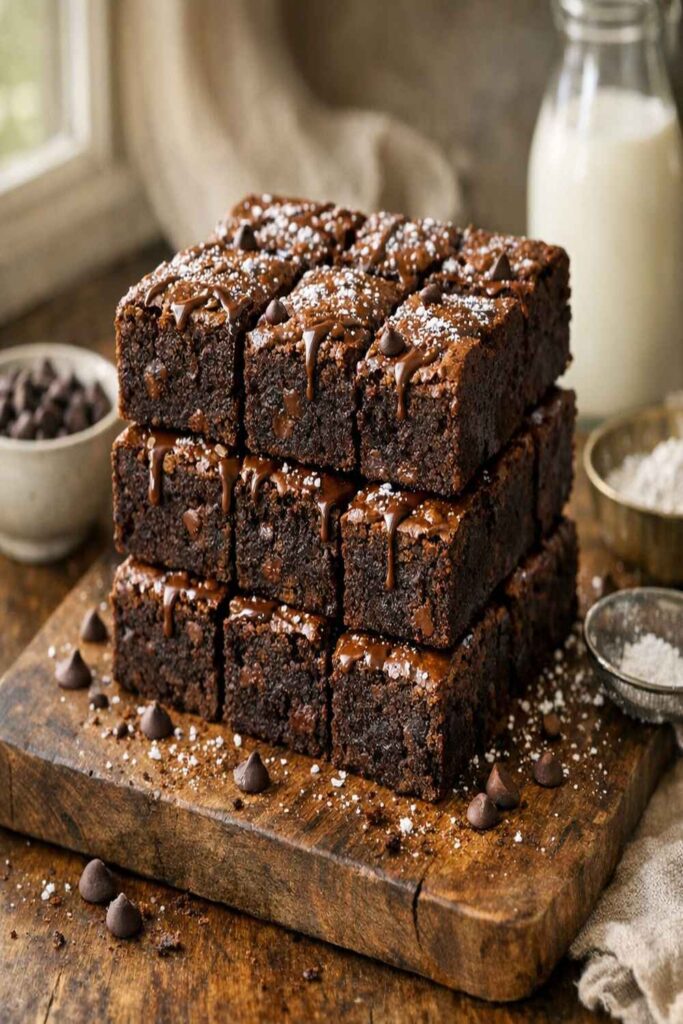
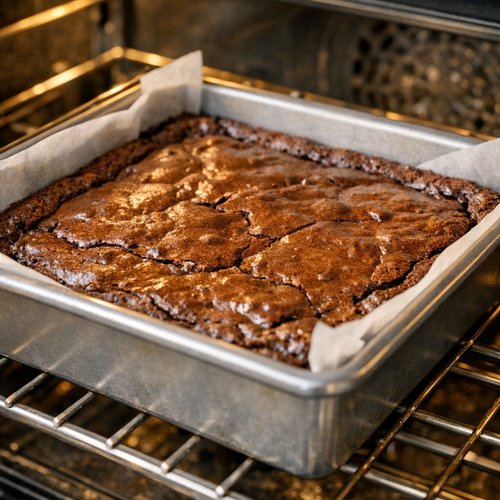
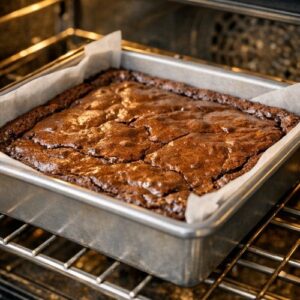
Place the pan in your preheated 350°F oven. Bake for 28 to 30 minutes. You’re looking for specific visual cues here: the edges should be firm and pulling away slightly from the pan, and the top should be shiny with a thin, slightly cracked surface. A toothpick inserted into the center should come out with just a few fudgy crumbs—not clean, and not wet. If you pull it out and it’s completely clean, you’ve overbaked it.
Step 9: Cool Completely Before Slicing
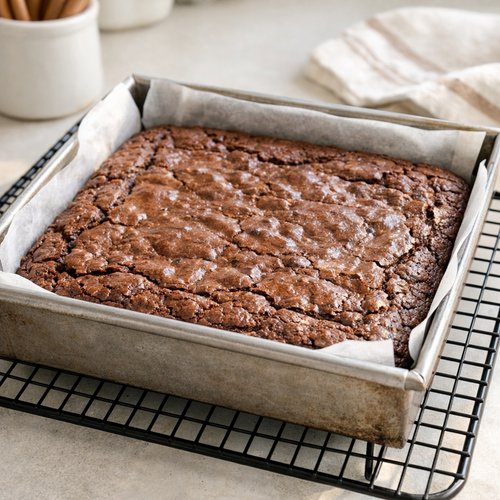
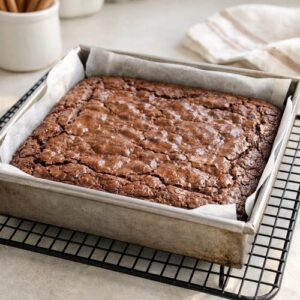
Remove the brownies from the oven and place the pan on a cooling rack. Do not skip the cooling step. Brownies continue cooking slightly from residual heat, and they set up properly as they cool. Let them cool completely at room temperature—this takes about 2 hours. Resist every urge to cut into them early. I know the chocolate smell is incredible, but warm brownies fall apart. Once they’re completely cool, you can cut them into nine perfect 3×3-inch squares. A sharp knife dipped in hot water and wiped dry between cuts helps you get clean edges.
The Most Common Mistakes (And How to Avoid Them)
- Overmixing after adding dry ingredients – This is the #1 mistake I see. Overmixing develops gluten and turns brownies cake-like. Solution: Use a spatula, fold gently, and stop the instant you see the last trace of flour. A few barely-visible streaks are fine.
- Adding cold eggs to warm butter – This creates lumpy, broken batter. Solution: Let your eggs sit on the counter for 30 minutes before baking. Room temperature eggs emulsify smoothly with the warm butter mixture.
- Pouring all the butter mixture in at once – This scrambles your eggs or breaks the emulsion. Solution: Add butter in small amounts—think tablespoon-sized splashes—while whisking constantly. Patience here means perfect brownies.
- Baking too hot or too long – High temperatures create dry edges and caky texture. Solution: Stick to 350°F and check at 28 minutes. The top should look shiny and slightly cracked, not browned.
How Do I Know When It’s Done?
Timing is just a guideline—your senses are your real guide. Here’s exactly what to look for: the edges of the brownie should be firm and pulling back slightly from the pan sides. When you gently shake the pan, the center should jiggle just barely—not slosh like liquid, and not completely solid. The top should be shiny (that’s the cocoa butter doing its job) with a thin, slightly cracked surface. A toothpick inserted into the absolute center should come out with a few moist fudgy crumbs clinging to it—think of it like a very moist chocolate cake, not like a piece of fudge. If the toothpick comes out clean, you’ve baked a minute too long. If it comes out with wet batter, give it another 1-2 minutes.
The 350°F temperature is crucial here. Too hot, and your edges set before your center cooks, creating dry perimeter squares and a gummy middle. Too cool, and you’ll overbake trying to get the center done, drying out the whole batch.
Troubleshooting: When Things Go Wrong
- Brownies came out cakey instead of fudgy – Exact cause: You either overmixed after adding flour, added too much flour (packed instead of spooned), or overbaked. Prevention: Measure flour by spooning it into your measuring cup and leveling with a knife—never scoop directly from the bag. Stop mixing the instant you see the last flour streak. Check at 28 minutes.
- Brownies are gummy in the center, dry on edges – Exact cause: Your oven temperature was too high, or the center of your pan is sitting in a hot spot. Prevention: Use an oven thermometer to verify your oven’s true temperature. Rotate your pan halfway through baking if you notice uneven browning. Bake at 350°F, not 375°F.
- Batter was lumpy or grainy – Exact cause: You added the warm butter too quickly to cold eggs, or your eggs weren’t room temperature. Prevention: Always bring eggs to room temperature. Always add warm butter slowly while whisking constantly. If you see lumps forming, stop and whisk vigorously to smooth them out before continuing.
- Brownies stuck to the pan – Exact cause: Pan wasn’t properly prepared, or you used a dark nonstick pan that conducts heat too aggressively. Prevention: Always use parchment paper and spray it lightly. If using a dark nonstick pan, reduce oven temperature by 25°F.
Can I Store 9×9 Brownie Recipe?
Absolutely, and brownies actually improve with time as flavors develop. Store completely cooled brownies in an airtight container at room temperature for up to 5 days. The parchment paper in which you cut them works great for layering between brownies. For longer storage, wrap individual brownies in plastic wrap and freeze for up to 3 months—they thaw beautifully at room temperature in about 30 minutes.
I recommend storing brownies slightly warmer than you’d store cookies. Room temperature keeps the fudgy texture intact. Cold storage can make them texture harder. If they dry out at all, a piece of fresh bread tucked into the container overnight will restore moisture (the bread transfers its moisture to the brownies).
Expert’s Nutritional Insight
As a registered dietitian, I want to highlight something important about cocoa powder. Unsweetened cocoa is rich in flavonoids—plant compounds with antioxidant properties. When you use real cocoa instead of chocolate-based brownie mixes loaded with added sugar and fillers, you’re getting substantially more cocoa solids per bite. The espresso powder deserves a mention too: it contains polyphenols that work synergistically with chocolate’s compounds to enhance their antioxidant activity in your body. Translation? You’re eating brownies that actually contain real chocolate nutrition, not just sugar and cocoa flavor.
Make-Ahead Guide
Here’s my professional meal-prep approach to brownies:
- Prepare 24 hours ahead: Mix your dry ingredients in a bowl and store in an airtight container. Mix your butter-oil-sugar mixture, cool it completely, cover, and refrigerate. The morning of baking, bring butter mixture to room temperature (about 30 minutes), then proceed from Step 4 onward.
- Batter freezing: You can prepare the complete batter, transfer it to your prepared pan (skip baking), cover tightly with plastic wrap, and freeze for up to 2 weeks. Bake directly from frozen—add 3-5 minutes to baking time and check for doneness as usual.
- Partially baked brownies: Bake for 20 minutes only, cool, wrap tightly, and refrigerate up to 3 days. Finish baking in a 350°F oven for 8-10 minutes when ready to serve for freshly-baked brownie texture.
Seasonal Variations
This base recipe is incredibly adaptable. Here’s how I shift it through the seasons:
- Spring/Summer: Replace ¼ cup chocolate chips with ¼ cup freeze-dried strawberries or raspberries. Add ½ teaspoon of fresh lemon zest to your egg mixture for brightness.
- Fall/Winter: Add 1 teaspoon of cinnamon and ¼ teaspoon of cayenne pepper to your dry ingredients. These enhance chocolate’s warmth beautifully.
- Holiday version: Fold in ¼ cup chopped toasted pecans or walnuts, and add 1 tablespoon of bourbon or rum to the butter mixture for sophistication.
What Can I Serve With 9×9 Brownie Recipe?
These brownies shine on their own, but here are my favorite pairings:
- Vanilla ice cream – The cold creaminess against warm fudgy brownie is pure heaven. Serve a brownie slightly warm with a scoop melting on top.
- Cold milk or espresso – A tall glass of cold milk or a hot cup of espresso cuts through the richness beautifully.
- Fresh berries – Tart raspberries or strawberries add brightness that balances chocolate’s intensity.
- Whipped cream with cocoa powder – Light, elegant, and elevates a simple brownie into something special.
If you’re building a dessert spread, these pair beautifully with lighter sweets. Try them alongside a Blonde Brownie Recipe for visual contrast, or serve them with Bakewell Slice for a sophisticated British-inspired dessert board.
Nutrition Information
Per brownie (one 3×3-inch square): Approximately 285 calories, 15g total fat (8g saturated), 38g carbohydrates, 2g fiber, 28g sugar, and 3g protein. According to USDA database analysis, this brownie delivers significant antioxidant content from cocoa—specifically flavonoids and polyphenols. The fiber content aids digestive health, and the small amount of protein comes from eggs. These brownies are indulgent treats, meant to be savored in single-square portions. The rich, fudgy texture means one square truly satisfies, which I appreciate from a nutritional standpoint.

9x9 Brownie Recipe
Ingredients
Method
- Start by preheating your oven to 350°F (175°C). Line a 9x9-inch baking pan with parchment paper, letting the edges hang slightly over the sides—this makes removal and slicing so much easier. Lightly spray the parchment with non-stick baking spray. Why this matters: parchment prevents sticking while maintaining the brownie's edges, and the slight overhang means you can lift the entire slab out whole. Set your pan aside.
- In a large mixing bowl, sift together the all-purpose flour, baking powder, fine salt, unsweetened cocoa powder, and espresso powder if you're using it. Sift this mixture—don't just stir it. Sifting aerates the cocoa and removes lumps, which ensures smooth, even chocolate distribution throughout your brownies. This is one of those steps that feels fussy but makes a real difference. Set this bowl aside—you'll need it in just a moment.
- In a medium saucepan, combine the unsalted butter, neutral oil, and ⅓ cup of the granulated sugar. Place this over medium heat and stir frequently until the butter melts completely and the mixture is smooth. This should take about 3-4 minutes. Don't let it bubble or get too hot—you want it warm enough to create steam, but not so hot it will cook your eggs when you add them. Remove from heat immediately once the butter is melted and the sugar slightly dissolves.
- In another large mixing bowl, combine your two room-temperature eggs, one egg yolk, the remaining 1 cup of sugar, and pure vanilla extract. Using a whisk, beat this mixture for about 30 seconds until it's well combined and slightly pale. You're not trying to whip air into it like you would for a cake—just combine everything thoroughly. This is a key moment: room temperature eggs whisk smoothly and incorporate the warm butter mixture without curdling.
- Now comes the moment that determines your success: slowly pouring the warm butter mixture into the egg mixture while whisking constantly. This is not a step to rush. Pour just a tiny bit—maybe a tablespoon—of the warm butter into your eggs while whisking vigorously. Once that's combined, add another small splash and whisk again. Keep going, adding the butter gradually in small amounts and whisking constantly, until it's fully incorporated. This slow combination creates a stable emulsion that gives you that signature fudgy texture. If you dump it all in at once, you'll either scramble the eggs or create a broken, separated batter.
- Once your butter and egg mixture is completely combined and smooth, add your sifted dry ingredients and chocolate chips to the bowl. Using a rubber spatula, slowly stir until just combined. This is critical: stop the moment you see the last trace of dry flour disappear. Do not keep stirring. Do not make extra passes with your spatula. Overmixing develops gluten, which turns your brownies from fudgy to cakey. I know it's tempting to make sure everything is perfectly blended, but resist that urge. A few faint streaks of flour are infinitely better than overmixed batter.
- Scrape every bit of batter into your prepared 9x9-inch pan. Using the same rubber spatula or an offset spatula, gently smooth the top. Don't press down hard—let the batter settle naturally. You want an even surface, but you're not compacting the batter.
- Place the pan in your preheated 350°F oven. Bake for 28 to 30 minutes. You're looking for specific visual cues here: the edges should be firm and pulling away slightly from the pan, and the top should be shiny with a thin, slightly cracked surface. A toothpick inserted into the center should come out with just a few fudgy crumbs—not clean, and not wet. If you pull it out and it's completely clean, you've overbaked it.
- Remove the brownies from the oven and place the pan on a cooling rack. Do not skip the cooling step. Brownies continue cooking slightly from residual heat, and they set up properly as they cool. Let them cool completely at room temperature—this takes about 2 hours. Resist every urge to cut into them early. I know the chocolate smell is incredible, but warm brownies fall apart. Once they're completely cool, you can cut them into nine perfect 3x3-inch squares. A sharp knife dipped in hot water and wiped dry between cuts helps you get clean edges.
Notes
FAQs
Can I use melted chocolate instead of cocoa powder?
Yes, but with adjustments. Replace the ½ cup cocoa powder with 3 ounces of melted dark chocolate mixed into your warm butter mixture. Melt it gently and let it cool slightly before whisking it into the eggs. The brownies will be slightly more fudgy and dense, which many people prefer. Skip the espresso powder if you do this—you don’t need the intensity boost with melted chocolate.
My brownies always crack on top—is that bad?
Not at all! That shiny, slightly cracked top is actually what we’re aiming for. It indicates proper moisture and structure. If you want absolutely smooth tops, cover the pan with foil for the last 5 minutes of baking, but I think the crackle is part of the charm and proof that your brownies are baked correctly.
Can I double this recipe for a 9×13-inch pan?
Yes! Double all ingredients exactly and bake in a 9×13-inch pan. You’ll need to add 3-5 minutes to baking time (so check at 31-33 minutes). The brownies will be slightly thinner, which some people prefer. This makes 18 brownies instead of 9.
What if I don’t have espresso powder?
Simply omit it. The brownies will be delicious—slightly less complex in flavor, but still rich and fudgy. Don’t substitute with instant coffee granules; they won’t dissolve properly. If you want extra chocolate depth, add an extra tablespoon of cocoa powder instead.
Why does my batter look broken or separated?
This almost always means you added the warm butter too quickly or your eggs were cold. If you catch it happening, stop and whisk vigorously for 30-60 seconds—sometimes you can bring it back together. If you’ve already added all the butter and it’s still broken, add one egg yolk whisked with a tablespoon of water, whisking constantly. This often rescues an emulsion. In the future, room temperature eggs and slow butter addition will prevent this completely.
More Recipes You’ll Love
- Jersey Mike’s Brownie Recipe – A copycat version of the beloved sandwich shop brownies if you want to explore variations
- Blonde Brownie Recipe Easy – The vanilla-forward cousin to these chocolate brownies—same technique, different flavor profile
- Bread Machine Cinnamon Bun Recipe – A comforting baked good that shares that same soulful quality as fresh brownies
You now have everything you need to create bakery-quality brownies in your own kitchen—the science, the technique, the troubleshooting, and the confidence. This isn’t just a recipe; it’s a method backed by my years of professional nutrition work and family kitchen wisdom. Those brownies my grandmother made? That magic came from understanding exactly why each step matters. You’ve got that knowledge now too. Your 9×9 pan is waiting, your ingredients are ready, and I absolutely believe in your success. Cook with confidence!