

Ingredients
Method
Step 1: Load Your Bread Machine Like a Pro
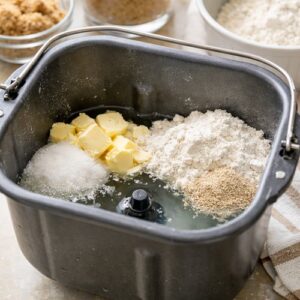
- This is the moment where sequence matters. Always add liquids first—that lukewarm water goes into the bottom of your bread machine pan. Then add your room-temperature butter chunks scattered over the water. Next comes the sugar and egg, which will start to incorporate as the machine begins mixing. Then your salt. Finally, gently pour in your flour, creating a small mountain over everything else. Nestle your quick-rise yeast into a small pocket in the top of the flour—it should never touch the wet ingredients directly, or it'll activate prematurely and give you uneven rising. If your bread machine has a separate yeast dispenser, use it. If not, that flour pocket is your safety measure. Some machines have delayed-start features that let you load ingredients and set a timer—I'd skip that for this recipe since we want optimal yeast activation timing.
Step 2: Run the Dough Cycle
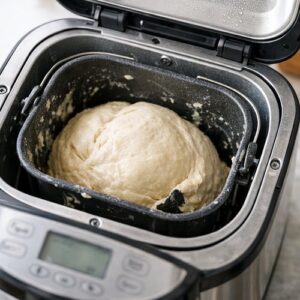
- Close your bread machine and select the dough cycle only—not the full bread cycle. This cycle will mix, knead, and do the first rise, then stop before baking. Most dough cycles run 90 minutes, but check your machine's manual since times vary. You want the dough to rise until it's puffy and spring-back when you poke it gently. During this time, you can prep your filling. This is your secret to efficiency: while the machine works, you're getting ahead.
Step 3: Make Your Cinnamon Sugar Filling (While the Machine Runs)
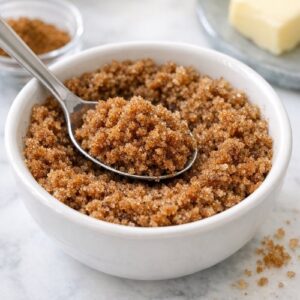
- In a small bowl, combine your packed brown sugar and ground cinnamon. Stir thoroughly to distribute the cinnamon evenly—you don't want pockets of pure cinnamon or plain sugar. If you're using Ceylon cinnamon (which I recommend), you'll notice a more complex sweetness compared to standard cassia. This filling is the soul of these buns, so don't rush it. Set it aside until you need it.
Step 4: Remove Dough and Divide Into Two Portions
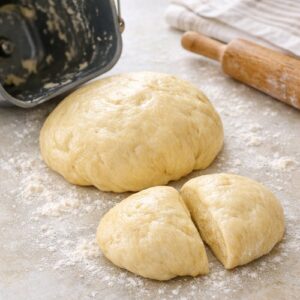
- When your bread machine signals the dough cycle is complete, transfer it to a lightly floured surface. It'll be soft, warm, and beautifully risen. Divide it into two equal portions—you can eyeball this or use a kitchen scale for precision. If you're feeding a crowd, this gives you two full 9x13-inch sheets of buns. If you're freezing half for later, this split is your friend.
Step 5: Roll Your First Dough Portion Into a Rectangle
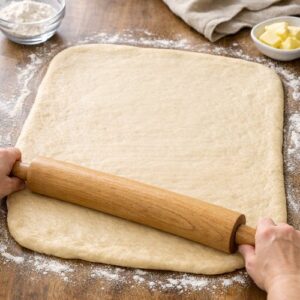
- Flour your work surface lightly and place your first dough portion on it. Using a rolling pin, gently roll it into approximately an 18x12-inch rectangle. You want it uniform in thickness—about 1/4 inch. Don't be aggressive; this dough has already done the hard work of rising, and you're just shaping it. If the dough fights you and springs back, let it rest for 5 minutes. It has memory, and it'll relax and become easier to work with. This is not a race.
Step 6: Spread Butter and Fill
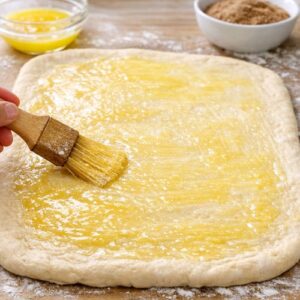
- Brush or spread half of your melted butter over the entire surface of the rolled dough. This butter creates the flaky layers and carries your flavor, so make sure every area gets coverage. Then sprinkle about half of your cinnamon sugar mixture evenly over the butter. I recommend leaving about 1/2 inch at the top edge uncovered—this gives you a clean seal when you roll. Don't skimp on the filling. The dark, caramelized cinnamon sugar layer is what makes these buns Instagram-worthy, and it's what you'll crave.
Step 7: Roll, Seal, and Slice
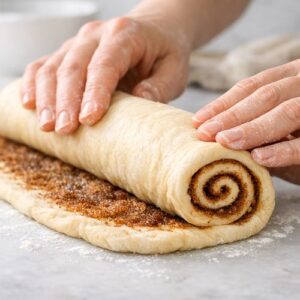
- Starting at one of the long ends, roll your rectangle tightly into a log. Think of it as rolling a yoga mat—evenly and firmly, but not so tight you're squeezing filling out. As you roll toward that unfilled edge you left, it acts as your final seal. Pinch gently to close. Now for the magic moment: using a sharp, straight knife, slice your log into approximately 1-inch pieces. You should get about 12 beautiful pinwheel-shaped buns from each portion. Wipe your knife between cuts if cinnamon sugar buildup occurs—this keeps your edges clean. Pro tip: dental floss works brilliantly for slicing yeast dough if you don't have a bread knife. Pull a long section of unflavored floss, position it above your log, press down gently, and pull toward you. No dragging, no crushing.
Step 8: Arrange on Baking Sheets
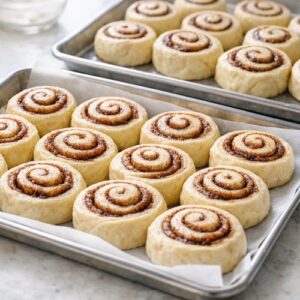
- Prepare two 9x13-inch metal baking sheets with light greasing or parchment paper. Place your buns cut-side up. Here's your creative choice: nestle them so they're touching slightly, or space them 2 inches apart. Touching buns will steam together and create soft, connected rolls—that's my preference. Spaced buns will have crispier outer edges. Both approaches are correct. Choose based on your preference and whether you want more browning or that connected, coffee-shop aesthetic.
Step 9: Repeat With Second Dough Portion
- Roll, fill, slice, and arrange your second portion of dough exactly as you did the first. Now you have two full sheet pans of cinnamon buns ready for their final rise.
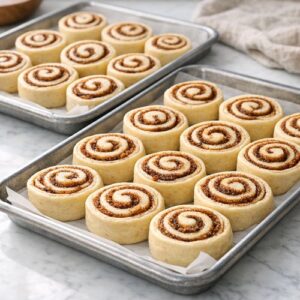
Step 10: Final Rise in a Warm Environment
- Cover both sheet pans loosely with a clean kitchen towel or plastic wrap. Place them somewhere warm—an unheated oven with the light on, a turned-off microwave, or even a warm spot on your counter. Let them rise for 25-30 minutes. They should increase noticeably in size and look puffy and soft. Don't skip this step or rush it. These final 30 minutes create the tender, pillowy texture. You'll know they're ready when a gentle poke with your finger leaves an indent that springs back slowly.
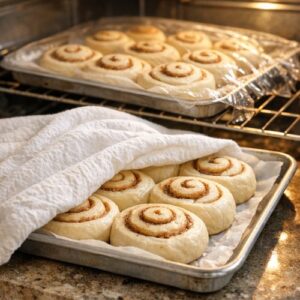
Step 11: Bake to Golden Perfection
- Preheat your oven to 350°F. Once your oven reaches temperature, place both sheet pans inside. Bake for 17-20 minutes, until the tops are lightly golden brown. If you're using glass baking dishes, add 2-3 extra minutes since glass conducts heat differently. The doneness test: gently tap the middle of a bun with your finger. It should feel set but still slightly yielding, and it should spring back slowly. If it feels hollow underneath, you've got perfect structure.
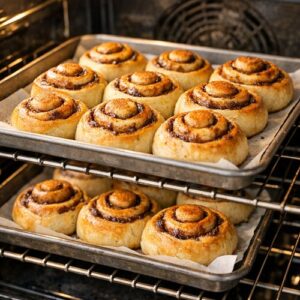
Step 12: Create Your Vanilla Bean Icing
- While buns bake, sift your powdered sugar into a medium bowl to break up any lumps. This is non-negotiable for smooth icing. Add your softened butter, pure vanilla extract, and 4 tablespoons of milk. Whisk until completely smooth. If you prefer thinner icing that drips into the crevices, add another tablespoon or two of milk. If you like it thicker and more spreadable, leave it as is.
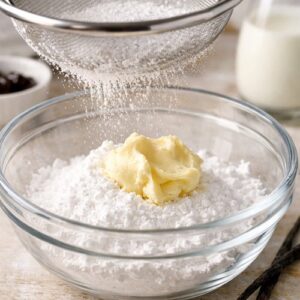
Step 13: The Glory Moment: Icing Warm Buns
- The moment your buns come out of the oven, they're still warm enough that the icing will melt slightly and seep into every crevice. Spread or drizzle your vanilla icing generously over the warm buns. This is not the time for restraint. The icing will set as the buns cool, but that initial melting creates the most indulgent texture. Step back. Breathe in that aroma. You just made bakery-quality cinnamon buns in less than 2 hours.

Notes
- Water temperature matters more than you think. If your water is below 105°F, your yeast wakes up slowly and rises unevenly. If it's above 120°F, you kill the yeast entirely. Invest in an instant-read thermometer—they cost $10 and solve this problem forever. This is the #1 reason people say their bread machine dough "didn't rise properly."
- Putting yeast directly in the water. This is where most machines differ, but if your manual says to add yeast to water, follow it. If it says to make a yeast pocket in the flour, do that instead. Jumping the gun activates yeast before the machine is ready to mix, and you get a false rise that collapses during actual mixing.
- Rolling too thin or too thick. Thinner than 1/4 inch and your buns are all filling with minimal dough structure. Thicker than 3/8 inch and the centers don't bake through before the edges brown. Aim for consistent, 1/4-inch thickness using your rolling pin as your guide.
- Skipping the final rise or rushing it. Those 25-30 minutes aren't optional. This is where your buns transform from dense and tough to pillowy and tender. If you've got the time to bake them, you've got the time to let them rise properly.