Bread Machine Cinnamon Bun Recipe

Last Updated on September 24, 2026
This post contains affiliate links. As an Amazon Associate I earn from qualifying purchases.
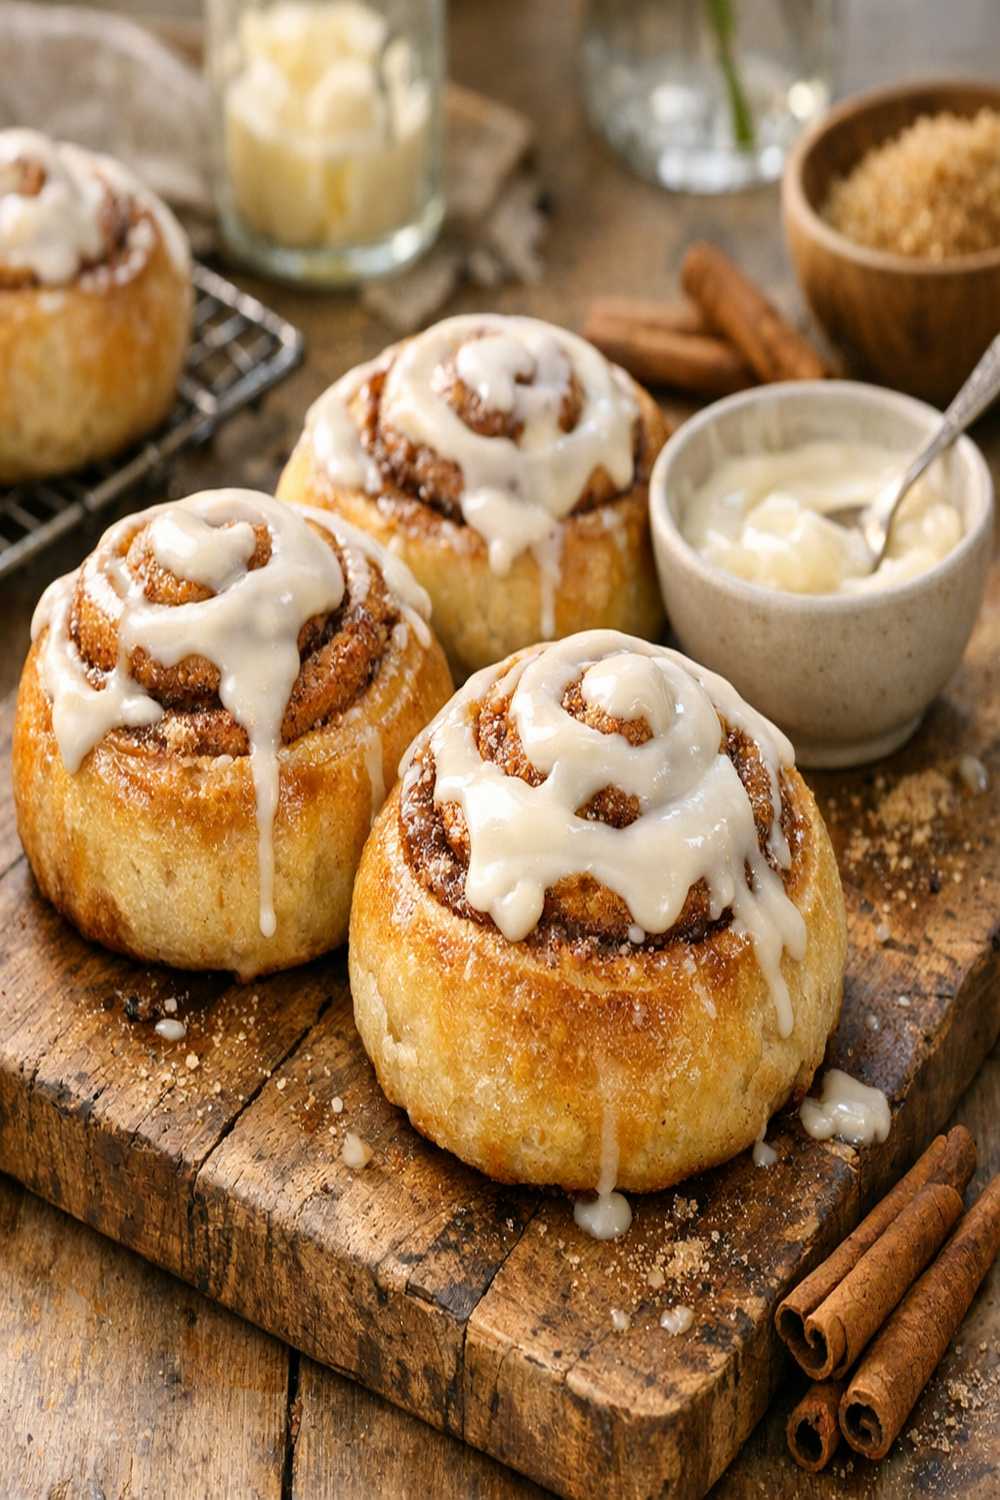
Before you throw those pantry staples away thinking you can’t make anything spectacular, turn them into something even better. This Bread Machine Cinnamon Bun Recipe was born from exactly that moment—when my grandmother pulled room-temperature butter, a few eggs, and some flour from her kitchen and created magic that filled our entire Texas house with that unmistakable aroma of cinnamon and caramelized sugar. I watched her hands work that dough like she was composing a symphony, and I realized: the best recipes aren’t born from fancy techniques or exotic ingredients. They’re born from knowing what you have and trusting yourself to transform it.
That’s the spirit I’m bringing to you today. Whether you’re a bread machine novice or a seasoned baker, this recipe takes the intimidation completely out of homemade cinnamon buns. Your bread machine does the heavy lifting, and you get to experience the joy of pulling warm, fragrant rolls from your oven. No complicated proofing schedules. No guesswork about yeast activation. Just straightforward, foolproof instructions that deliver bakery-quality results every single time.
How to Turn Your Bread Machine Into a Cinnamon Bun Factory (Even If You’ve Never Made Yeast Dough Before)
Here’s what I love most about this approach: a bread machine takes away the variables that intimidate home bakers. No sticky hands fighting with dough. No wondering if you kneaded it long enough. No anxiety about whether your rise happened at the right temperature. The machine handles all of that while you prep your filling and clear counter space.
Years ago, I was helping my aunt prepare for a church potluck. She had a bread machine gathering dust in her basement—a wedding gift she’d never opened because she was convinced she couldn’t bake bread. I challenged her: “Let’s just try it.” Two hours later, we were pulling the most beautiful, evenly-risen dough from that machine, and within the hour, we had fresh cinnamon buns cooling on her rack. Her face when she bit into one? Pure joy. That’s when I understood: this recipe isn’t about impressing people with complicated techniques. It’s about delivering happiness in the simplest possible way.
What Makes This Bread Machine Cinnamon Bun Recipe Different
Most cinnamon bun recipes require overnight refrigeration, multiple rises, or complicated laminating techniques borrowed from French pastry traditions. Beautiful? Absolutely. Realistic for a weeknight? Not even close. This version respects your time while refusing to compromise on flavor or texture.
The bread machine does your heavy lifting in about 90 minutes. Then you roll, fill, slice, do a quick rise—just 25-30 minutes—and bake. From pantry to warm bun in your hands? Less than 2 hours total. That’s a complete breakfast solution that tastes like you spent all morning on it.
I’ve engineered this recipe based on what I’ve learned from working with families across Texas who want real food without real complexity. The butter ratio gives you that tender crumb. The brown sugar filling caramelizes just enough during baking to create those gorgeous spiral layers. And the quick-rise yeast paired with the bread machine’s consistent warmth means your dough rises like it’s been coached by someone who knows exactly what they’re doing.
The Ingredients (Makes 24 Beautiful Cinnamon Buns)
For the Dough
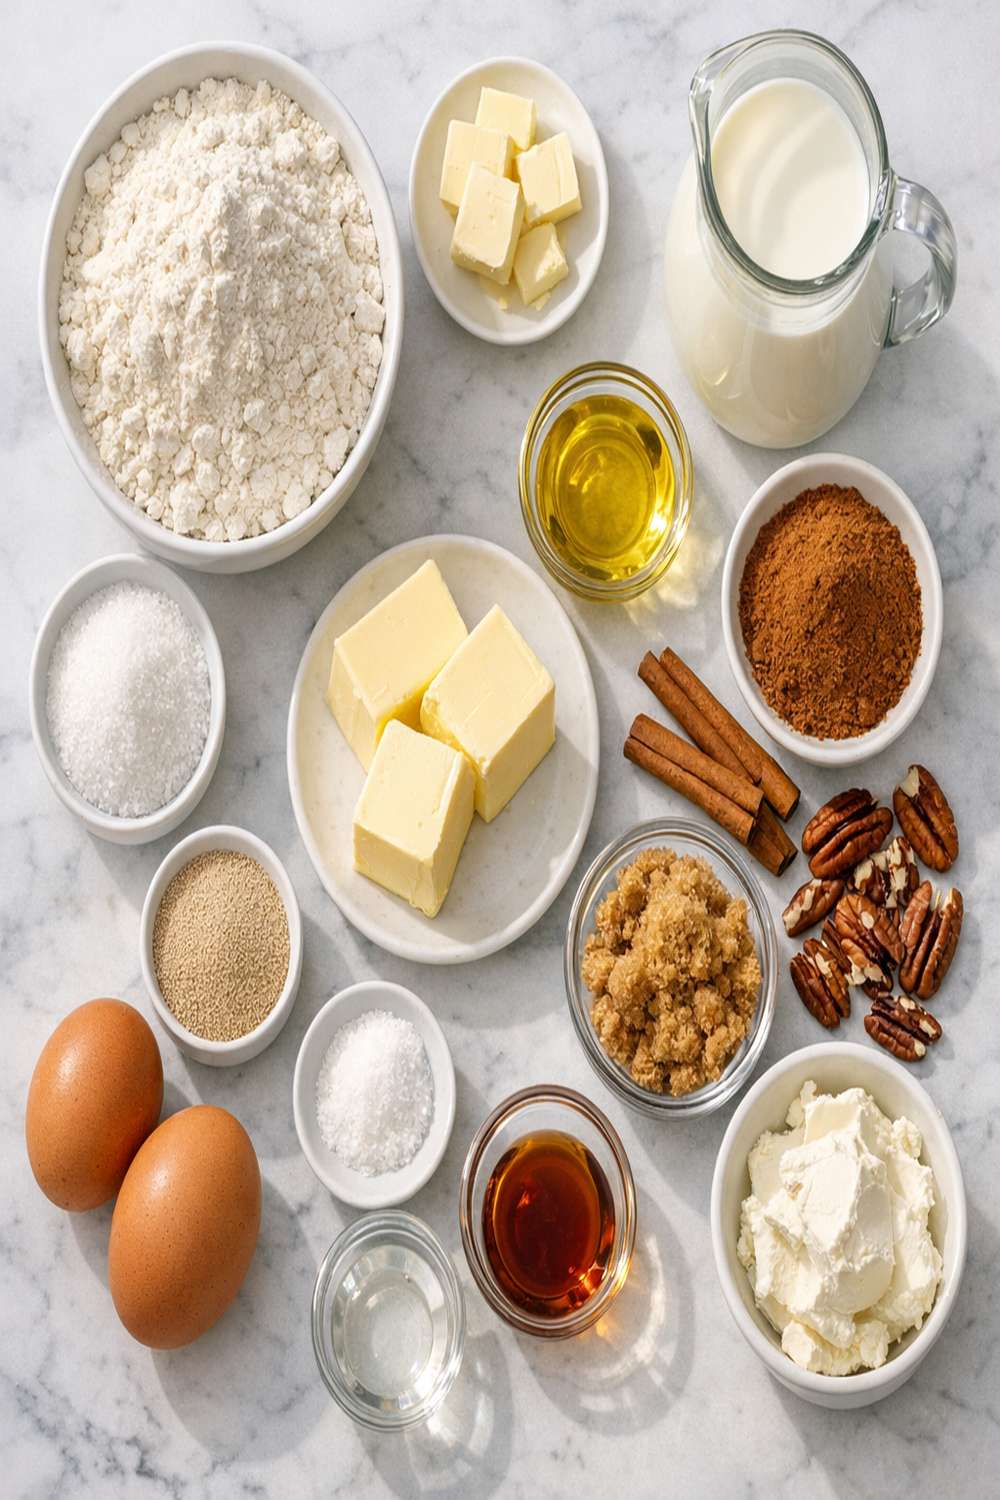
- 1 tablespoon quick-rise yeast (SAF or Fleischmann’s work beautifully)
- 1/2 cup unsalted butter (room temperature and cut into small chunks for even distribution)
- 4 1/2 cups all-purpose flour (spooned and leveled, never packed into measuring cup)
- 1/2 teaspoon ground cardamom (optional but adds sophisticated warmth)
- 5 tablespoons granulated sugar (feeds the yeast and creates subtle sweetness in dough)
- 1 large egg (room temperature for smooth incorporation)
- 1 teaspoon kosher salt (balances sweetness and strengthens gluten structure)
- 1 1/3 cups water (lukewarm between 110-115°F—this is your golden temperature for yeast activation)
For the Cinnamon Sugar Filling
- 1/2 cup unsalted butter (melted and slightly cooled before spreading)
- 2 tablespoons ground cinnamon (Ceylon cinnamon tastes sweeter and more floral than cassia)
- 1 1/2 cups packed brown sugar (cane sugar creates deeper molasses notes than refined)
For the Vanilla Bean Icing
- 4 tablespoons whole milk (plus 1-2 tablespoons more if you prefer thinner consistency)
- 1/2 teaspoon pure vanilla extract (not imitation—the difference is noticeable)
- 1 tablespoon unsalted butter (softened, for richness and shine)
- 3 cups powdered sugar (sifted to prevent lumps)
The Transformation: How to Make Bread Machine Cinnamon Bun Recipe Step by Step
This is where you become the baker. I’m going to walk you through every single step with the kind of detail that means you’ll know exactly what success looks like at each stage. Because baking confidence comes from knowing what to expect.
Step 1: Load Your Bread Machine Like a Pro
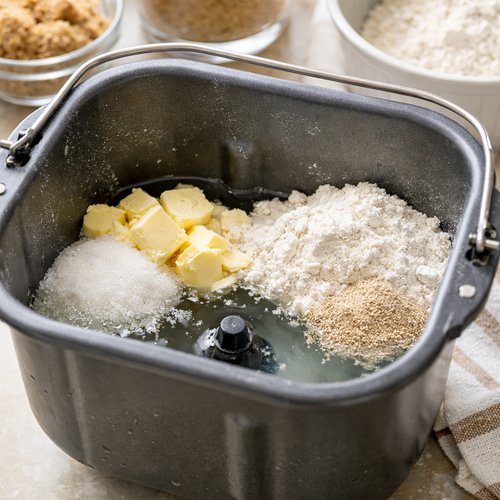
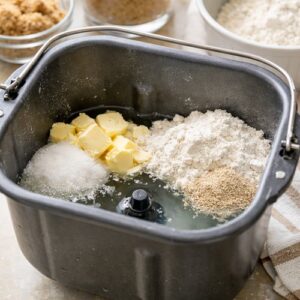
This is the moment where sequence matters. Always add liquids first—that lukewarm water goes into the bottom of your bread machine pan. Then add your room-temperature butter chunks scattered over the water. Next comes the sugar and egg, which will start to incorporate as the machine begins mixing. Then your salt. Finally, gently pour in your flour, creating a small mountain over everything else. Nestle your quick-rise yeast into a small pocket in the top of the flour—it should never touch the wet ingredients directly, or it’ll activate prematurely and give you uneven rising.
If your bread machine has a separate yeast dispenser, use it. If not, that flour pocket is your safety measure. Some machines have delayed-start features that let you load ingredients and set a timer—I’d skip that for this recipe since we want optimal yeast activation timing.
Step 2: Run the Dough Cycle
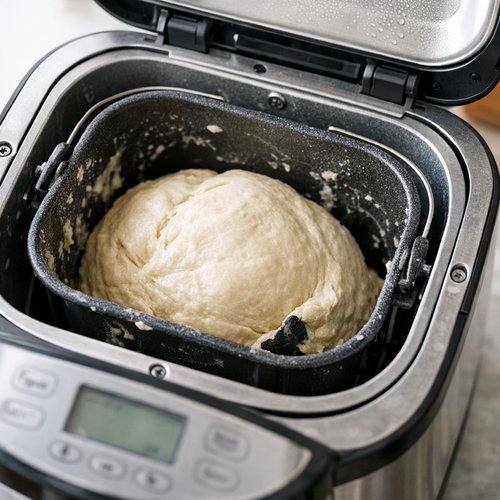
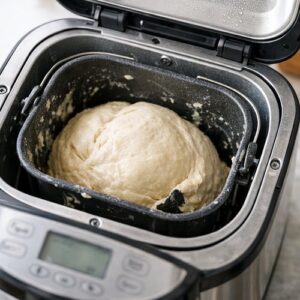
Close your bread machine and select the dough cycle only—not the full bread cycle. This cycle will mix, knead, and do the first rise, then stop before baking. Most dough cycles run 90 minutes, but check your machine’s manual since times vary. You want the dough to rise until it’s puffy and spring-back when you poke it gently.
During this time, you can prep your filling. This is your secret to efficiency: while the machine works, you’re getting ahead.
Step 3: Make Your Cinnamon Sugar Filling (While the Machine Runs)
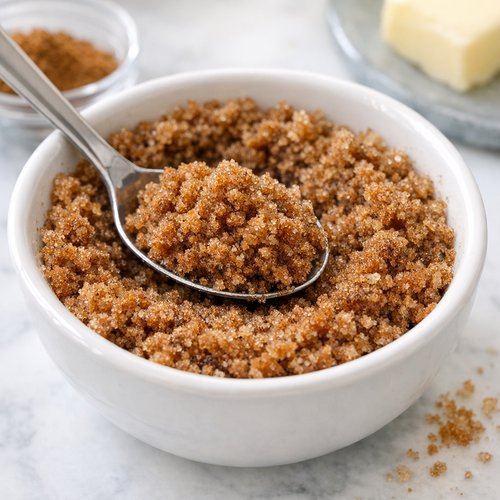
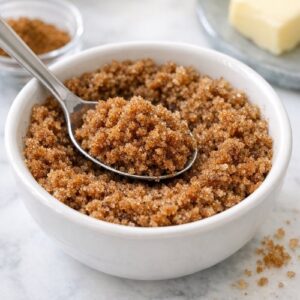
In a small bowl, combine your packed brown sugar and ground cinnamon. Stir thoroughly to distribute the cinnamon evenly—you don’t want pockets of pure cinnamon or plain sugar. If you’re using Ceylon cinnamon (which I recommend), you’ll notice a more complex sweetness compared to standard cassia. This filling is the soul of these buns, so don’t rush it. Set it aside until you need it.
Step 4: Remove Dough and Divide Into Two Portions
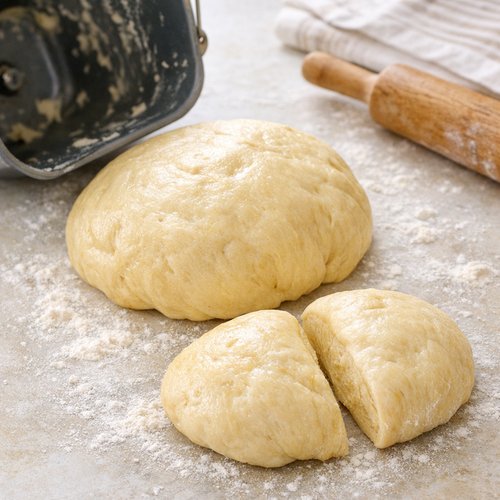
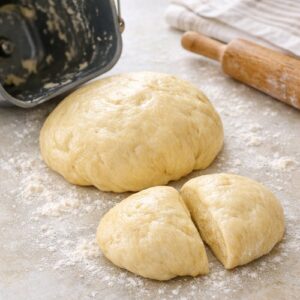
When your bread machine signals the dough cycle is complete, transfer it to a lightly floured surface. It’ll be soft, warm, and beautifully risen. Divide it into two equal portions—you can eyeball this or use a kitchen scale for precision. If you’re feeding a crowd, this gives you two full 9×13-inch sheets of buns. If you’re freezing half for later, this split is your friend.
Step 5: Roll Your First Dough Portion Into a Rectangle
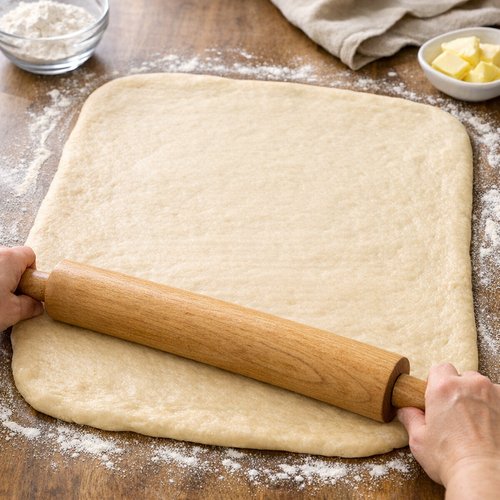
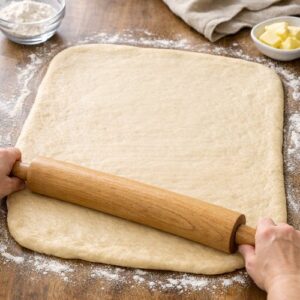
Flour your work surface lightly and place your first dough portion on it. Using a rolling pin, gently roll it into approximately an 18×12-inch rectangle. You want it uniform in thickness—about 1/4 inch. Don’t be aggressive; this dough has already done the hard work of rising, and you’re just shaping it.
If the dough fights you and springs back, let it rest for 5 minutes. It has memory, and it’ll relax and become easier to work with. This is not a race.
Step 6: Spread Butter and Fill
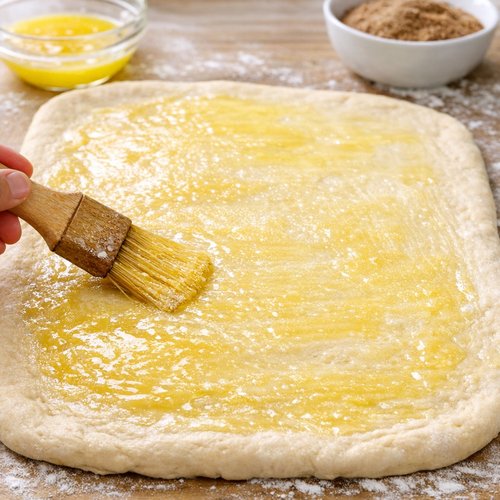
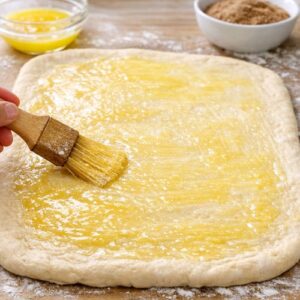
Brush or spread half of your melted butter over the entire surface of the rolled dough. This butter creates the flaky layers and carries your flavor, so make sure every area gets coverage. Then sprinkle about half of your cinnamon sugar mixture evenly over the butter. I recommend leaving about 1/2 inch at the top edge uncovered—this gives you a clean seal when you roll.
Don’t skimp on the filling. The dark, caramelized cinnamon sugar layer is what makes these buns Instagram-worthy, and it’s what you’ll crave.
Step 7: Roll, Seal, and Slice
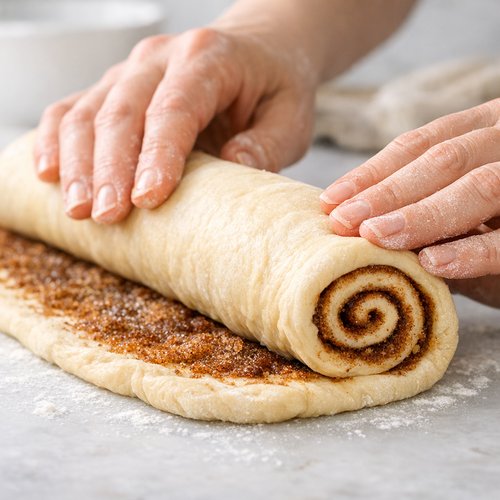
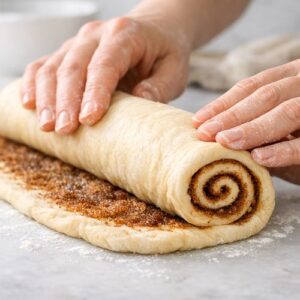
Starting at one of the long ends, roll your rectangle tightly into a log. Think of it as rolling a yoga mat—evenly and firmly, but not so tight you’re squeezing filling out. As you roll toward that unfilled edge you left, it acts as your final seal. Pinch gently to close.
Now for the magic moment: using a sharp, straight knife, slice your log into approximately 1-inch pieces. You should get about 12 beautiful pinwheel-shaped buns from each portion. Wipe your knife between cuts if cinnamon sugar buildup occurs—this keeps your edges clean.
Pro tip: dental floss works brilliantly for slicing yeast dough if you don’t have a bread knife. Pull a long section of unflavored floss, position it above your log, press down gently, and pull toward you. No dragging, no crushing.
Step 8: Arrange on Baking Sheets
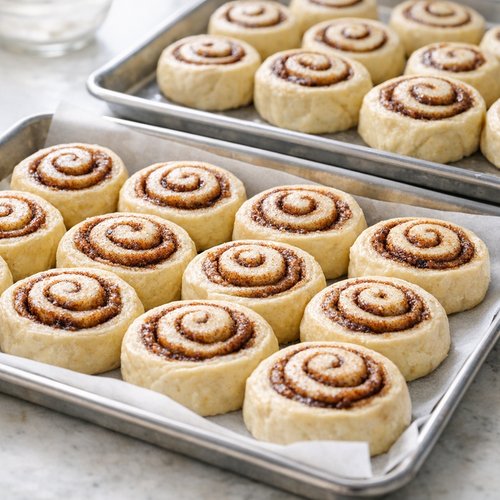
Prepare two 9×13-inch metal baking sheets with light greasing or parchment paper. Place your buns cut-side up. Here’s your creative choice: nestle them so they’re touching slightly, or space them 2 inches apart. Touching buns will steam together and create soft, connected rolls—that’s my preference. Spaced buns will have crispier outer edges.
Both approaches are correct. Choose based on your preference and whether you want more browning or that connected, coffee-shop aesthetic.
Step 9: Repeat With Second Dough Portion
Roll, fill, slice, and arrange your second portion of dough exactly as you did the first. Now you have two full sheet pans of cinnamon buns ready for their final rise.
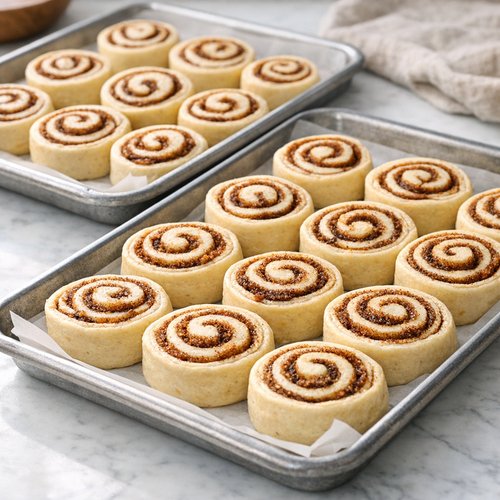
Step 10: Final Rise in a Warm Environment
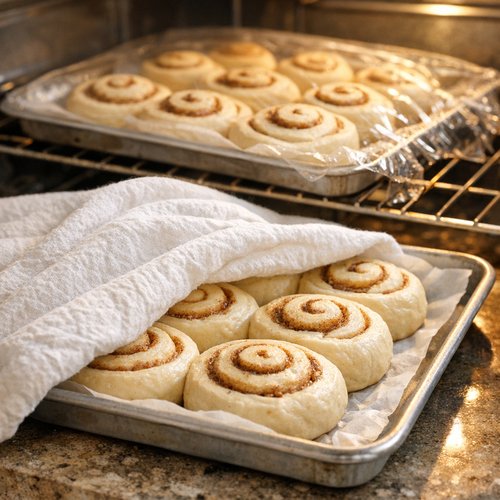
Cover both sheet pans loosely with a clean kitchen towel or plastic wrap. Place them somewhere warm—an unheated oven with the light on, a turned-off microwave, or even a warm spot on your counter. Let them rise for 25-30 minutes. They should increase noticeably in size and look puffy and soft.
Don’t skip this step or rush it. These final 30 minutes create the tender, pillowy texture. You’ll know they’re ready when a gentle poke with your finger leaves an indent that springs back slowly.
Step 11: Bake to Golden Perfection
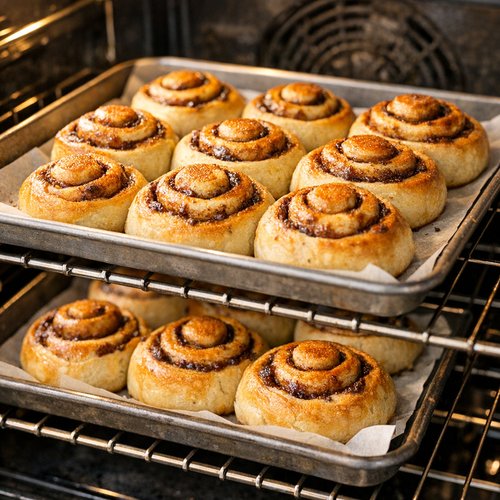
Preheat your oven to 350°F. Once your oven reaches temperature, place both sheet pans inside. Bake for 17-20 minutes, until the tops are lightly golden brown. If you’re using glass baking dishes, add 2-3 extra minutes since glass conducts heat differently.
The doneness test: gently tap the middle of a bun with your finger. It should feel set but still slightly yielding, and it should spring back slowly. If it feels hollow underneath, you’ve got perfect structure.
Step 12: Create Your Vanilla Bean Icing
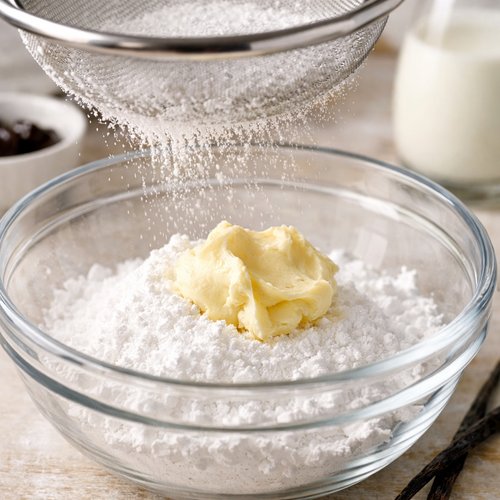
While buns bake, sift your powdered sugar into a medium bowl to break up any lumps. This is non-negotiable for smooth icing. Add your softened butter, pure vanilla extract, and 4 tablespoons of milk. Whisk until completely smooth. If you prefer thinner icing that drips into the crevices, add another tablespoon or two of milk. If you like it thicker and more spreadable, leave it as is.
Step 13: The Glory Moment: Icing Warm Buns
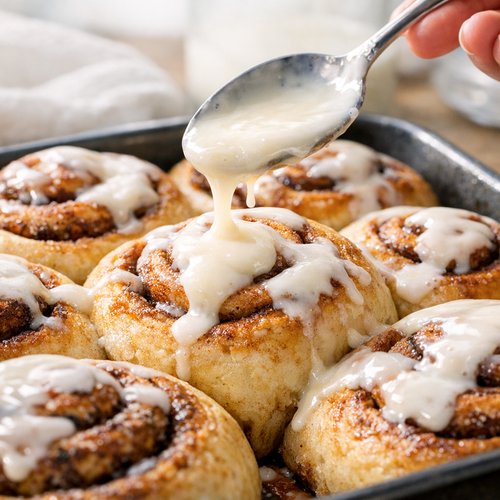
The moment your buns come out of the oven, they’re still warm enough that the icing will melt slightly and seep into every crevice. Spread or drizzle your vanilla icing generously over the warm buns. This is not the time for restraint. The icing will set as the buns cool, but that initial melting creates the most indulgent texture.
Step back. Breathe in that aroma. You just made bakery-quality cinnamon buns in less than 2 hours.
Expert’s Nutritional Tip: Understanding Your Ingredients From a Dietitian’s Perspective
Let me talk about what’s actually happening in this recipe from a nutritional standpoint, because as a registered dietitian, I want you to understand the role each ingredient plays beyond just flavor and texture.
The brown sugar versus granulated sugar choice matters more than most people realize. Brown sugar contains molasses, which adds not just deeper flavor but also minerals like potassium and calcium. It also has a slightly lower glycemic impact than refined white sugar because the molasses slows absorption. When you’re making something indulgent like cinnamon buns, this small choice means your blood sugar rises slightly less sharply—not a magic solution, but a smart swap that actually works.
The egg yolk in this dough (the whole egg, really) isn’t just a binder. It’s an emulsifier that helps distribute fat evenly throughout the dough, which creates that tender crumb and helps the dough stay moist longer. It also adds choline, essential for brain health. These aren’t throwaway ingredients; they’re nutritional contributors wearing flavor disguises.
And here’s what excites me as a nutrition professional: the Ceylon cinnamon option. Research published in the Journal of Medicinal Food shows that Ceylon cinnamon contains significantly lower levels of coumarin—a compound that can stress your liver in large amounts—compared to cassia cinnamon. If you’re making these regularly (and let’s be honest, you will be), Ceylon is the choice that lets you enjoy them guilt-free more frequently.
Common Mistakes to Avoid (So You Get It Right the First Time)
I’ve watched thousands of home bakers, and I’ve seen the same handful of mistakes derail what could be perfect buns. Let me save you from these:
- Water temperature matters more than you think. If your water is below 105°F, your yeast wakes up slowly and rises unevenly. If it’s above 120°F, you kill the yeast entirely. Invest in an instant-read thermometer—they cost $10 and solve this problem forever. This is the #1 reason people say their bread machine dough “didn’t rise properly.”
- Putting yeast directly in the water. This is where most machines differ, but if your manual says to add yeast to water, follow it. If it says to make a yeast pocket in the flour, do that instead. Jumping the gun activates yeast before the machine is ready to mix, and you get a false rise that collapses during actual mixing.
- Rolling too thin or too thick. Thinner than 1/4 inch and your buns are all filling with minimal dough structure. Thicker than 3/8 inch and the centers don’t bake through before the edges brown. Aim for consistent, 1/4-inch thickness using your rolling pin as your guide.
- Skipping the final rise or rushing it. Those 25-30 minutes aren’t optional. This is where your buns transform from dense and tough to pillowy and tender. If you’ve got the time to bake them, you’ve got the time to let them rise properly.
How to Adapt Based on What You Have
- If you don’t have quick-rise yeast—use active dry yeast instead, but increase the dough cycle time by 10-15 minutes. Active dry takes longer to wake up and work, but it absolutely works. Just give it time.
- If you don’t have buttermilk or whole milk for the icing—use any liquid that makes sense: oat milk, almond milk, even a splash of the bun’s egg wash. The icing will work; texture might shift slightly based on fat content, but consistency always trumps perfection.
- If your dough feels too sticky after the machine cycle—dust your work surface more generously and don’t panic. Slightly sticky dough means proper hydration. Just work with slightly dampened hands instead of floury hands.
- If you only have white granulated sugar—use it for the filling, but add 1 tablespoon of molasses or honey to deepen the flavor profile. Brown sugar’s secret is that molasses, so if you’re making your own, this swap works perfectly.
- If your dough is cold and fighting you during rolling—let it rest under that towel for 10 minutes. Dough has temperature memory. Pulling it straight from the machine and attacking it immediately is the fastest way to frustration.
Make-Ahead Guide: Your Strategic Baking Advantage
One of my favorite things about this recipe is how beautifully it cooperates with your schedule. You don’t have to do everything in one sitting.
Make-ahead option 1: Prepare dough the day before. Run your bread machine cycle in the evening. Divide dough, roll, fill, and slice into your baking sheet. Cover tightly with plastic wrap and refrigerate overnight. In the morning, remove from fridge, let sit at room temperature for 15-20 minutes until it loses the chill, then proceed with the 25-30-minute rise and baking. Cold dough rises slower, so budget extra time.
Make-ahead option 2: Freeze unbaked buns. After slicing and arranging on your sheet pan, cover with plastic wrap and freeze for up to 2 weeks. When you want fresh buns: remove from freezer, let sit covered at room temperature for 45-60 minutes (they’ll both thaw and rise simultaneously), then bake as directed, adding 2-3 minutes to account for the frozen center warming through.
Make-ahead option 3: Bake ahead, freeze, and reheat. Bake fully, cool completely, then freeze in an airtight container for up to 1 month. Reheat wrapped in foil at 325°F for 15 minutes. The icing can be applied before freezing or after reheating—your choice based on texture preference.
My personal favorite? Prepare through the slicing stage the night before, then do the rise and bake fresh in the morning. You get that warm-from-the-oven magic with minimal morning effort.
Seasonal Variations: Keeping This Recipe Fresh Year-Round
The beautiful thing about mastering one base recipe is how infinitely adaptable it becomes. Here’s how I adjust this throughout the year:
- Spring: Add cardamom and lemon zest. Include 1/2 teaspoon of ground cardamom in your dough. When making your icing, add 1 tablespoon of fresh lemon zest and reduce vanilla to 1/4 teaspoon. It’s floral, bright, and feels like renewal.
- Summer: Swap filling for berry and almond. Keep the brown sugar base but add 1/2 cup of dried tart cherries or cranberries to your cinnamon sugar filling. Add 1/4 teaspoon of almond extract to your icing. This variation pairs beautifully with afternoon coffee.
- Fall: Embrace the spices. Keep your cinnamon but add 1/2 teaspoon of ground nutmeg, 1/4 teaspoon of ground cloves, and 1/4 teaspoon of ground ginger to your filling. Add 1/2 teaspoon of vanilla and a pinch of sea salt to your icing. It tastes like autumn in a bun.
- Winter: Go dark and rich. Add 1/4 cup of chopped pecans or walnuts to your cinnamon sugar filling. Add 1 tablespoon of unsweetened cocoa powder to your icing and increase vanilla to 3/4 teaspoon. Dust finished buns with a sprinkle of sea salt.
Zero Waste: Using Every Last Bit
As someone who learned to cook watching my family stretch every ingredient, I can’t let you waste a single piece of this recipe.
Icing too thick and you made extra? Refrigerate it and use it on quick breads, oatmeal cookies, or coffee cake within a week. It’s excellent as a dipping sauce for breakfast bread.
Leftover cinnamon sugar filling? This keeps in an airtight container for months. Use it on toast, stir into oatmeal, sprinkle over baked apples, or mix into softened cream cheese for a flavored spread.
Did you trim your rolled dough? Those small scraps can be kneaded back into your remaining dough, used as bread pudding cubes, or dried and pulsed into breadcrumbs for coating chicken or fish.
Buns hardening after a day or two? Don’t toss them. Tear them into chunks, spread on a sheet pan, dry at 275°F for 20 minutes, and you’ve got the world’s best homemade breadcrumbs. Or cube them and make bread pudding, which transforms day-old buns into something even more luxurious.
Can I Store Bread Machine Cinnamon Bun Recipe?
Room temperature storage: 2 days in an airtight container. These buns stay moist and fresh covered on your counter. After day two, they begin to firm up slightly. Nothing wrong with that—I actually like day-two buns dunked in hot coffee.
Refrigerated storage: up to 5 days. Cover them tightly with plastic wrap or store in an airtight container. They’ll keep this way without drying out. Reheat gently wrapped in foil at 325°F for 10-12 minutes.
Frozen storage: up to 3 months. Wrap cooled buns individually in plastic wrap, then place in a freezer bag with as much air pressed out as possible. Thaw covered at room temperature for 2-3 hours, then reheat as above.
A registered dietitian note: When reheating, avoid microwaving if possible, as it can create uneven hot spots. Low-temperature oven reheating preserves the tender structure of the crumb and the creamy quality of the icing.
Nutrition Information (Per Bun, Based on 24 Total)
Let me be transparent about what you’re eating with these calculations based on USDA nutritional databases. These numbers reflect one bun without additional icing applied post-bake:
- Calories: 285
- Total Fat: 11g
- Saturated Fat: 6.5g
- Cholesterol: 18mg
- Sodium: 195mg
- Total Carbohydrate: 41g
- Dietary Fiber: 1g
- Sugars: 16g
- Protein: 4g
What excites me nutritionally: these buns contain more protein than you’d expect from a quick bread because of the egg and whole-grain potential of the flour. The fat content comes mostly from butter, and while that’s saturated fat, it’s also what creates the tender crumb that makes these special. The 4g of protein per bun means this works as a complete breakfast with eggs and fruit, not just a sweet treat.
If you’re managing blood sugar, pair these with protein and fat: eggs, Greek yogurt, or nuts will slow the carbohydrate absorption and create sustained energy rather than a spike-and-crash pattern.
What to Serve With Bread Machine Cinnamon Bun Recipe?
These buns are glorious on their own, but they’re also part of a greater breakfast picture. Here’s what I serve alongside:
- Soft scrambled eggs or a vegetable-loaded frittata—protein that balances the sweet and creates a satisfying meal rather than a sugar rush
- Fresh fruit: berries, sliced oranges, or melon—acid and natural sugar that complements the cinnamon without competing with it
- Greek yogurt with honey—creamy, tangy contrast that lets the cinnamon shine
- Herbed cream cheese—if you’re leaning into a brunch situation, this is decadent and surprisingly balanced
- Strong black coffee or espresso—non-negotiable. The bitter-rich contrast is what makes these buns taste even more indulgent
If you’re building a full brunch spread, these pair beautifully with Broccoli Bites Recipe for a savory-sweet balance. And honestly, if you’re already in bread-machine mode, you might want to check out the Breadmaker Rolls Recipe for a savory companion option.

Bread Machine Cinnamon Bun Recipe
Ingredients
Method
- This is the moment where sequence matters. Always add liquids first—that lukewarm water goes into the bottom of your bread machine pan. Then add your room-temperature butter chunks scattered over the water. Next comes the sugar and egg, which will start to incorporate as the machine begins mixing. Then your salt. Finally, gently pour in your flour, creating a small mountain over everything else. Nestle your quick-rise yeast into a small pocket in the top of the flour—it should never touch the wet ingredients directly, or it'll activate prematurely and give you uneven rising. If your bread machine has a separate yeast dispenser, use it. If not, that flour pocket is your safety measure. Some machines have delayed-start features that let you load ingredients and set a timer—I'd skip that for this recipe since we want optimal yeast activation timing.
- Close your bread machine and select the dough cycle only—not the full bread cycle. This cycle will mix, knead, and do the first rise, then stop before baking. Most dough cycles run 90 minutes, but check your machine's manual since times vary. You want the dough to rise until it's puffy and spring-back when you poke it gently. During this time, you can prep your filling. This is your secret to efficiency: while the machine works, you're getting ahead.
- In a small bowl, combine your packed brown sugar and ground cinnamon. Stir thoroughly to distribute the cinnamon evenly—you don't want pockets of pure cinnamon or plain sugar. If you're using Ceylon cinnamon (which I recommend), you'll notice a more complex sweetness compared to standard cassia. This filling is the soul of these buns, so don't rush it. Set it aside until you need it.
- When your bread machine signals the dough cycle is complete, transfer it to a lightly floured surface. It'll be soft, warm, and beautifully risen. Divide it into two equal portions—you can eyeball this or use a kitchen scale for precision. If you're feeding a crowd, this gives you two full 9x13-inch sheets of buns. If you're freezing half for later, this split is your friend.
- Flour your work surface lightly and place your first dough portion on it. Using a rolling pin, gently roll it into approximately an 18x12-inch rectangle. You want it uniform in thickness—about 1/4 inch. Don't be aggressive; this dough has already done the hard work of rising, and you're just shaping it. If the dough fights you and springs back, let it rest for 5 minutes. It has memory, and it'll relax and become easier to work with. This is not a race.
- Brush or spread half of your melted butter over the entire surface of the rolled dough. This butter creates the flaky layers and carries your flavor, so make sure every area gets coverage. Then sprinkle about half of your cinnamon sugar mixture evenly over the butter. I recommend leaving about 1/2 inch at the top edge uncovered—this gives you a clean seal when you roll. Don't skimp on the filling. The dark, caramelized cinnamon sugar layer is what makes these buns Instagram-worthy, and it's what you'll crave.
- Starting at one of the long ends, roll your rectangle tightly into a log. Think of it as rolling a yoga mat—evenly and firmly, but not so tight you're squeezing filling out. As you roll toward that unfilled edge you left, it acts as your final seal. Pinch gently to close. Now for the magic moment: using a sharp, straight knife, slice your log into approximately 1-inch pieces. You should get about 12 beautiful pinwheel-shaped buns from each portion. Wipe your knife between cuts if cinnamon sugar buildup occurs—this keeps your edges clean. Pro tip: dental floss works brilliantly for slicing yeast dough if you don't have a bread knife. Pull a long section of unflavored floss, position it above your log, press down gently, and pull toward you. No dragging, no crushing.
- Prepare two 9x13-inch metal baking sheets with light greasing or parchment paper. Place your buns cut-side up. Here's your creative choice: nestle them so they're touching slightly, or space them 2 inches apart. Touching buns will steam together and create soft, connected rolls—that's my preference. Spaced buns will have crispier outer edges. Both approaches are correct. Choose based on your preference and whether you want more browning or that connected, coffee-shop aesthetic.
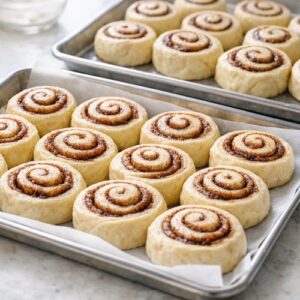
- Roll, fill, slice, and arrange your second portion of dough exactly as you did the first. Now you have two full sheet pans of cinnamon buns ready for their final rise.
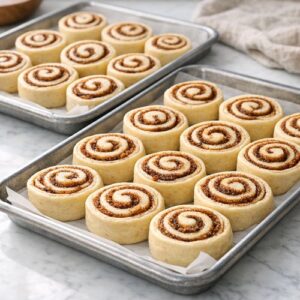
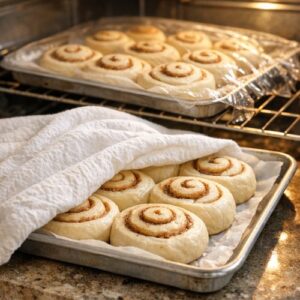
- Cover both sheet pans loosely with a clean kitchen towel or plastic wrap. Place them somewhere warm—an unheated oven with the light on, a turned-off microwave, or even a warm spot on your counter. Let them rise for 25-30 minutes. They should increase noticeably in size and look puffy and soft. Don't skip this step or rush it. These final 30 minutes create the tender, pillowy texture. You'll know they're ready when a gentle poke with your finger leaves an indent that springs back slowly.
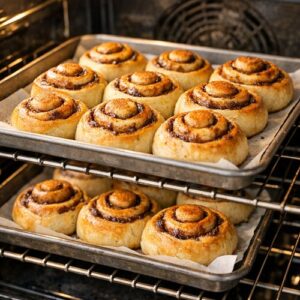
- Preheat your oven to 350°F. Once your oven reaches temperature, place both sheet pans inside. Bake for 17-20 minutes, until the tops are lightly golden brown. If you're using glass baking dishes, add 2-3 extra minutes since glass conducts heat differently. The doneness test: gently tap the middle of a bun with your finger. It should feel set but still slightly yielding, and it should spring back slowly. If it feels hollow underneath, you've got perfect structure.
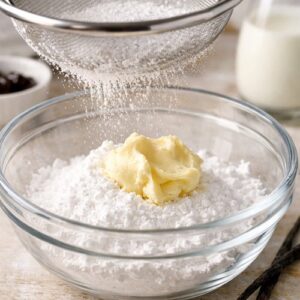
- While buns bake, sift your powdered sugar into a medium bowl to break up any lumps. This is non-negotiable for smooth icing. Add your softened butter, pure vanilla extract, and 4 tablespoons of milk. Whisk until completely smooth. If you prefer thinner icing that drips into the crevices, add another tablespoon or two of milk. If you like it thicker and more spreadable, leave it as is.
- The moment your buns come out of the oven, they're still warm enough that the icing will melt slightly and seep into every crevice. Spread or drizzle your vanilla icing generously over the warm buns. This is not the time for restraint. The icing will set as the buns cool, but that initial melting creates the most indulgent texture. Step back. Breathe in that aroma. You just made bakery-quality cinnamon buns in less than 2 hours.

Notes
FAQs: Your Bread Machine Cinnamon Bun Questions Answered
Can I make this without a bread machine?
Absolutely. You’re just taking on the work the machine would do: combine water, butter, sugar, egg, salt, and flour in a large bowl. Mix until shaggy, then knead for 10 minutes by hand or with a stand mixer fitted with a dough hook. Let rise covered for 60-90 minutes until doubled, then proceed with dividing, rolling, and filling. The bread machine just removes the physical labor and guarantees consistent results, but the recipe itself is entirely doable by hand.
What if I don’t have quick-rise yeast?
Use active dry yeast at the same measurement, but extend your bread machine dough cycle by 10-15 minutes. Active dry yeast has larger granules and takes longer to hydrate and activate. It works perfectly; it just needs extra time. Never use instant yeast if you can help it—that’s a different product with different hydration ratios.
Can I use instant chocolate chips or caramel bits in the filling?
You can, but I’d reduce the brown sugar slightly and apply any melting toppings after baking rather than in the filling. Heat can cause chocolate to separate, and caramel bits can burn. If you want chocolate-cinnamon swirl buns, sprinkle finely chopped dark chocolate over the filling before rolling, then proceed normally. It’ll melt during baking and create beautiful streaks.
Why did my buns have a dense center?
Most commonly: insufficient final rise. Those 25-30 minutes aren’t optional—they’re where yeast creates the lift that makes centers tender. Second most common: water temperature too cold, meaning yeast never fully activated. Third: overbaking, which dries the inside. Check your oven temperature with an oven thermometer to verify it’s accurate.
Can I make smaller or larger buns?
Absolutely. Slice thinner for 36 small buns (reduce baking time to 12-15 minutes) or thicker for 18 larger buns (increase baking time to 22-25 minutes). The key is even thickness so they bake uniformly. Remember that smaller buns will finish faster and larger ones need that extra oven time to warm the center.
Is there dairy-free icing option?
Yes. Use dairy-free butter, unsweetened oat or almond milk, and pure vanilla extract. The icing will work identically. Some non-dairy milks are thinner than whole milk, so you might use only 3 tablespoons and add more carefully if needed. The consistency might shift slightly, but the flavor is equally delicious.
Can I use a stand mixer instead of a bread machine?
Yes. Combine all dough ingredients in a stand mixer bowl. Mix on low with the dough hook attachment for 2 minutes, then medium for 8 minutes. The dough should be slightly sticky but elastic. Transfer to a greased bowl, cover, and let rise in a warm spot for 60-90 minutes until doubled. Then proceed with rolling and filling. You’re doing exactly what the bread machine does, just manually.
More Leftover Transformation Recipes You’ll Love
- Calzone Dough Recipe—turn your bread machine expertise into savory hand pies
- my weeknight pasta—comfort food for another day using pantry staples
- Chicken Alfredo Bake Recipe—transform simple proteins into restaurant-worthy dinners
- Chicken Kabob Marinade Recipe—take grilled proteins to the next level