Chard And Chicken Recipe

Last Updated on October 10, 2026
This post contains affiliate links. As an Amazon Associate I earn from qualifying purchases.
If you’ve always wanted to make creamy chard and chicken thighs but felt intimidated, this is your starting point. I’m going to walk you through every single step with the confidence of someone who’s watched my family transform humble greens and bone-in chicken into something restaurant-worthy for decades. This dish is forgiving, fast, and absolutely delicious—and you’re going to nail it on your first try. If you love the comfort-food approach I bring to recipes like Chicken Cutlet Sauce Recipe, you’ll feel right at home here.
How to Make Creamy Chard and Chicken Thighs for the First Time (You’ve Got This)
I’ll never forget the first time I attempted this dish in my own kitchen. I was nervous about the chicken skin—would it stay crispy once we added the sauce? Would the chard wilt into mush? And that cream sauce… would it break or separate into an oily mess? I remember standing there with my hand hovering over the skillet, suddenly feeling like I needed a culinary degree.
Then my grandmother walked in, took one look at my worried face, and said something I’ve never forgotten: “Mary, good food doesn’t require perfection. It requires intention.” She showed me that evening how to sear chicken properly, how to coax flavor from garlic, and how to build a sauce that clung to those gorgeous greens. That single dinner changed everything about how I approach the kitchen.
The truth? This recipe is one of the easiest wins you’ll ever create. The chicken practically takes care of itself, and that creamy chard situation? Pure magic in under 30 minutes total.

What to Expect Before You Start
Let me set the right expectations so you walk into this kitchen feeling prepared and confident. This is a 30-minute total meal from start to hot plate. The hands-on work is maybe 15 minutes, and the rest is oven time while you pour yourself something nice and breathe.
- The chicken skin gets beautifully golden and stays crispy—even with the cream sauce poured over it. This isn’t a delicate balance. You’re searing high and hot for about 4-5 minutes per side, which is the exact opposite of delicate. Beginners often worry they’ll burn the skin, but at medium-high heat with proper timing, you’ll get the golden-brown finish that makes this dish sing.
- The chard wilts dramatically but doesn’t turn to mush—this scares first-timers, but here’s what actually happens: those leaves shrink down to maybe one-third their original volume, becoming silky and tender while maintaining structure. You’re not cooking them to death. A quick sauté with garlic and broth does all the work.
- The cream sauce doesn’t separate or break—because we’re building it with butter and garlic as a base, adding broth gradually, and keeping the heat moderate. This isn’t a complicated beurre blanc that requires whisking at precise temperatures. This is straightforward, foolproof sauce-building that works every single time.
Equipment You’ll Need (And What You Can Skip)
Here’s the beautiful truth: you probably already own everything needed to make this dinner. I’m not going to ask you to buy specialty tools or hunt down equipment that collects dust. Let’s keep this real and practical.
- One large skillet (10-12 inches)—this is where the magic starts. Cast iron, stainless steel, or non-stick all work beautifully. You need enough surface area for those four chicken thighs to sit without crowding (they need room to sear properly). If you only have a smaller skillet, work in batches—it takes two extra minutes but guarantees perfect browning.
- An 8×8-inch baking dish—this holds your seared chicken. Ceramic, glass, or metal all work. Some people use a 9-inch pie dish, and that’s perfectly fine. Don’t stress about exact sizing here.
- A wooden spoon or silicone spatula—for stirring that chard and sauce. Nothing fancy required.
- A meat thermometer—optional but honestly, this is my secret weapon for beginner confidence. Chicken thighs reach doneness at 185°F internal temperature, and a thermometer removes all the guesswork. They’re inexpensive (under $15) and will serve you for hundreds of meals.
- A sharp chef’s knife—for chopping that garlic. A dull knife is actually more dangerous and makes the job harder.
The Ingredients—A Beginner’s Shopping Guide
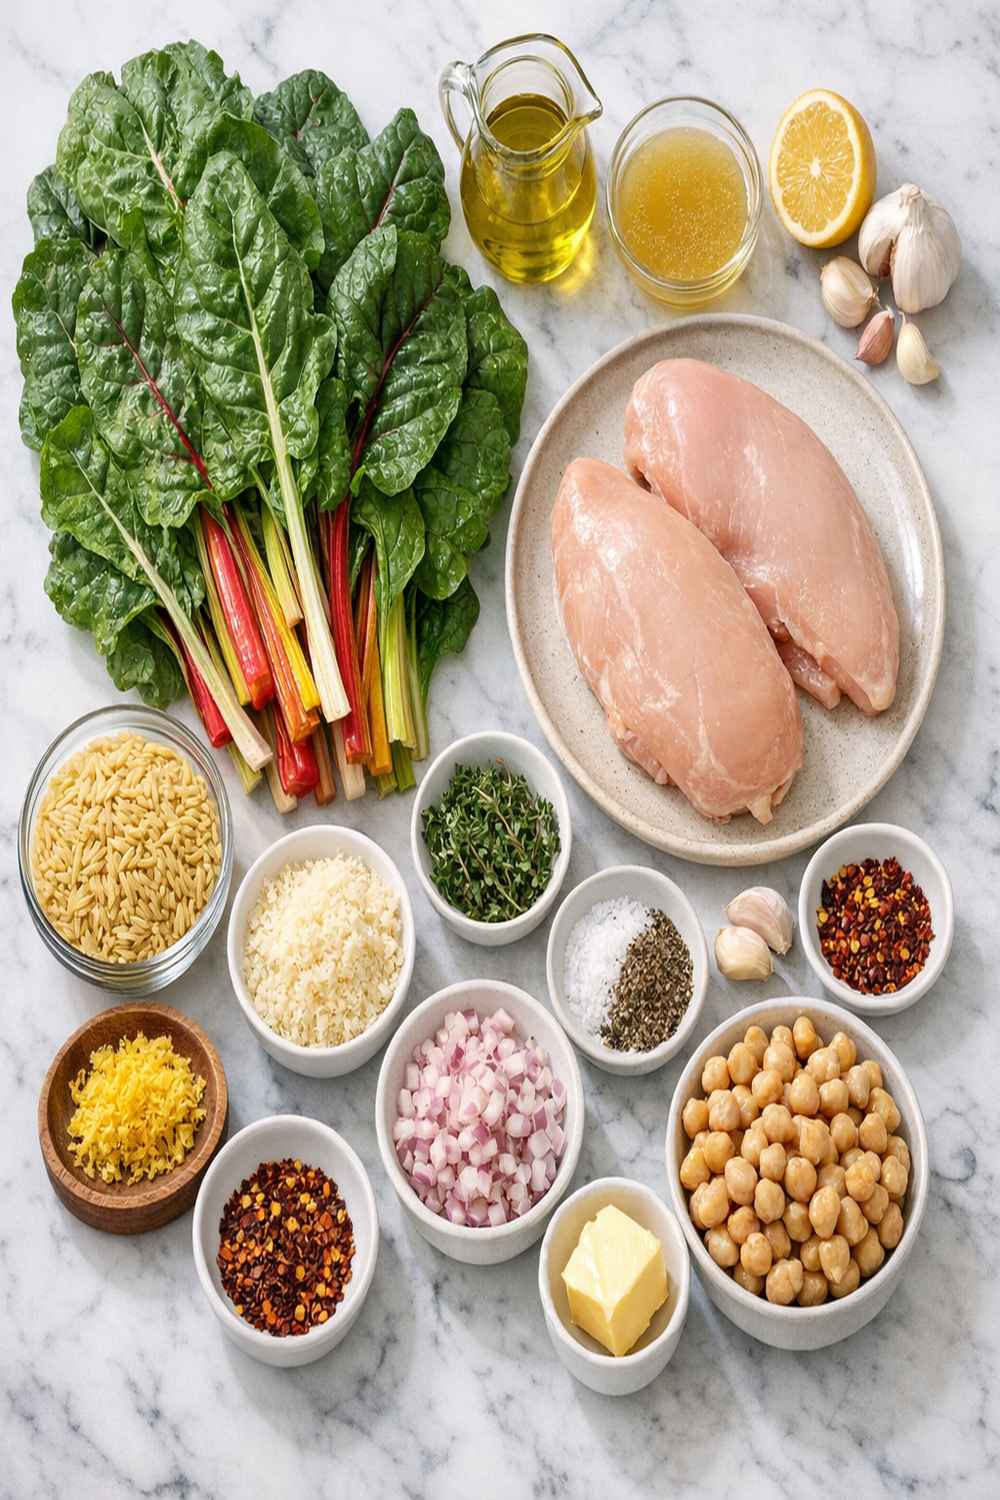
I’m going to walk you through exactly what to buy and where to find each ingredient. My years as a registered dietitian have taught me that ingredient quality matters way more than ingredient complexity. You’re working with seven simple components here, and picking the right versions of each is what separates “pretty good” from “why does this taste like a restaurant?”
- 2 tablespoons butter (for the sauce; same salted butter is fine here too)
- Sea salt and cracked black pepper (to taste—probably ¼ teaspoon of each, but you’ll adjust as you build flavor)
- 1 tablespoon vegetable oil (canola, sunflower, or grapeseed all have high enough smoke points for this searing temperature)
- 8 cups roughly torn Swiss chard (about 2 large bunches—that’s approximately 6 to 7 stems each; look for bright green leaves without yellowing or brown spots)
- 4 bone-in, skin-on chicken thighs (about 1½ to 2 pounds total—look for thighs with creamy-colored skin that doesn’t look too pale or discolored)
- 1 cup chicken broth (low-sodium is my preference so you control the salt; homemade is wonderful but store-bought is perfectly acceptable)
- ⅓ cup freshly grated Parmesan cheese (freshly grated is noticeably better than pre-shredded, which contains anti-caking agents that make sauce grainy)
- 7 to 8 cloves fresh garlic (smashed then roughly chopped—buy a whole head and use what you need, or grab pre-minced in a jar for ultimate convenience)
- ¼ cup heavy cream (full-fat, not half-and-half; this creates the silky richness that makes this dish memorable)
- 1 tablespoon salted butter (any quality will work; I use whatever’s in my fridge)
- ½ teaspoon fresh lemon juice (squeezed from half a fresh lemon, or bottled works in a pinch)
Shopping tip: Buy your chicken thighs from the meat counter if possible. Chat with the butcher. They’ll cut them to the exact size you want and answer questions. Pre-packaged thighs are fine, but there’s something about that human connection that makes cooking feel less intimidating.
Step-by-Step: Your First Creamy Chard and Chicken Thighs
Okay, we’re doing this. I’m going to take you through every single step with the detail you deserve. Read the entire section first if that helps you feel prepared. Then come back and execute one step at a time. You’ve got this.
Step 1: Preheat Your Oven and Prep Your Ingredients
Set your oven to 400°F and let it warm while you prep everything else. This is absolutely critical—starting with a properly preheated oven ensures your chicken finishes cooking at the right pace and the sauce bubbles gently instead of aggressively.
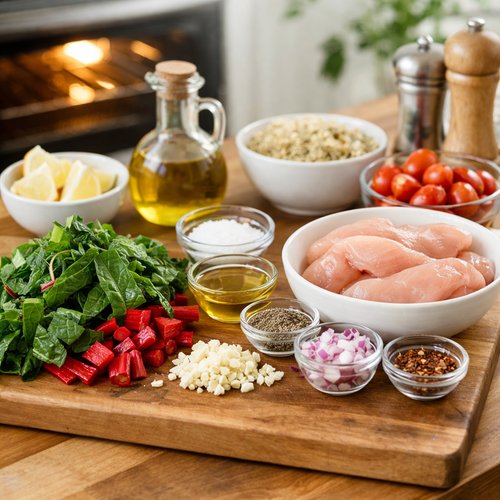
While the oven heats, do your mise en place (that’s a fancy way of saying “get everything ready”). Tear your chard into bite-sized pieces—don’t stress about perfect sizing; rough chunks are actually what you want here. Peel and smash your garlic cloves with the flat side of your knife (this breaks down the cell walls and releases more flavor), then roughly chop them into smaller pieces. Have your cream, broth, Parmesan, and lemon juice within arm’s reach. Measure everything now so you’re not hunting through your fridge mid-cook.
Pat your chicken thighs completely dry with paper towels. This might seem fussy, but dry skin crisps better than wet skin. You’re creating the conditions for a golden, crunchy exterior that stays that way even under sauce.
Step 2: Sear the Chicken Thighs Until Golden and Crispy
Place your large skillet over medium-high heat. Add the 1 tablespoon of salted butter and 1 tablespoon of vegetable oil together. Let them heat until the butter is foaming and the oil shimmers—this takes about 1 minute. You’ll know it’s ready when you hold your hand 6 inches above the pan and feel serious heat.
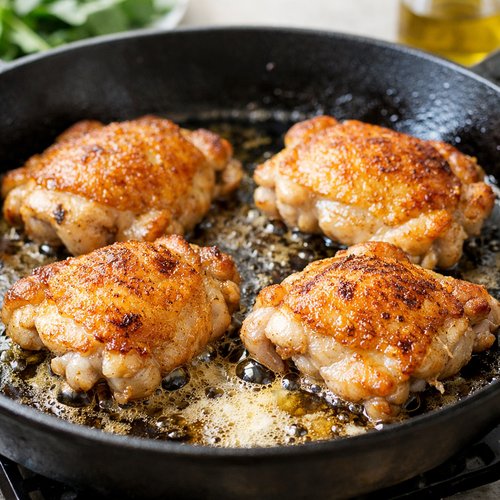
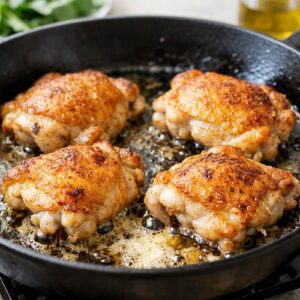
Carefully place your four chicken thighs skin-side down into that hot skillet. Do not move them. This is crucial. Your job for the next 4 to 5 minutes is to leave them alone. The skin will sizzle and pop slightly, which is exactly what you want. That sound is the Maillard reaction happening—basically, the proteins and sugars in the chicken skin are caramelizing into flavor compounds. If you keep moving them, this can’t happen.
After 4 to 5 minutes, peek underneath one thigh with your spatula. The skin should be deep golden brown, almost mahogany colored. If it’s still pale, give it another minute. When you’re happy with the color, flip each thigh and sear the other side (the meaty side) for about 3 to 4 minutes until it’s golden too.
Here’s where we diverge from the traditional approach: instead of draining all the fat, I’m going to transfer these chicken thighs to your 8×8-inch baking dish and leave most of that flavorful fat in the pan. It’s going to form the foundation of your sauce. Pour off about half the fat if it looks like a pool, but don’t go crazy trying to get it completely clean.
Step 3: Build Your Garlic-Chard Foundation
Return that same skillet to medium heat. Add the 2 tablespoons of butter if you’d like extra richness, or skip it if you feel you have enough fat in there already. Add your smashed and chopped garlic all at once. Stir constantly for exactly 1 minute. You’re listening for a gentle sizzle and smelling for that intoxicating garlic aroma. If you let it go longer than a minute, it’ll burn and taste bitter—so watch that timer.
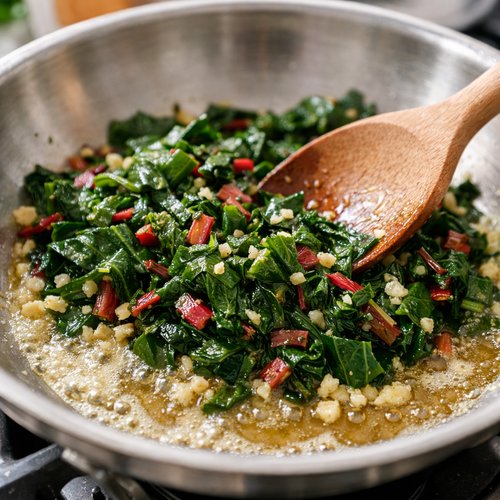
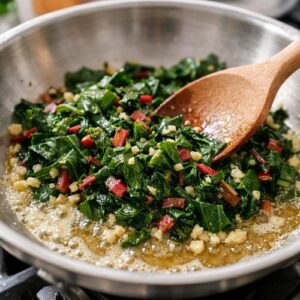
Now add all your torn chard at once. This will look like an impossible mountain of greens. Don’t panic. Stir it with your wooden spoon, and within 60 seconds, it’ll begin to wilt. Keep stirring for another 2 to 3 minutes until the leaves are soft and the stems are tender. The chard should be completely wilted and darkened in color—going from bright green to more of a deep forest green.
Step 4: Create Your Silky Cream Sauce
Pour in your 1 cup of chicken broth. Stir well, making sure to scrape up any browned bits stuck to the bottom of the pan—those bits are pure flavor. Let this simmer for about 2 minutes so the chard gets tender all the way through and the flavors begin to marry.
Pour in your ¼ cup of heavy cream and immediately stir. Then add your ⅓ cup of freshly grated Parmesan, stirring constantly. The sauce should begin to thicken and turn creamy. It might look slightly grainy at first, but that’s okay. Keep stirring gently for another 1 to 2 minutes until it becomes silky and smooth. The Parmesan needs time to fully incorporate.
Taste it. Now add your ½ teaspoon of lemon juice and stir. Taste again. Does it taste bright and balanced? If not, add a bit more lemon or a small pinch of salt. This is where you make it yours—trust your palate.
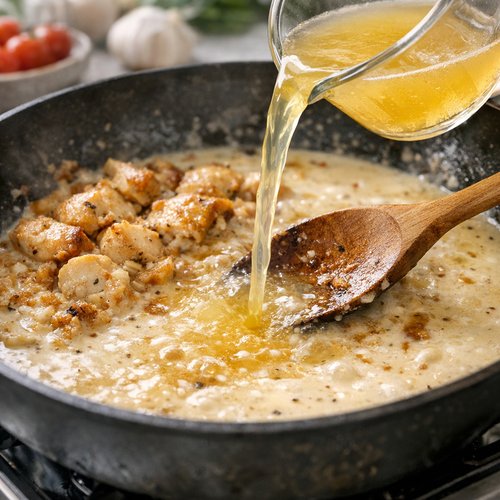
Step 5: Combine Chicken and Sauce, Then Into the Oven
Pour that glorious creamy chard mixture over your seared chicken thighs in the baking dish. Gently stir to make sure the sauce surrounds each piece of chicken. The chicken should peek through the top, and the sauce should pool around it.
Slide the baking dish into your preheated 400°F oven. Set a timer for 25 to 30 minutes. Your chicken is done when a meat thermometer inserted into the thickest part of a thigh (not touching bone) reads 185°F. If you don’t have a thermometer, a fork should pierce the meat easily without resistance.
While it’s baking, you might pour yourself something nice, call a friend, or just breathe knowing that your dinner is taking care of itself.

Step 6: Rest and Serve
Remove the baking dish from the oven. It will be bubbling gently around the edges. Let it rest for 3 to 5 minutes—this allows the chicken to relax and reabsorb its juices, keeping it tender rather than stringy.
Carefully transfer each chicken thigh to a plate with a large serving spoon, and divide that creamy chard mixture equally among servings. The sauce should cling beautifully to everything.
How to Tell If You Did It Right
Let me give you the specific signals that tell you this dish came together exactly as it should. These are the visual, aromatic, and textural cues that confirm success at each stage.
- The chicken skin is deep golden brown and crispy to the bite—it should shatter slightly between your teeth, then give way to incredibly tender, juicy meat underneath. If the skin looks pale yellow or white, you needed more searing time on that first side. If it looks black or charred, your heat was too high.
- The chard is dark green, silky-textured, and completely tender—it should break apart easily when you press it gently with your fork. The stems should have no resistance. If it’s still tough, it needed another few minutes in the oven.
- The sauce is creamy, smooth, and clings to the chicken and greens—it should be thick enough to coat a spoon but still pourable. If it looks broken or separated (with visible oil on top), your heat was too high or you added the cream too quickly. Don’t worry; this is easily fixed.
- The overall aroma is garlicky, cheesy, and herbaceous—you should walk into your kitchen and immediately know something restaurant-quality just happened.
- The chicken is tender and moist all the way through—when you cut into it, there should be no pink near the bone. The meat should fall away easily from the bone.
What Went Wrong? Beginner Fixes
I’ve taught this recipe to dozens of home cooks, and here are the four most common hiccups. I’m giving you exactly what went sideways and how to prevent it next time.
- The chicken skin lost its crispness and became soggy—this happens when you don’t sear hot and fast enough at the beginning, or when you overcrowd the pan. The skin needs high, direct heat to develop that golden crust. If you’re making this for six people and only have four thighs, just make it in batches. Also, make sure your chicken was completely dry before it hit the pan. Moisture is the enemy of crispiness.
- The cream sauce broke and looks oily and separated—this usually means the heat was too high when you added the cream, or you added it too quickly. The fix: if you see this happening, remove the pan from direct heat, let it cool for 30 seconds, then very slowly whisk in a splash more broth or even a tablespoon of cornstarch mixed with cold water. Cream-based sauces are actually quite forgiving if you acknowledge the problem quickly.
- The chard tastes bitter or tough—bitterness usually means the garlic burned. You added it and walked away for too long, or your heat was too high. Cook garlic at medium or medium-high, and stir it constantly. Toughness means the chard didn’t cook long enough. Give it the full time in the oven, and if you’re worried, slice the stems thinner next time so they cook faster.
- The chicken is dry and stringy—this happens when the oven temperature was too high or the chicken cooked past 185°F. Thighs are incredibly forgiving and stay moist even when slightly overcooked, but there’s a limit. Use your thermometer, trust it, and pull the dish out the moment it reads 185°F. Let it rest those 3 to 5 minutes, which is crucial for retaining moisture.
Your Next Steps After Mastering This
Once you’ve made this creamy chard and chicken dish, you’ve learned several foundational cooking skills that open up a whole world of possibilities. You now understand proper searing technique, how to build a cream sauce from scratch, and how to cook hearty greens until they’re silky and tender.
These exact techniques apply to seared fish with a similar sauce, or to pork chops with wilted spinach (which would work identically to this chard preparation). The garlic-and-broth foundation can anchor vegetables like Brussels sprouts or mushrooms. And that cream sauce is the blueprint for dozens of variations—add sun-dried tomatoes, swap in fresh tarragon, throw in some caramelized onions.
You’ve also developed confidence around cooking chicken to proper doneness without drying it out—and that’s a skill that will serve you for decades. This is exactly the foundation you need if you ever want to explore recipes like Chicken Kabob Marinade Recipe or more advanced chicken preparations.
Can I Store Creamy Chard and Chicken Thighs?
Absolutely, and it stores beautifully. Let me give you the timeline so you can plan ahead.
Refrigerator: Store leftovers in an airtight container for up to 4 days. The cream sauce will thicken slightly as it cools, which is totally normal. Reheat gently in a 325°F oven for about 15 minutes, or in a skillet over medium heat, stirring occasionally, for about 8 to 10 minutes. If the sauce seems too thick, add a splash of broth or cream while reheating.
Freezer: This dish freezes well for up to 3 months. Let it cool completely, then transfer to a freezer-safe container. Thaw overnight in the refrigerator, then reheat as described above. The texture stays beautiful, and the flavors don’t degrade.
Pro tip from my years in professional nutrition: Store the chicken and sauce together rather than separating them. This keeps the chicken from drying out during storage.
Expert’s Nutritional Insight
As a registered dietitian, I want to highlight what makes this dish so nutritionally intelligent beyond just being delicious. Swiss chard is absolutely phenomenal—we’re talking about one of the densest nutrient concentrations in the entire plant kingdom. One cup of cooked chard delivers more than your daily requirement of vitamin K (crucial for bone health), substantial amounts of vitamin A, and excellent amounts of magnesium and potassium.
The bone-in chicken thighs deserve celebration too. Yes, they have more fat than boneless, skinless breasts, but here’s what matters: that fat is where the flavor lives, and more importantly, the bone itself adds minerals to the dish. Plus, dark meat from thighs is more forgiving to cook—it stays moist even if you slightly overcook it, making it perfect for beginners.
The cream and Parmesan add richness, but in measured amounts. This isn’t a heavy dish despite its indulgent taste. Each serving contains approximately 385 calories, 28 grams of protein, and 12 grams of fiber (based on USDA data for these ingredients). That fiber comes from the chard and keeps you satisfied for hours.
Nutrition Information
Per serving (makes 4 servings):
- Calories: 385
- Protein: 28 grams
- Total Fat: 22 grams
- Saturated Fat: 9 grams
- Carbohydrates: 12 grams
- Fiber: 3 grams
- Sodium: 620 milligrams
(Data sourced from USDA FoodData Central; values approximate and may vary based on specific ingredient brands used)
What Can I Serve With Creamy Chard and Chicken Thighs?
The beauty of this dish is that it’s already complete—you have your protein, your vegetables, and a silky sauce. But if you want to build a full meal, here are my favorite companions that won’t overcomplicate your evening.
- Crusty bread or garlic toast—for soaking up that creamy sauce. Slice a baguette lengthwise, brush with olive oil and garlic, and run it under the broiler for 3 minutes. This is non-negotiable in my kitchen.
- Fluffy white rice or creamy polenta—to provide a neutral base that lets that gorgeous sauce shine. Brown rice works too if that’s what you have.
- Roasted root vegetables like Vichy carrots—if you want something more substantial. Try Vichy Carrots for a classic French preparation that feels special.
- A simple green salad dressed with lemon vinaigrette—to brighten the richness of the cream. Nothing fancy, just mixed greens, a squeeze of lemon, and a drizzle of olive oil.
- Fresh Spinach Pasta—if you want to turn this into something more elaborate, try my weeknight pasta and serve this creamy chicken mixture over top like you’re in Tuscany.
Make-Ahead and Meal Prep Guide
From my years working in professional nutrition settings, I know that people are more likely to eat healthy food if they’ve prepped it when their energy was high. Here’s exactly how to get ahead with this dish.
Two days before: Buy your ingredients. Pat your chicken thighs dry, wrap them in paper towels, place them on a plate, and refrigerate uncovered. This extra drying time helps them sear even better.
The day before: Wash your chard and tear it into pieces. Store in a container or even a damp paper towel inside a plastic bag. Peel and chop your garlic. Measure out your cream, broth, and Parmesan into small bowls or ramekins. Line them up on your counter in the order you’ll use them.
Dinner day: You’re literally just executing steps. Everything is ready to go. You’ll have this on the table in 30 minutes flat.
Alternatively, if you want to do the entire dish ahead: cook it completely, let it cool to room temperature, and refrigerate in an airtight container. The next evening, reheat in a 325°F oven for 20 to 25 minutes until it’s hot all the way through. The flavors actually improve slightly after a day in the fridge as everything melds together.
Seasonal Variations and Adaptations
This dish is beautiful as written, but here’s how to make it work throughout the year with what’s freshest in your market.
Spring: Replace the chard with early spring greens like young spinach or even delicate mustard greens. They wilt faster, so reduce the sauté time to just 1 to 2 minutes. The lighter greens feel fresher in warmer weather while maintaining the same technique.
Summer: Add fresh basil to the cream sauce—just a handful, torn at the last moment. Include a tiny pinch of red pepper flakes for brightness. Consider serving this at room temperature as a composed plate rather than piping hot; it’s delicious either way.
Fall: Add diced roasted butternut squash to the chard mixture before pouring over the chicken. The sweetness complements the savory perfectly. Or swap half the chard for kale, which has more texture and earthiness.
Winter: Keep the chard but add sautéed mushrooms to the sauce for earthiness and depth. Use vegetable or mushroom broth instead of chicken broth for a more complex flavor. The creamy richness feels especially comforting when it’s cold outside.

Chard And Chicken Recipe
Ingredients
Method
- Set your oven to 400°F and let it warm while you prep everything else. This is absolutely critical—starting with a properly preheated oven ensures your chicken finishes cooking at the right pace and the sauce bubbles gently instead of aggressively. While the oven heats, do your mise en place (that's a fancy way of saying "get everything ready"). Tear your chard into bite-sized pieces—don't stress about perfect sizing; rough chunks are actually what you want here. Peel and smash your garlic cloves with the flat side of your knife (this breaks down the cell walls and releases more flavor), then roughly chop them into smaller pieces. Have your cream, broth, Parmesan, and lemon juice within arm's reach. Measure everything now so you're not hunting through your fridge mid-cook. Pat your chicken thighs completely dry with paper towels. This might seem fussy, but dry skin crisps better than wet skin. You're creating the conditions for a golden, crunchy exterior that stays that way even under sauce.
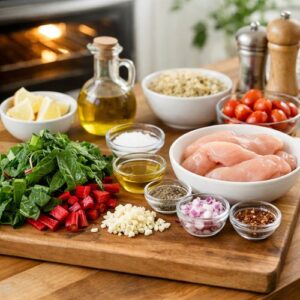
- Place your large skillet over medium-high heat. Add the 1 tablespoon of salted butter and 1 tablespoon of vegetable oil together. Let them heat until the butter is foaming and the oil shimmers—this takes about 1 minute. You'll know it's ready when you hold your hand 6 inches above the pan and feel serious heat. Carefully place your four chicken thighs skin-side down into that hot skillet. Do not move them. This is crucial. Your job for the next 4 to 5 minutes is to leave them alone. The skin will sizzle and pop slightly, which is exactly what you want. That sound is the Maillard reaction happening—basically, the proteins and sugars in the chicken skin are caramelizing into flavor compounds. If you keep moving them, this can't happen. After 4 to 5 minutes, peek underneath one thigh with your spatula. The skin should be deep golden brown, almost mahogany colored. If it's still pale, give it another minute. When you're happy with the color, flip each thigh and sear the other side (the meaty side) for about 3 to 4 minutes until it's golden too. Here's where we diverge from the traditional approach: instead of draining all the fat, I'm going to transfer these chicken thighs to your 8x8-inch baking dish and leave most of that flavorful fat in the pan. It's going to form the foundation of your sauce. Pour off about half the fat if it looks like a pool, but don't go crazy trying to get it completely clean.
- Return that same skillet to medium heat. Add the 2 tablespoons of butter if you'd like extra richness, or skip it if you feel you have enough fat in there already. Add your smashed and chopped garlic all at once. Stir constantly for exactly 1 minute. You're listening for a gentle sizzle and smelling for that intoxicating garlic aroma. If you let it go longer than a minute, it'll burn and taste bitter—so watch that timer. Now add all your torn chard at once. This will look like an impossible mountain of greens. Don't panic. Stir it with your wooden spoon, and within 60 seconds, it'll begin to wilt. Keep stirring for another 2 to 3 minutes until the leaves are soft and the stems are tender. The chard should be completely wilted and darkened in color—going from bright green to more of a deep forest green.
- Pour in your 1 cup of chicken broth. Stir well, making sure to scrape up any browned bits stuck to the bottom of the pan—those bits are pure flavor. Let this simmer for about 2 minutes so the chard gets tender all the way through and the flavors begin to marry. Pour in your ¼ cup of heavy cream and immediately stir. Then add your ⅓ cup of freshly grated Parmesan, stirring constantly. The sauce should begin to thicken and turn creamy. It might look slightly grainy at first, but that's okay. Keep stirring gently for another 1 to 2 minutes until it becomes silky and smooth. The Parmesan needs time to fully incorporate. Taste it. Now add your ½ teaspoon of lemon juice and stir. Taste again. Does it taste bright and balanced? If not, add a bit more lemon or a small pinch of salt. This is where you make it yours—trust your palate.

- Pour that glorious creamy chard mixture over your seared chicken thighs in the baking dish. Gently stir to make sure the sauce surrounds each piece of chicken. The chicken should peek through the top, and the sauce should pool around it. Slide the baking dish into your preheated 400°F oven. Set a timer for 25 to 30 minutes. Your chicken is done when a meat thermometer inserted into the thickest part of a thigh (not touching bone) reads 185°F. If you don't have a thermometer, a fork should pierce the meat easily without resistance. While it's baking, you might pour yourself something nice, call a friend, or just breathe knowing that your dinner is taking care of itself.

- Remove the baking dish from the oven. It will be bubbling gently around the edges. Let it rest for 3 to 5 minutes—this allows the chicken to relax and reabsorb its juices, keeping it tender rather than stringy. Carefully transfer each chicken thigh to a plate with a large serving spoon, and divide that creamy chard mixture equally among servings. The sauce should cling beautifully to everything.
Notes
FAQs
Can I use boneless, skinless chicken breasts instead of thighs?
Technically yes, but I wouldn’t recommend it for a first attempt. Here’s why: chicken breasts are lean and have very little margin for error. If you cook them even 5 minutes too long, they become dry and stringy. Thighs, on the other hand, stay moist and forgiving because of their higher fat content. Once you’ve mastered this with thighs, then experiment with breasts if you want. For now, stick with thighs and set yourself up for success.
What if I can’t find Swiss chard at my store?
Substitute with spinach, kale, or even collard greens. Spinach will wilt much faster (reduce cooking time to 1 minute), while kale needs about the same time as chard but might need a slightly longer oven time. Collards are tougher and would need closer to 35 to 40 minutes in the oven. The sauce method stays exactly the same regardless of which green you choose.
Can I make this in a slow cooker or Instant Pot?
You absolutely can, but you’ll lose that beautiful seared chicken skin. Here’s what I’d do: sear the chicken in a skillet first (don’t skip this step), then transfer to your slow cooker with the chard and sauce ingredients. Cook on low for 4 to 5 hours, or high for 2 to 3 hours. The Instant Pot works similarly—sear the chicken using the sauté function, then pressure cook for 8 minutes on high. The results are still delicious, just slightly different in texture.
Is there dairy-free way to make the cream sauce?
Yes. Replace the heavy cream with full-fat coconut milk (canned, not the carton kind), and skip the Parmesan or replace it with nutritional yeast for a cheesy flavor without dairy. The sauce will be slightly less rich but still creamy and delicious. Use just as much coconut milk as you would cream. The technique is identical.
How do I know if my garlic is actually cooked and not just warmed through?
Cooked garlic loses its sharp, raw bite and becomes mellow and sweet. Raw garlic smells sharp and pungent. As you stir your garlic in that butter, you’ll smell the transition happen—it’ll go from harsh to warm and caramelized. That’s your signal that you’re at the one-minute mark and ready to add the chard. If you’re nervous, you can take a tiny piece and taste it (carefully, it’s hot). It should be soft and sweet, not crunchy or harsh.
More Beginner-Friendly Recipes You’ll Love
- Chicken Cutlet Sauce Recipe—Learn the same sauce-building techniques with pan-seared chicken cutlets for an elegant weeknight dinner
- Fresh Spinach Pasta—Once you master creamy sauces, use that knowledge to create silky pasta dishes that feel restaurant-quality
- What to Pair with Brie en Croute—Another creamy, indulgent dish that uses similar techniques and will feel intuitive after you’ve made this chicken
You just made creamy chard and chicken thighs from scratch. You seared chicken properly, built a cream sauce without breaking it, and transformed tough greens into something silky and delicious. That’s not a small accomplishment. That’s you stepping into the kitchen with intention, with confidence, and with the understanding that good food comes from technique and care—not perfection.
I want you to know that the nervousness you felt before you started? That’s the mark of someone who cares about doing things right. That matters. Lean into it. The next time you make this dish, you’ll be faster and even more confident. And the time after that, you might play with the recipe, add your own touches, make it yours.
Cook with confidence!


