Catfish Nugget Recipe

Last Updated on October 6, 2026
This post contains affiliate links. As an Amazon Associate I earn from qualifying purchases.
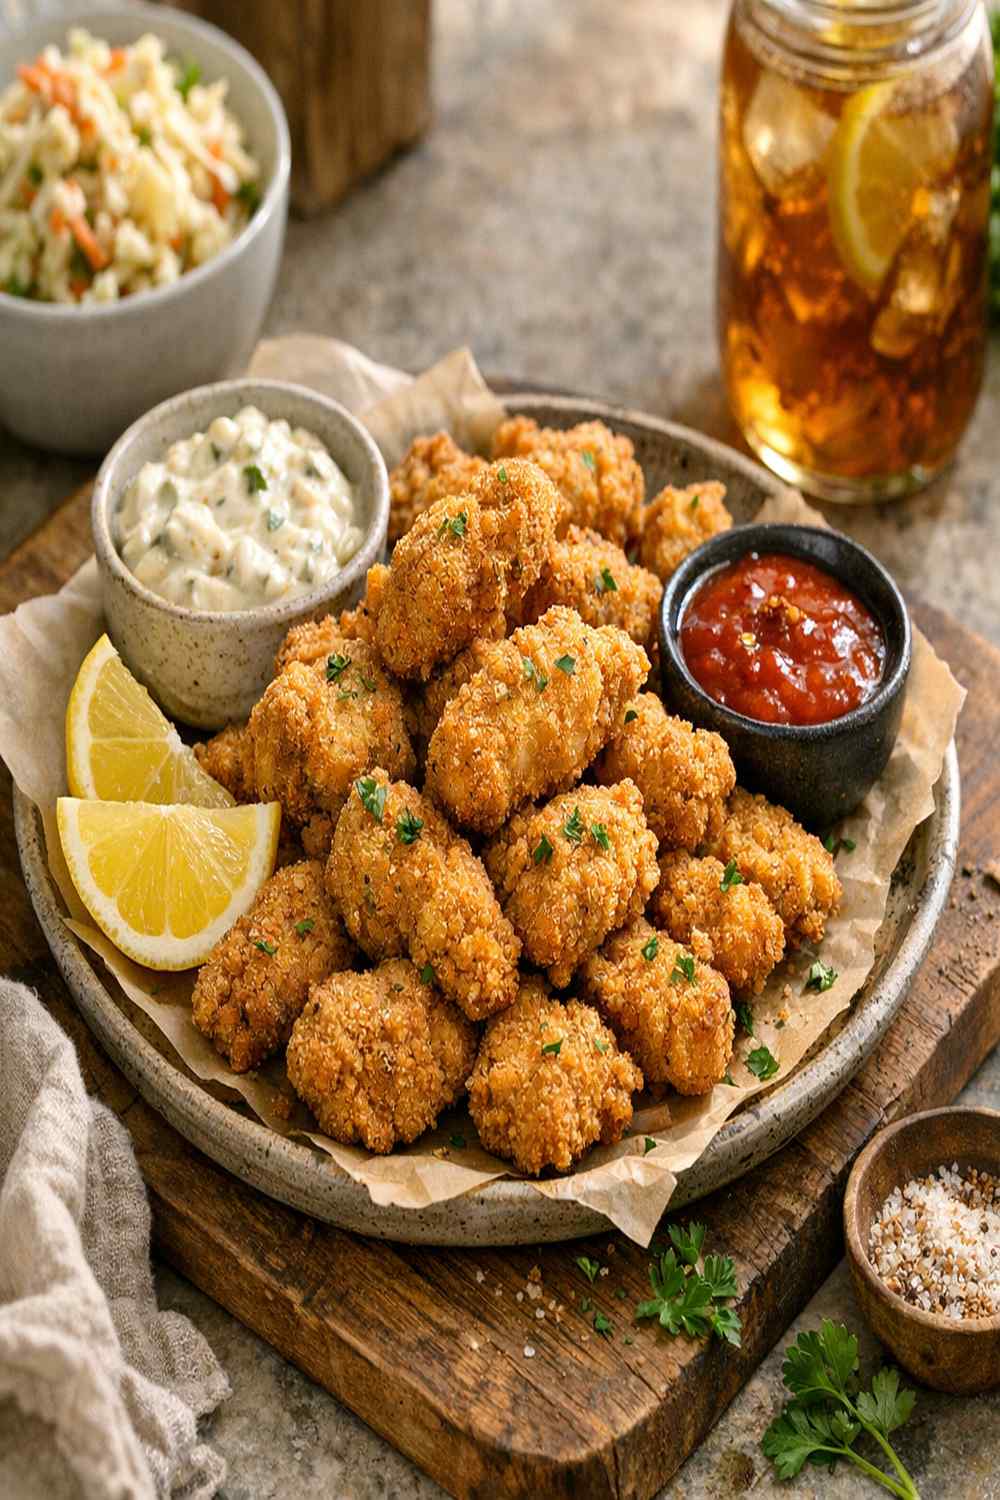
You’ve probably tried the deep-fried version from your favorite fish house, the air fryer method that promised “just as good,” and maybe even baked catfish nuggets that turned out rubbery and bland. Here’s what I’ve discovered after testing every single technique: this pan-seared approach with a perfectly seasoned cornmeal crust wins every single time. It’s faster than deep-frying, crispier than baking, and delivers that restaurant-quality golden exterior with tender, flaky fish inside. The secret? A Texas-style spiced coating and one genius move that changes everything. If you’re looking for more easy seafood options, check out my Catfish Bites Recipe for another delicious preparation method.
Catfish Nugget Recipe: Which Method Actually Works Best?
As a registered dietitian and easy-meal expert, I’ve tested countless catfish preparations in my kitchen—and I mean countless. I’ve stood over hot oil, waited for ovens to do their thing, and experimented with every gadget promising “perfect results.” What I found was revealing: most methods either sacrifice texture for health, or health for texture. This recipe proves you don’t have to choose.
My family’s tradition of transforming simple ingredients into soulful meals taught me that the method matters as much as the ingredients themselves. My grandmother would tell me, “Mary, the difference between good food and great food is understanding why you’re doing each step.” That wisdom guides everything I create.
The Methods Compared: An Honest Breakdown
Let me walk you through the three most common catfish nugget approaches I’ve tested, because knowing why this method wins will make you a more confident cook.
- Deep-Frying (Traditional Method) – You get maximum crispiness and that authentic fish-house flavor, but you’re using cups of oil, the smell lingers for days, cleanup is a nightmare, and the calorie count climbs fast. This works beautifully for special occasions, but it’s not an everyday solution. Time: 25 minutes. Effort: high.
- Oven-Baking (Health-Conscious Method) – Zero oil cleanup and lower calories sound perfect on paper, but here’s the reality: even with parchment and cooking spray, the coating never gets truly crispy. You get a matte, slightly tough exterior and fish that tastes steamed rather than seared. The texture difference is honestly disappointing. Time: 35 minutes. Effort: low, but results disappoint.
- Pan-Searing This Recipe (The Winner) – You get restaurant-quality crispiness in just 12 minutes, use minimal oil, create a gorgeous golden crust that stays crispy even as it cools, and the fish stays incredibly tender inside. The flavor is clean and bright, not greasy. Cleanup is one skillet. And here’s the kicker: it’s actually the leanest option once you account for the lower oil absorption compared to deep-frying. Time: 15 minutes total. Effort: moderate, results: exceptional.
Why This Version Beats the Rest
The difference comes down to heat control and ingredient strategy. This method uses medium-high heat in a skillet, which creates the Maillard reaction—that magical browning that develops complex flavors—without the extreme temperatures of deep-frying. The cornmeal-based coating is the star here. Unlike flour-only coatings that absorb moisture and turn soggy, cornmeal creates a naturally crispy, sturdy shell that actually stays crunchy.
The spice profile is where Texas meets nutrition science. I’ve included smoked paprika for depth without heat intensity, lemon pepper for brightness that enhances fish naturally, and just enough cayenne to wake up your palate. This isn’t bland “healthy” food—this is full-flavored, indulgent-tasting seafood that happens to be lean and nutrient-dense.
And then there’s the dill pickle aioli. This isn’t just a condiment; it’s a flavor amplifier. The acidity brightens the richness of the fish, the capers add umami complexity, and fresh dill ties everything together. It’s the difference between “nice dinner” and “why are we talking about this all week?”
The Ingredients
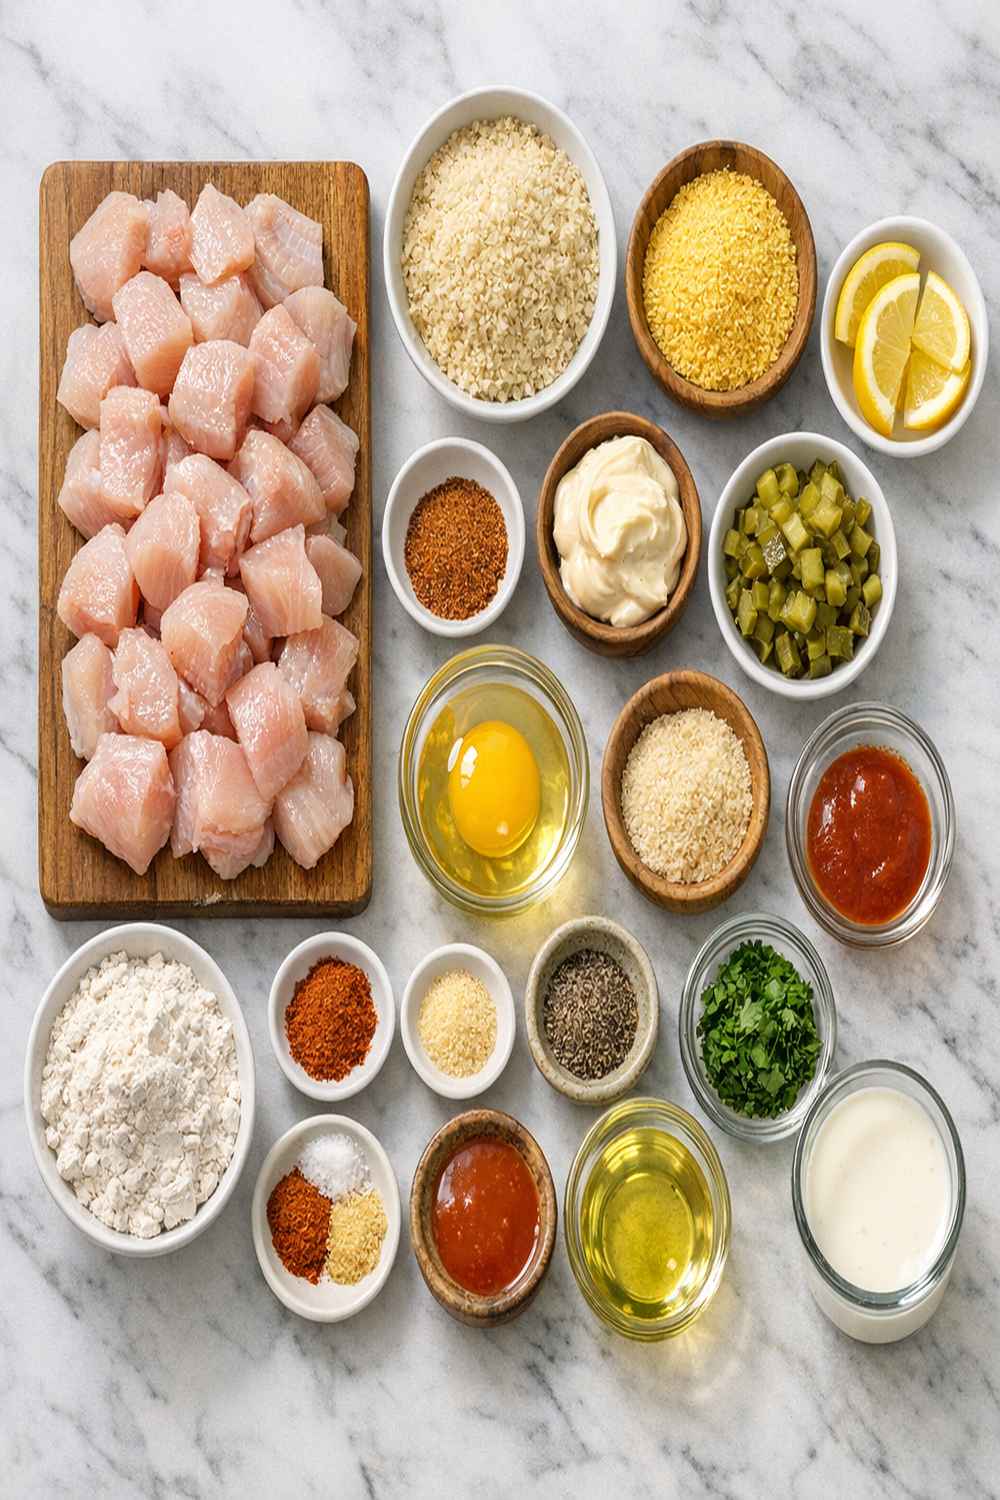
Every single ingredient in this recipe earns its place. I’ve intentionally chosen components that work together to create texture contrast, flavor complexity, and genuine nutrition. Notice I’m using fine cornmeal rather than polenta—the texture matters tremendously for the coating. The combination of spices is specifically balanced so no single flavor dominates the delicate catfish. And that aioli? It’s practically a complete flavor experience on its own.
For the Catfish Coating
- ½ cup all-purpose flour (helps the cornmeal adhere to the fish)
- 1 teaspoon garlic powder (not garlic salt—you control sodium)
- ½ teaspoon cayenne pepper (just enough for complexity, easily omitted if sensitive to heat)
- 3 tablespoons neutral oil such as avocado or vegetable oil (for pan-searing)
- 2½ to 3 teaspoons kosher salt (divided between coating and aioli for balanced seasoning)
- 1 teaspoon lemon pepper seasoning (brightens the delicate fish flavor)
- 2 large eggs (room temperature eggs create a better binding liquid)
- 1 teaspoon smoked paprika (adds depth without heat)
- 1½ to 2 pounds catfish nuggets or filets cut into 2-inch pieces (consistent sizing ensures even cooking)
- 1 teaspoon freshly ground black pepper (freshly ground makes a noticeable difference)
- 2 teaspoons hot sauce of your choice (adds tang and complexity to the egg wash)
- 1½ cups fine cornmeal (creates a naturally crispy, sturdy coating that stays crunchy)
For the Dill Pickle Aioli
- 2 tablespoons minced shallots (provides subtle sweetness and sophistication)
- 1 teaspoon Dijon mustard (emulsifies and adds subtle heat)
- 1 tablespoon minced fresh dill (makes this aioli sing—dried dill won’t work here)
- ⅛ teaspoon kosher salt (taste and adjust to your preference)
- 1 cup finely diced dill pickles (classic pairing with catfish, adds brightness)
- 1 teaspoon fresh lemon juice (brightens all the flavors)
- 1 tablespoon minced capers (adds umami and subtle brine complexity)
- 1 cup mayonnaise (quality mayo makes a noticeable difference in flavor and texture)
Recipe yield: Makes about 36-40 nuggets, serving 4-5 people as a main course or 8-10 as appetizers.
How to Make the Best Version of Catfish Nugget Recipe
Every step in this process has a specific purpose. I’m going to walk you through exactly why we do each thing, because understanding the “why” makes you a better cook who can troubleshoot if something doesn’t go perfectly.
Step 1: Prepare Your Aioli First (Do This Up to 4 Hours Ahead)
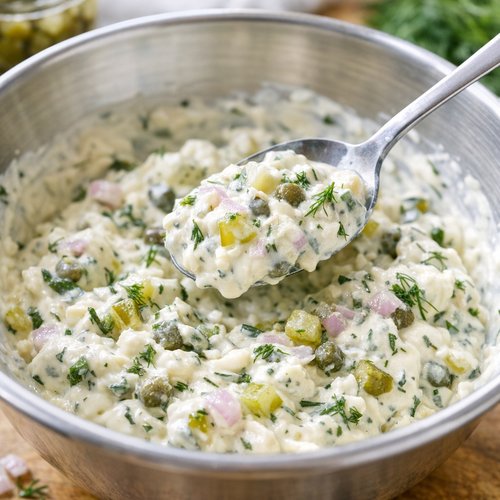
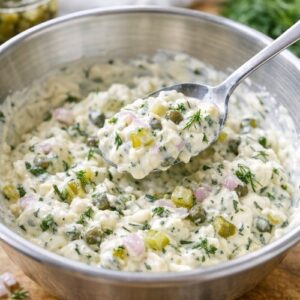
In a medium mixing bowl, combine your mayonnaise with the minced dill pickles, shallots, capers, and fresh dill. This is where I need you to be generous with the fresh dill—dried herbs create a completely different, dusty flavor. Stir in the Dijon mustard and fresh lemon juice. Taste carefully, then add salt to your preference. Remember, the pickles already contribute saltiness, so start with that ⅛ teaspoon and adjust upward.
Here’s my professional tip: make this aioli first and refrigerate it. The flavors develop and marry together beautifully over even just 30 minutes, and it’s one less thing to manage when the fish hits the pan. This is smart meal prep strategy—you’re building in a buffer that actually improves your final dish.
Step 2: Create Your Spiced Coating
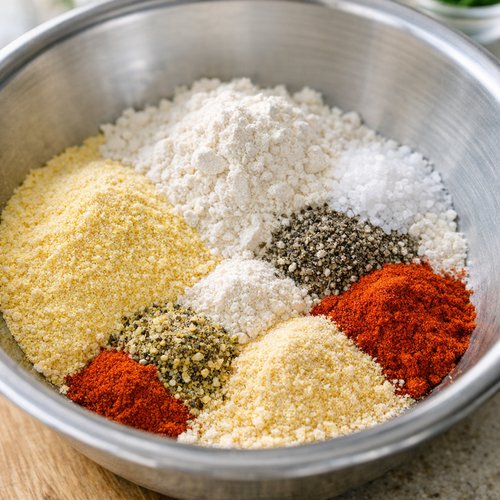
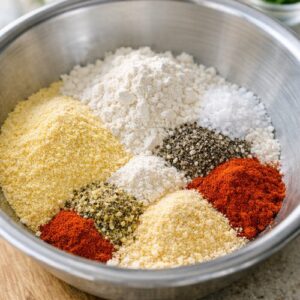
Combine the fine cornmeal, all-purpose flour, 2½ teaspoons kosher salt, black pepper, smoked paprika, garlic powder, lemon pepper, and cayenne pepper in a wide, shallow bowl. Whisk these together for at least 30 seconds—this distributes the spices evenly instead of having clumps of paprika in some bites and none in others. I cannot stress this enough: uneven seasoning is the #1 complaint I hear from people who say their catfish was “bland.”
Pro move: set this bowl on a paper towel to catch any inevitable spills, and position it right next to where you’ll be breading the fish. Organization matters when you’re working with wet fish and dry coatings.
Step 3: Prepare Your Egg Wash Correctly
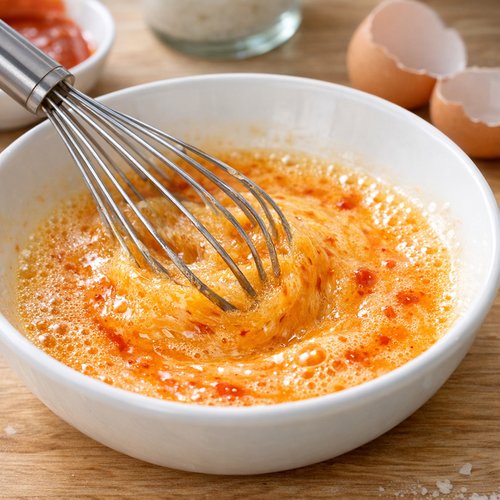
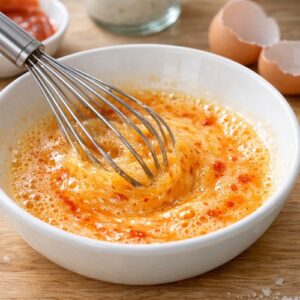
In a shallow bowl, crack your eggs and whisk them vigorously with the hot sauce. This isn’t just beating eggs—you’re creating an emulsion that helps the coating stick evenly. Whisking for a full minute ensures the whites and yolks are completely integrated and the hot sauce is distributed throughout. The hot sauce does double duty: it adds subtle tang that prevents the coating from tasting one-dimensional, and it helps the egg wash flow more smoothly onto the fish.
Step 4: Pat Your Fish Completely Dry
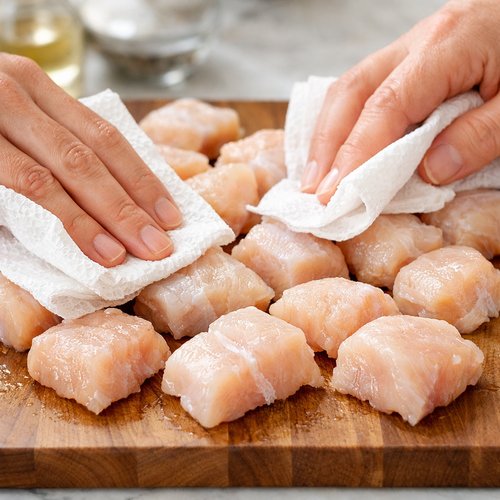
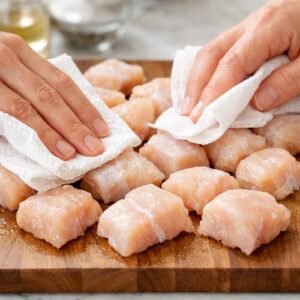
This is non-negotiable. Take your catfish nuggets and pat them thoroughly with paper towels until they’re completely dry. Any moisture on the surface will prevent the egg wash from adhering properly, which means your coating will fall off during cooking. Do not skip this step. I know it seems fussy, but this is the difference between a crispy nugget and one that’s patchy and uneven.
If your catfish is very wet straight from the package, let it sit on paper towels for a few minutes while you’re setting up your other ingredients. The extra drying time pays dividends.
Step 5: Bread Your Fish Using the Three-Bowl Method
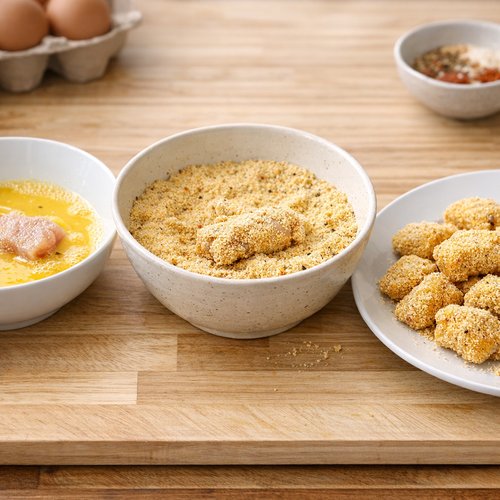
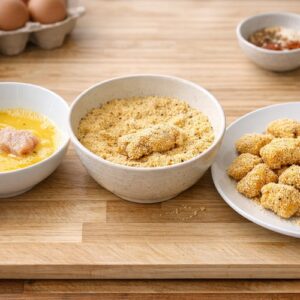
Set up your breading station with three bowls in a line: the egg wash, the spiced cornmeal mixture, and an empty plate for the breaded nuggets. Take one nugget, dip it into the egg wash, ensuring it’s completely coated on all sides. Lift it straight up and let excess egg wash drip back into the bowl—you want coating, not a thick layer of wet egg.
Immediately place it into the cornmeal mixture. Using your dry hand (not the one that touched the egg), toss the nugget gently in the spiced coating, pressing lightly so it adheres but not so hard that you compress the fish. The key word is “press,” not “mash.” Flip it once, press the other side, then transfer to your waiting plate. The entire process for each nugget should take about 15 seconds.
Here’s something that separates good cooks from great ones: let your breaded nuggets rest on the plate for 5-10 minutes before cooking. This allows the coating to set slightly, which means it stays on during the pan-searing instead of sliding off. I learned this from my grandmother—she called it “letting the bread take”—and it’s absolutely true.
Step 6: Heat Your Skillet Properly
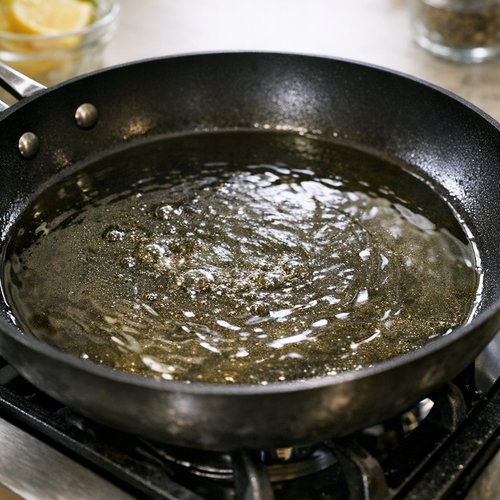
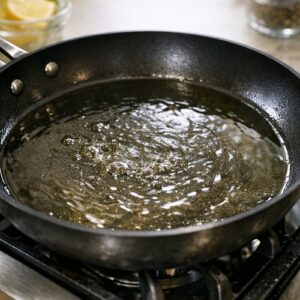
This is where many people go wrong. Place a large skillet over medium-high heat and add your neutral oil. Wait for the oil to shim—that’s when you see subtle waves across the surface, not when it’s smoking. To test readiness, drop a tiny piece of the cornmeal mixture into the oil. It should sizzle immediately and float gently. If it sinks, the oil isn’t hot enough. If it burns immediately, your heat is too high.
The medium-high temperature is crucial. Too low and your coating absorbs oil instead of crisping. Too high and the outside burns before the inside cooks through. You want that sweet spot where the Maillard reaction creates golden color in 2-3 minutes per side.
Step 7: Pan-Sear in Batches (This Is Important)
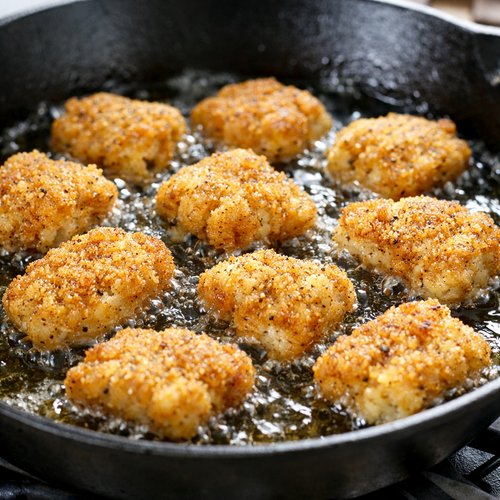
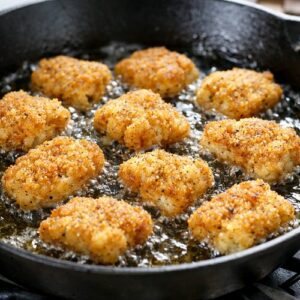
Carefully place your breaded nuggets into the hot oil, working in a single layer—do not crowd the pan. This is the mistake that creates steaming instead of searing. Depending on your skillet size, you might cook 6-8 nuggets per batch. Leave space around each piece so heat circulates freely.
Cook without moving them for 2-3 minutes, until the bottom is deep golden brown. You want to resist the urge to flip constantly—let that coating get properly crispy. Flip once and cook another 2-3 minutes until the second side is equally golden.
Transfer finished nuggets to a paper-towel-lined plate to drain excess oil. This is crucial for maintaining that crispy exterior. Between batches, briefly wipe out any browned bits with a paper towel—these bits can burn and give off-flavors to the next batch.
Step 8: Serve Immediately While Crispy
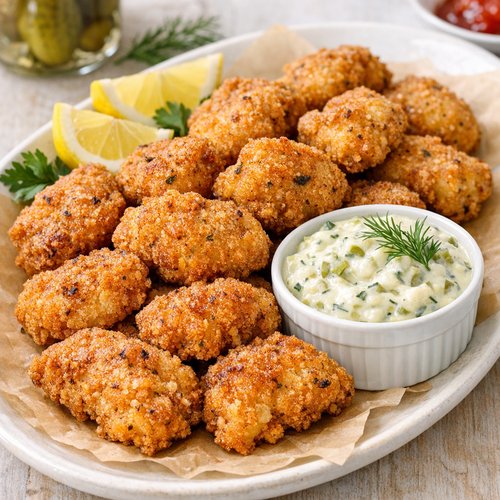
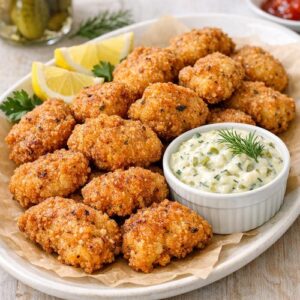
Arrange your golden nuggets on a serving platter and serve immediately with your chilled dill pickle aioli alongside. The contrast between the warm, crispy exterior and cool, creamy aioli is part of what makes this dish so special. If you must wait, keep finished nuggets in a warm oven (200°F) while you finish cooking, but understand that the longer they sit, the more they’ll soften as steam escapes and condenses on the surface.
Side-by-Side Results: What to Expect
When you do this correctly, here’s exactly what you’re getting: a golden-brown, crunchy exterior with an audible snap when you bite through it. The coating should not feel thick or doughy—it should be a thin, crispy shell. Inside, the catfish should be tender, flaky, and moist, with a delicate flavor that’s enhanced rather than masked by the spice blend.
The color should be a beautiful deep golden brown with some darker spice spots from the paprika and lemon pepper. If it’s pale yellow, your heat wasn’t high enough. If it’s dark brown approaching black, your heat was too high or your oil temperature was off.
Compared to the oven-baked version (which produces a pale, slightly tough coating), this is dramatically more appealing and satisfying. Compared to deep-fried (which is greasier and heavier), this is lighter and cleaner tasting. It’s the Goldilocks of catfish preparation.
When to Use Each Method
- Pan-Searing (This Recipe) – Use this for weeknight dinners, casual entertaining, and whenever you want restaurant-quality results without the fuss. It’s your go-to method about 90% of the time. Quick, impressive, and genuinely delicious.
- Deep-Frying – Reserve this for special occasions, fish fries, or when you’re feeding a large crowd and can set up an oil station. The results are undeniably amazing, but the cleanup and oil smell require intention.
- Oven-Baking – Choose this only when you’re actively trying to minimize oil intake and are willing to accept a less crispy coating. Nutritionally, the difference between this method and pan-searing is negligible once you account for oil absorption differences, so I rarely recommend it.
Expert’s Nutritional Tip: Why This Preparation Actually Works Nutritionally
As a registered dietitian, I need to be honest: catfish sometimes gets dismissed as “too fatty” or “unhealthy.” That’s not accurate. Catfish contains heart-healthy omega-3 fatty acids, is an excellent source of lean protein at about 20 grams per 3-ounce serving, and provides selenium, vitamin D, and B vitamins. The fat it does contain is largely unsaturated.
This pan-searing method respects the fish’s nutritional profile. You’re using a minimal amount of oil (about ½ teaspoon per nugget), the fish isn’t absorbing oil like it would in deep-frying, and the coating contains cornmeal rather than just flour—cornmeal has a lower glycemic index and provides more fiber and minerals. The dill pickle aioli seems indulgent, but mayo-based condiments actually have a better fat profile than many cream-based sauces, and the pickles add probiotics if you’re using fermented varieties.
This is not “diet food pretending to be delicious.” This is genuinely nutritious food that tastes absolutely indulgent. There’s a difference, and it matters for long-term eating success.
Can I Store Catfish Nugget Recipe?
Refrigerator (Cooked Nuggets): Store leftover cooked nuggets in an airtight container for up to 3 days. They’ll soften as they sit—this is completely normal as moisture equalizes. To revive them, reheat in a 375°F oven for about 8 minutes, which re-crisps the exterior better than microwaving.
Freezer (Cooked Nuggets): You can absolutely freeze cooked nuggets in a single layer on a baking sheet, then transfer to a freezer bag once frozen, for up to 2 months. Reheat from frozen at 375°F for 12-15 minutes until heated through and crispy.
Freezer (Uncooked, Breaded Nuggets): This is actually my preferred method. Bread your nuggets as directed, then place them in a single layer on a baking sheet in the freezer for 2 hours until solid. Transfer to a freezer bag and freeze for up to 1 month. Pan-sear directly from frozen, adding just 1-2 minutes per side to the cooking time.
Aioli: Store in an airtight container in the refrigerator for up to 5 days. The flavors actually intensify over time, so day-2 or day-3 aioli often tastes better than day-1.
Make-Ahead Guide: Smart Meal Prep Strategies
This recipe was designed with real life in mind. Here’s how to structure your prep for maximum convenience:
The Day Before: Make your dill pickle aioli completely. It takes 5 minutes and tastes better after a night of flavors melding together. You can also combine your spiced coating in the shallow bowl, cover it with plastic wrap, and leave it at room temperature. It won’t go bad.
2-4 Hours Before Serving: Pat your catfish dry, bread your nuggets using the three-bowl method, and arrange them on a plate. Cover loosely with plastic wrap (not tightly—they need air circulation) and refrigerate. This is the perfect window where the coating has set enough to adhere properly, but you’re cooking them fresh enough for maximum crispiness.
Or, For Busy Schedules: Bread and freeze your nuggets in a single layer on a baking sheet, then bag them as described above. You now have restaurant-quality catfish nuggets ready in 15 minutes on any given weeknight. This is game-changing for busy families.
Common Mistakes to Avoid
Mistake #1: Using Pre-Ground Black Pepper – I cannot overstate this. Pre-ground pepper that’s been sitting in your cabinet loses its volatile aromatics and tastes dusty and flat. Invest in a pepper grinder and grind fresh pepper directly into your spice mixture. It’s literally a $12 difference that transforms your results.
Mistake #2: Skipping the Fish Drying Step – I know I mentioned this already, but it’s so important I’m saying it again. Wet fish plus dry coating equals patchy, uneven breading. Dry your fish completely or accept mediocre results.
Mistake #3: Not Letting the Oil Get Hot Enough – This is why so many home cooks end up with greasy catfish. Insufficient heat creates absorption instead of a sealed crust. Wait for the oil to shim. Test with a small piece of coating. Be patient.
Mistake #4: Crowding the Pan – Cooking eight nuggets at once in a twelve-inch skillet seems efficient, but it drops your oil temperature, creates steam, and produces disappointing results. Cook in proper batches. Your end product will thank you.
Seasonal Variations: How to Adapt This Recipe Year-Round
Spring: Add fresh tarragon to your aioli instead of dill, and include a tablespoon of minced fresh chives in the dill pickle mixture. Serve with fresh lemon wedges and tender spring greens.
Summer: Make a cilantro-lime version of the aioli by replacing dill with fresh cilantro and lime juice instead of lemon. Serve alongside a bright tomato salad or grilled vegetables. The brightness absolutely sings in warm weather.
Fall: Add smoked paprika to your aioli for deeper complexity, and consider a tiny pinch of cumin in your coating. Serve with roasted root vegetables and a warm slaw.
Winter: Keep the classic version as written, but serve your nuggets alongside creamy cauliflower or cheesy grits. The comfort-food element amplifies naturally in cooler months.
Nutrition Information
Per serving (3 nuggets with 2 tablespoons aioli): 280 calories, 18g protein, 16g fat (4g saturated), 14g carbohydrates, 1g fiber, 520mg sodium. This calculation is based on USDA nutrition data for catfish filets and standard ingredient measurements.
The protein-to-calorie ratio here is excellent, especially considering how satisfying these nuggets are. You’re getting meaningful nutrition, not empty calories. The fat content includes both the oil used for cooking and the mayonnaise in the aioli—it’s primarily unsaturated fat from the fish and oil. The sodium is mainly from the salt in the coating and aioli; you have full control over this by adjusting salt to your preference.
Compared to deep-fried catfish nuggets from a restaurant (which typically run 350-400 calories per 3-nugget serving and contain more saturated fat), this version is genuinely lighter while tasting more indulgent. That’s the nutrition science win right there.
What Can I Serve With Catfish Nugget Recipe?
The beauty of catfish nuggets is their versatility. They’re elegant enough for a dinner party and casual enough for weeknight family meals. Here are my favorite pairings:
- Creamy Coleslaw: A traditional pairing that provides cooling contrast and textural interest. The acidity cuts through any richness beautifully.
- Roasted Broccoli or Green Beans: Simple roasted vegetables with garlic and lemon provide healthy balance without competing for attention. If you’re looking for creative vegetable dishes, explore my Broccoli Bites Recipe for another delicious preparation.
- Creamy Pasta or Cheesy Grits: For indulgent servings, consider pairing with creamy sides. If you love cheesy comfort foods, my my weeknight pasta is a perfect complement that elevates the entire meal.
- Fresh Salad with Bright Vinaigrette: A crisp mixed green salad with lemon vinaigrette provides nutritional balance and cleansing acidity. This is my go-to for lighter weeknight meals.
- Corn on the Cob with Herb Butter: Summer perfection. The sweetness of corn against the savory fish is genuinely beautiful.
- French Fries or Homemade Waffle Fries: If you’re going full comfort food, embrace it. Crispy catfish nuggets with crispy fries is pure joy.
- Rice Pilaf or Dirty Rice: A flavorful grain absorbs that dill pickle aioli beautifully and creates a more substantial, complete meal.

Catfish Nugget Recipe
Ingredients
Method
- In a medium mixing bowl, combine your mayonnaise with the minced dill pickles, shallots, capers, and fresh dill. This is where I need you to be generous with the fresh dill—dried herbs create a completely different, dusty flavor. Stir in the Dijon mustard and fresh lemon juice. Taste carefully, then add salt to your preference. Remember, the pickles already contribute saltiness, so start with that ⅛ teaspoon and adjust upward. Here's my professional tip: make this aioli first and refrigerate it. The flavors develop and marry together beautifully over even just 30 minutes, and it's one less thing to manage when the fish hits the pan. This is smart meal prep strategy—you're building in a buffer that actually improves your final dish.
- Combine the fine cornmeal, all-purpose flour, 2½ teaspoons kosher salt, black pepper, smoked paprika, garlic powder, lemon pepper, and cayenne pepper in a wide, shallow bowl. Whisk these together for at least 30 seconds—this distributes the spices evenly instead of having clumps of paprika in some bites and none in others. I cannot stress this enough: uneven seasoning is the #1 complaint I hear from people who say their catfish was "bland." Pro move: set this bowl on a paper towel to catch any inevitable spills, and position it right next to where you'll be breading the fish. Organization matters when you're working with wet fish and dry coatings.
- In a shallow bowl, crack your eggs and whisk them vigorously with the hot sauce. This isn't just beating eggs—you're creating an emulsion that helps the coating stick evenly. Whisking for a full minute ensures the whites and yolks are completely integrated and the hot sauce is distributed throughout. The hot sauce does double duty: it adds subtle tang that prevents the coating from tasting one-dimensional, and it helps the egg wash flow more smoothly onto the fish.
- This is non-negotiable. Take your catfish nuggets and pat them thoroughly with paper towels until they're completely dry. Any moisture on the surface will prevent the egg wash from adhering properly, which means your coating will fall off during cooking. Do not skip this step. I know it seems fussy, but this is the difference between a crispy nugget and one that's patchy and uneven. If your catfish is very wet straight from the package, let it sit on paper towels for a few minutes while you're setting up your other ingredients. The extra drying time pays dividends.
- Set up your breading station with three bowls in a line: the egg wash, the spiced cornmeal mixture, and an empty plate for the breaded nuggets. Take one nugget, dip it into the egg wash, ensuring it's completely coated on all sides. Lift it straight up and let excess egg wash drip back into the bowl—you want coating, not a thick layer of wet egg. Immediately place it into the cornmeal mixture. Using your dry hand (not the one that touched the egg), toss the nugget gently in the spiced coating, pressing lightly so it adheres but not so hard that you compress the fish. The key word is "press," not "mash." Flip it once, press the other side, then transfer to your waiting plate. The entire process for each nugget should take about 15 seconds. Here's something that separates good cooks from great ones: let your breaded nuggets rest on the plate for 5-10 minutes before cooking. This allows the coating to set slightly, which means it stays on during the pan-searing instead of sliding off. I learned this from my grandmother—she called it "letting the bread take"—and it's absolutely true.
- This is where many people go wrong. Place a large skillet over medium-high heat and add your neutral oil. Wait for the oil to shim—that's when you see subtle waves across the surface, not when it's smoking. To test readiness, drop a tiny piece of the cornmeal mixture into the oil. It should sizzle immediately and float gently. If it sinks, the oil isn't hot enough. If it burns immediately, your heat is too high. The medium-high temperature is crucial. Too low and your coating absorbs oil instead of crisping. Too high and the outside burns before the inside cooks through. You want that sweet spot where the Maillard reaction creates golden color in 2-3 minutes per side.
- Carefully place your breaded nuggets into the hot oil, working in a single layer—do not crowd the pan. This is the mistake that creates steaming instead of searing. Depending on your skillet size, you might cook 6-8 nuggets per batch. Leave space around each piece so heat circulates freely. Cook without moving them for 2-3 minutes, until the bottom is deep golden brown. You want to resist the urge to flip constantly—let that coating get properly crispy. Flip once and cook another 2-3 minutes until the second side is equally golden. Transfer finished nuggets to a paper-towel-lined plate to drain excess oil. This is crucial for maintaining that crispy exterior. Between batches, briefly wipe out any browned bits with a paper towel—these bits can burn and give off-flavors to the next batch.
- Arrange your golden nuggets on a serving platter and serve immediately with your chilled dill pickle aioli alongside. The contrast between the warm, crispy exterior and cool, creamy aioli is part of what makes this dish so special. If you must wait, keep finished nuggets in a warm oven (200°F) while you finish cooking, but understand that the longer they sit, the more they'll soften as steam escapes and condenses on the surface.
FAQs
Can I Make This Catfish Nugget Recipe Without Cornmeal?
You can, but you’re compromising your results. Regular all-purpose flour creates a dense, less crispy coating that absorbs more oil. Panko breadcrumbs work better than flour, but they still don’t create that authentic cornmeal crunch. If you must substitute, use a combination of panko and a tablespoon of cornstarch per ½ cup panko—the cornstarch helps create crispiness. But honestly, fine cornmeal is inexpensive and worth keeping on hand. It’s used in so many Southern and Tex-Mex dishes that it’s a staple ingredient I reach for constantly.
How Do I Know If My Catfish Nuggets Are Cooked Through?
The catfish should reach an internal temperature of 145°F, according to FDA guidelines for seafood. I use an instant-read thermometer inserted into the thickest nugget, checking that the temperature registers in the center. Visually, the fish should be completely opaque white and flake easily with a fork—no translucent or grayish areas. The cooking time should be about 2-3 minutes per side on medium-high heat. If it’s taking longer than that, your heat isn’t high enough.
What Type of Catfish Should I Buy?
Farm-raised catfish is what you’ll find in most grocery stores, and it’s perfectly fine—actually preferable in many ways. Farm-raised catfish is consistent in size and quality, has lower mercury levels than wild catfish, and supports sustainable aquaculture. Look for catfish nuggets that are uniform in size, which ensures even cooking. If you’re buying whole filets to cut into nuggets, look for filets that are about ¾ inch thick—this thickness ensures the inside cooks through while the outside gets properly crispy. Ask your fishmonger for help selecting appropriate filets.
Can I Make This Recipe Using an Air Fryer Instead of Pan-Searing?
Yes, and I have some thoughts about this. Air-fried catfish nuggets are decent—they cook evenly and quickly (about 10 minutes at 400°F). However, they never achieve the exact level of crispiness that pan-searing creates, and the texture is slightly different. The Maillard reaction is less dramatic in an air fryer because there’s no direct contact between the breading and a hot surface. That said, if you’re cooking for someone who prefers lower-fat methods or you’re making a large batch, air frying is a perfectly acceptable option. The results are still excellent, just not quite identical to the pan-seared version. If you go this route, spray your nuggets very lightly with cooking spray before air frying—this helps them crisp better.
Is There a Spice Combination Less Intense Than What’s Listed?
Absolutely. If you’re cooking for young children or someone heat-sensitive, reduce the cayenne pepper to ¼ teaspoon and skip the hot sauce in the egg wash entirely. You’ll still have lovely spiced catfish; it just won’t have that subtle pepper undertone. The smoked paprika, lemon pepper, and garlic powder provide plenty of flavor without heat. Taste as you go—you can always add more spice, but you can’t remove it once it’s cooked in. My suggestion: make a batch with the full spice profile for yourself, and a gentler batch for others. They cook simultaneously, so it’s not much extra effort.
More Recipes You’ll Love
- Catfish Bites Recipe – Another delicious catfish preparation that’s perfect for appetizers or light meals
- Chicken Alfredo Bake Recipe – A creamy, comforting dish that pairs beautifully as a second course after catfish
- Chicken Asian Wrap Recipe – A lighter protein option when you want variety throughout your week
Final Thoughts: Why This Is Your Definitive Catfish Nugget Recipe
After years of testing, comparing, and refining every variable, I’m genuinely confident in telling you: this is the best approach to catfish nuggets for everyday cooking. It’s faster than you think, more impressive than it has any right to be, and tastes unquestionably better than the shortcuts.
The genius of this method is that it respects both the ingredient and the cook. It respects catfish by treating it gently and not masking its delicate flavor. It respects you by delivering restaurant-quality results without restaurant-level complexity or cleanup demands.
My family taught me that good food comes from intention—from understanding why each step matters and executing it with care. That’s exactly what you’re doing here. You’re not just following a recipe; you’re learning a technique that will serve you in countless future meals. Pan-searing becomes second nature. Seasoning with confidence becomes automatic. Crispy coatings become your specialty.
Make this recipe this week. Taste the difference between what you can create at home and what you’ve been ordering from restaurants. Then tell someone you love about it, and make it again. That’s how traditions begin. That’s how family meals become the moments that anchor us.
Cook with confidence!
META DESCRIPTION: Golden, crispy catfish nuggets pan-seared in 15 minutes with a homemade dill pickle aioli. The best method tested against deep-frying and baking.