Brown Sugar Cake Glaze Recipe
Last Updated on September 20, 2026
This post contains affiliate links. As an Amazon Associate I earn from qualifying purchases.
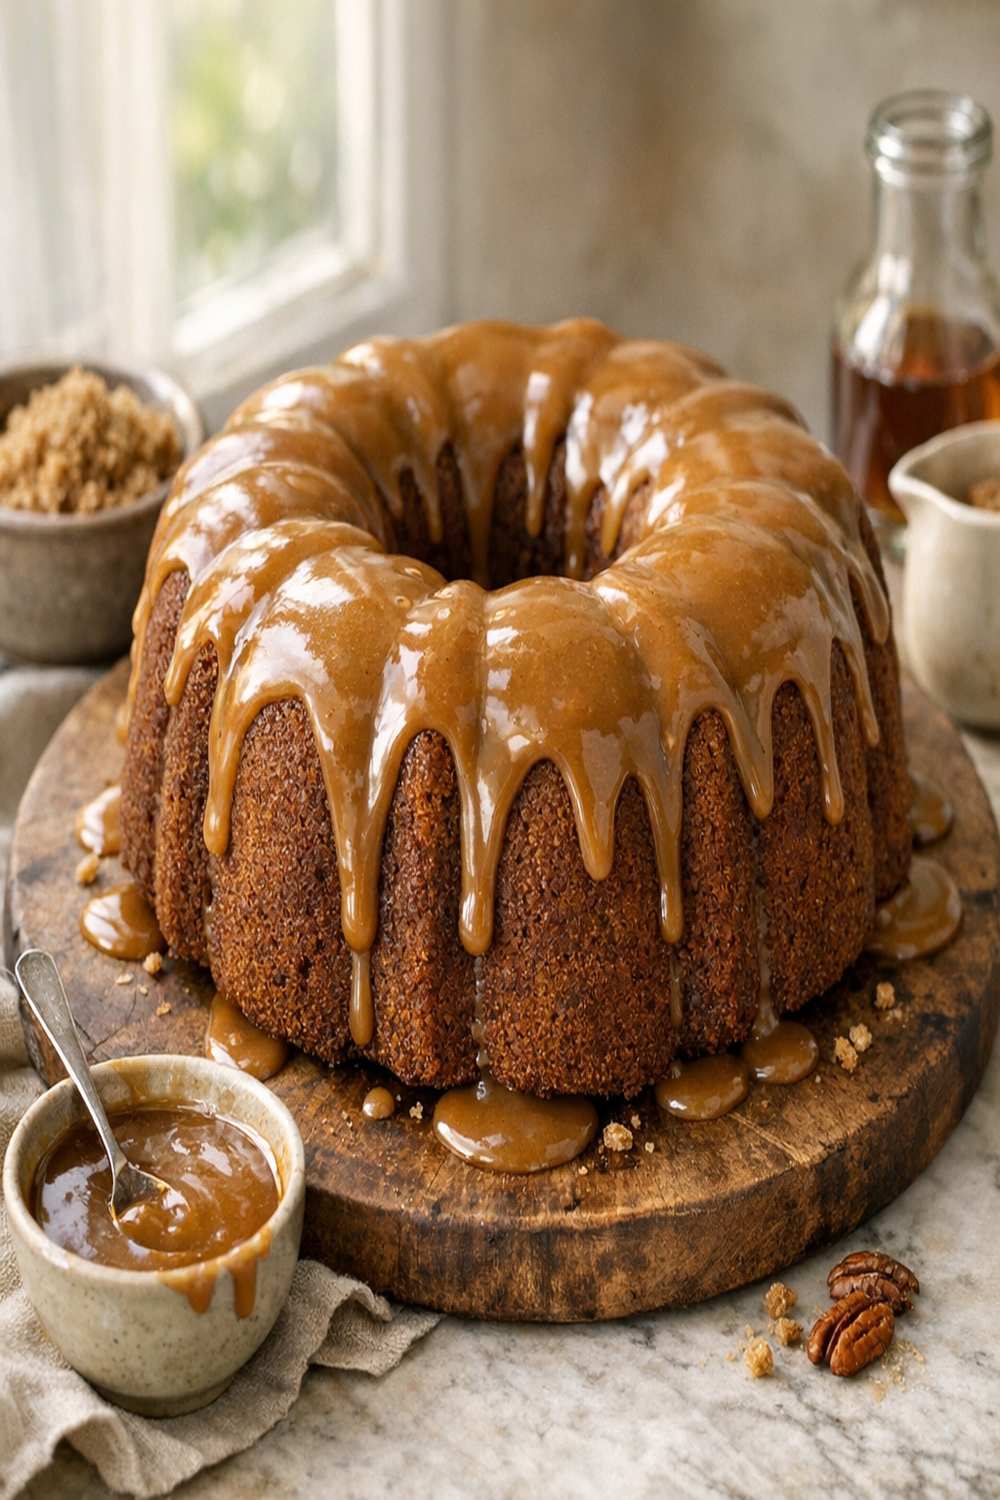
I’ll never forget the afternoon my grandmother called me into her kitchen—I was maybe eight years old—and showed me how to make a glaze that transformed a plain vanilla cake into something magical. She whisked butter and brown sugar together over gentle heat, and suddenly the kitchen smelled like caramel and possibility. That glaze taught me something fundamental about cooking: the simplest ingredients, treated with respect and technique, create the most indulgent results. Fast forward thirty years, and I’m still chasing that same kitchen magic for my own family—and now, I’m here to help you master it too.
If you’ve ever poured a glaze over a cake only to watch it either pool into a greasy puddle or harden into a crusty shell, you’ve experienced the frustration that brings so many home bakers to my inbox. The good news? This isn’t about luck or special talent. It’s about understanding the exact temperatures, ratios, and timing that transform five humble ingredients into a silky-smooth glaze that clings perfectly to every crumb. Whether you’re topping a homemade cake or drizzling over warm scones, I’m walking you through every single step—and every potential pitfall—so you nail this every single time.
Why Your Glazes Never Turned Out Right (And How to Fix It)
I’ve seen every glaze disaster in the book. The ones that crack and break apart. The ones that stay too thin and slide right off. The ones that taste more like cloying sweetness than caramel-kissed luxury. After years working with families in my practice and in my own kitchen, I realized the problem wasn’t the recipe—it was the missing education about temperature control and timing.
Most recipes rush you. They tell you to “combine ingredients” and “whisk,” but they don’t tell you why certain things happen or when to stop. They don’t explain that brown sugar needs proper heat to dissolve fully, or that rushing the cooling process creates a grainy, disappointing texture. I’m changing that starting right now. This brown sugar glaze recipe includes every troubleshooting tip, every sensory cue, and every “why” you need to create a professional-quality glaze in your own kitchen—guaranteed.
What Makes This Brown Sugar Cake Glaze Recipe Different?
The secret isn’t hiding in an exotic ingredient or a fancy technique. It’s in understanding the emulsion—the beautiful balance between fat, heat, and timing that creates that signature silky texture. Most home bakers skip the crucial step of bringing the butter and brown sugar mixture to a genuine low boil. This matters because gentle, sustained heat helps the brown sugar crystals dissolve completely, preventing that grainy texture that ruins so many homemade glazes.
The second game-changer? How we incorporate the powdered sugar. Instead of dumping it all in at once (which creates lumps and uneven texture), I’m teaching you to add it gradually while whisking continuously. This controlled approach builds a smooth, lump-free glaze that has the perfect consistency for spreading or drizzling, every single time. Combined with the specific ratio of cream to butter, this method creates a glaze that’s neither too thick nor too thin—it’s just right for clinging to your cake while setting into that gorgeous, semi-firm finish.
Before You Start: What You Need to Know
Before we dive into the kitchen, I want to share two critical pieces of knowledge that separate successful glazes from disappointing ones. These insights come from my background in registered dietetics and years of kitchen testing—they’re the foundation of everything that follows.
- Brown sugar’s behavior changes completely when heated—the molasses in brown sugar contains moisture that needs proper temperature and stirring to integrate smoothly with butter and cream. If you don’t bring the mixture to a true low boil with continuous stirring, you’ll end up with a grainy glaze that looks dull and tastes gritty, no matter how much whisking you do later.
- Timing is your secret weapon for perfect consistency—this glaze sets quickly as it cools, so understanding the exact texture window (usually 2-3 minutes after removing from heat) prevents you from adding too much powdered sugar and ending up with something too thick to work with, or too little and creating a glaze that slides right off the cake.
The Ingredients
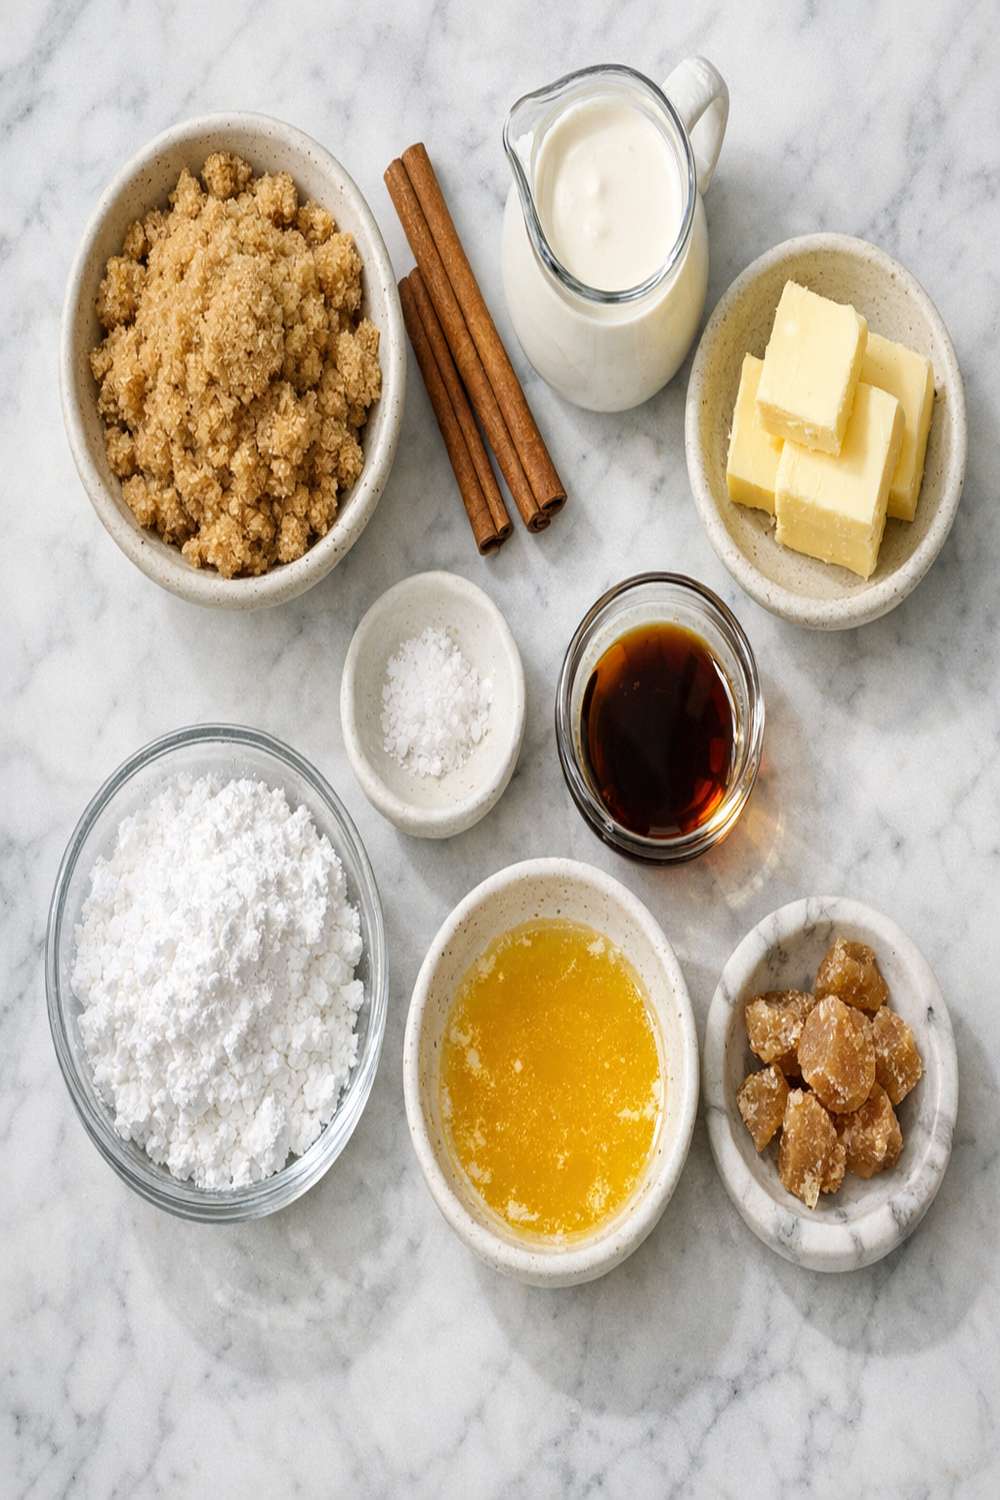
Every single ingredient in this glaze earns its place. I’ve chosen each one specifically to create a texture that’s silky, a flavor that’s deeply caramel-forward, and a finish that looks absolutely professional. Nothing here is filler—it’s all essential to that magic moment when you pour this glaze over warm cake and watch it settle into gorgeous, glossy perfection.
- 1 cup powdered sugar (creates smoothness and body without the grittiness of granulated sugar)
- 2 tablespoons heavy cream (creates the silky texture and prevents the glaze from setting too quickly or too hard)
- ½ cup brown sugar packed (provides molasses depth and that signature caramel flavor that regular sugar can’t match)
- ½ teaspoon cream of tartar (prevents crystallization and creates an ultra-smooth finish)
- ¼ teaspoon vanilla extract (rounds out the flavor profile and adds subtle warmth)
- Pinch of sea salt (optional but recommended—amplifies the caramel notes and balances sweetness)
- 5 tablespoons salted butter (adds richness and emulsifies the mixture; salted butter brings out the caramel notes better than unsalted)
Step-by-Step: How to Make Brown Sugar Cake Glaze Recipe Without Fail
I want you to feel confident in your kitchen. This process is straightforward when you understand what’s happening at each stage. I’m walking you through every step with the precision you deserve, including the exact cues that tell you everything is working perfectly.
Step 1: Combine Your Base Ingredients in a Small Saucepan
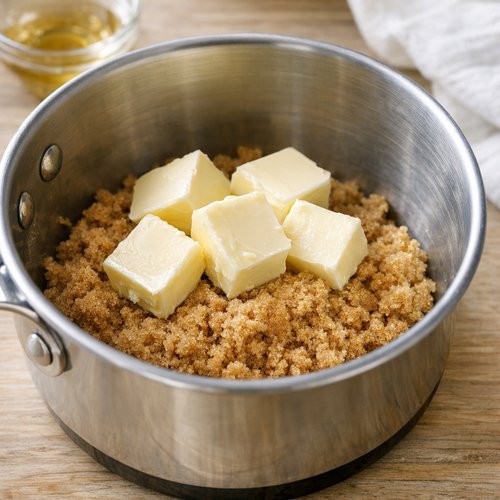
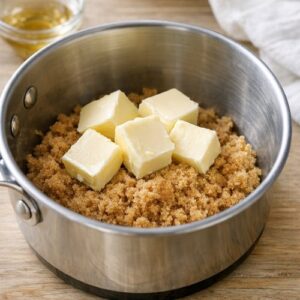
Grab a small saucepan (not a large one—this concentrates the heat and helps with even cooking). Add your 5 tablespoons of salted butter, ½ cup of packed brown sugar, and 2 tablespoons of heavy cream directly into the pan. Don’t start the heat yet. This matters because combining cold ingredients first prevents splashing and helps you monitor the process from the very beginning. The cream helps the butter and brown sugar incorporate without clumping, and the salted butter adds complexity to your final glaze.
Step 2: Heat to a Low Boil Over Medium Heat, Stirring Constantly
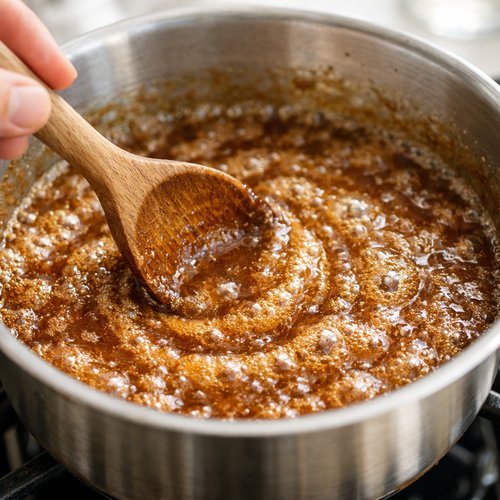
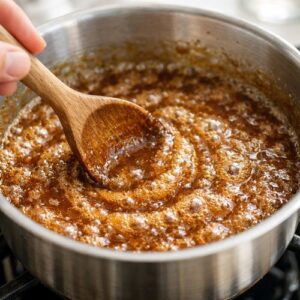
Turn your heat to medium and grab a wooden spoon or whisk. Stir continuously—this is non-negotiable. What you’re watching for is the moment when the mixture comes to a gentle, rolling boil (not a violent, aggressive boil). This takes about 3-4 minutes. The constant stirring serves a critical purpose: it breaks down the brown sugar crystals and helps the molasses distribute evenly throughout the mixture. You’ll see the mixture transition from grainy and separated to smooth and unified.
Here’s what success looks like: The butter melts completely, the brown sugar begins to dissolve, and the whole mixture takes on a warmer, deeper color. The aroma shifts from raw butter and sugar to something warmer and more caramel-forward. Keep your eyes on the consistency—it should look slightly thicker than when you started, with a subtle sheen.
Step 3: Remove from Heat and Let Cool Briefly
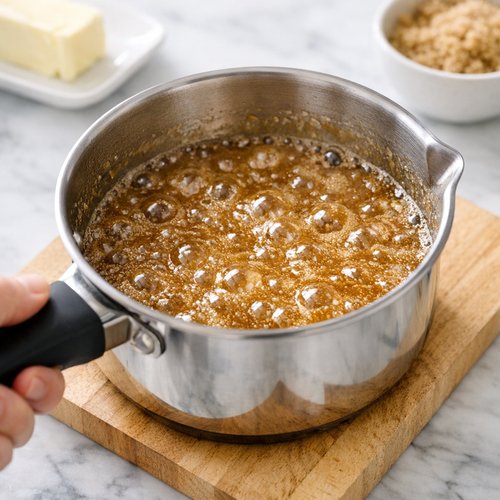
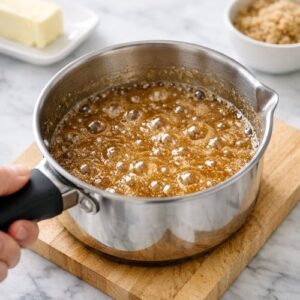
The moment you see that gentle boil, immediately remove the saucepan from heat. Don’t continue cooking—you’re looking for that brief boil moment, not an extended cook. Set the pan on a cool surface (not a hot burner). Now here’s where patience becomes your ally: let this mixture cool for approximately 2-3 minutes. This cooling window is absolutely critical.
Why? If you add powdered sugar to a mixture that’s too hot, the sugar will partially melt and create a slick, grainy mess. If you wait too long (beyond 5 minutes), the mixture begins to set and thicken, making it harder to achieve that perfect glaze consistency. You’re aiming for that Goldilocks moment—warm enough to be pourable, but cool enough to accept the powdered sugar gracefully.
Step 4: Whisk in the Vanilla Extract and Optional Cream of Tartar
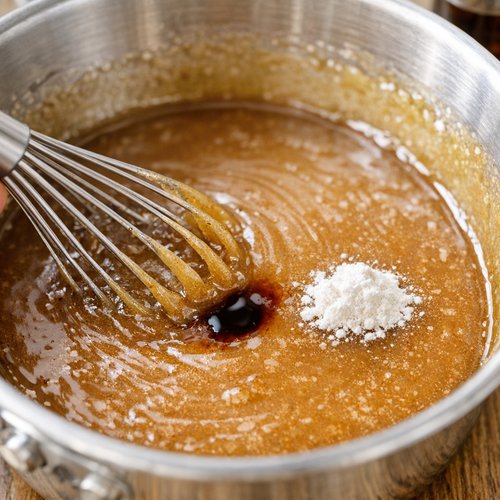
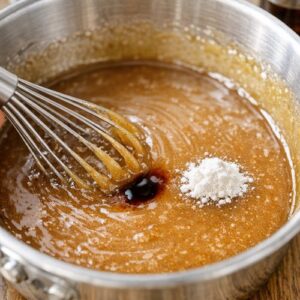
Once your mixture has cooled for those crucial 2-3 minutes, add your ¼ teaspoon of vanilla extract and a pinch of cream of tartar (this prevents crystallization and creates a silkier finish—trust me on this). Whisk these in gently but thoroughly, making sure they’re fully incorporated. The vanilla disperses quickly and adds a subtle warmth that rounds out the caramel notes beautifully. This is also where a light pinch of sea salt makes a huge difference if you choose to add it.
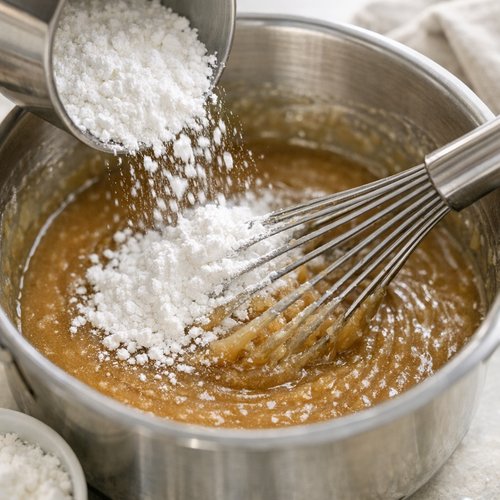
Step 5: Add Powdered Sugar Gradually, Whisking After Each Addition
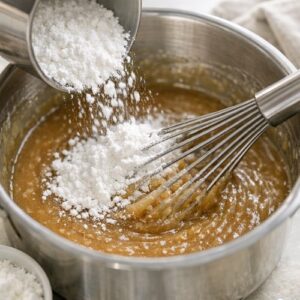
This is the step that separates lumpy, gritty glazes from silky-smooth ones. Add the powdered sugar slowly—about a quarter cup at a time—and whisk vigorously after each addition. Watch as the powder integrates into the warm liquid, creating a perfectly smooth, lump-free mixture.
After the first addition, you’ll have something that looks almost like caramel sauce. After the second addition, it begins to thicken noticeably. By the third addition, you’re getting close to your final consistency. The fourth and final addition brings you to the perfect glaze texture. This gradual approach takes maybe 90 seconds total, but it prevents the powdered sugar from clumping and ensures your glaze is absolutely flawless.
Step 6: Assess Your Consistency and Adjust if Needed
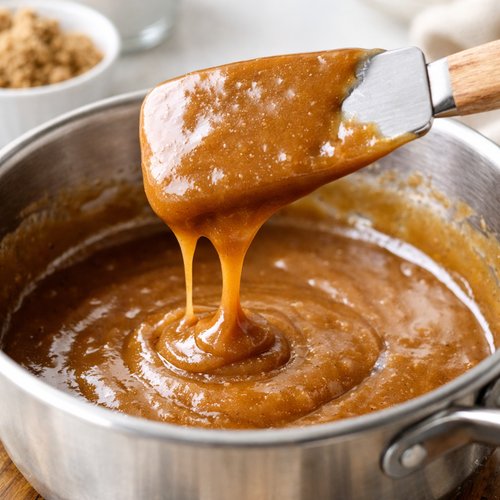
Before you pour or spread, take a moment to evaluate what you have. For a cake topping that you’ll spread with a spatula, you want a consistency that’s slightly thicker—it should move slowly when you tilt the spoon but still be pourable. For drizzling over scones, muffins, or a bundt cake, you want something slightly thinner that flows more readily.
If your glaze is too thick, whisk in a few drops of heavy cream or milk (literally, just 1 teaspoon at a time). If it’s too thin, whisk in a tablespoon or so more of sifted powdered sugar. You control the final outcome completely here.
Step 7: Use Immediately—Your Glaze is Ready
This glaze sets quickly, which is actually a feature, not a bug. Within minutes of reaching your desired consistency, this glaze will begin to set as it cools to room temperature. If you’re frosting a warm cake, the heat from the cake actually helps keep the glaze at the perfect spreadable consistency for a few extra minutes—use this to your advantage.
If you’re drizzling, work confidently and don’t second-guess yourself. A few generous drizzles across the top of warm muffins or scones, and you’re done. The glaze will set into a beautiful semi-firm coating that’s neither hard nor sticky—it’s absolutely perfect.
The Most Common Mistakes (And How to Avoid Them)
- Skipping the stirring step during heating—Home bakers often think they can just throw ingredients together and turn up the heat. The result? A separated, grainy glaze with visible brown sugar crystals that never fully dissolve. The fix is simple: don’t skip that continuous stirring while bringing the mixture to a low boil. This 3-4 minute investment prevents 100% of graininess issues.
- Adding powdered sugar to a mixture that’s still too hot—I see this constantly. The baker wants to work quickly and dumps all the powdered sugar in while the mixture is still steaming. The result is a slick, partially melted, grainy disaster that no amount of additional whisking can save. The solution: wait those crucial 2-3 minutes. Set a timer if you have to. That brief cooling period is everything.
- Adding all the powdered sugar at once instead of gradually—This creates lumps that are nearly impossible to whisk away, and you end up with a glaze that has a grainy mouthfeel. Always add in four stages, whisking between each addition. It takes 90 seconds and guarantees perfection.
- Using unsalted butter and wondering why the glaze tastes flat—Salted butter brings out the caramel and buttery notes far better than unsalted. It’s not just about saltiness; it’s about flavor complexity. Use salted butter as specified, and your glaze will taste restaurant-quality.
How Do I Know When It’s Done?
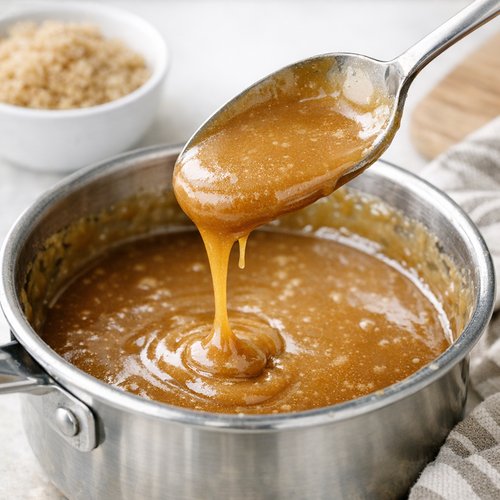
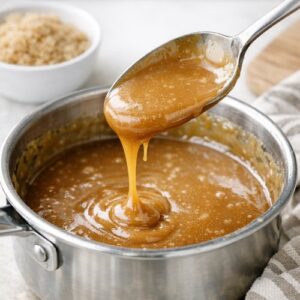
You’ll know this glaze is perfect when you see these specific cues. The mixture should have a deep, warm golden-brown color—not dark or burnt, but definitely darker than when you started. The aroma should smell like caramel and butter, not raw sugar. When you tilt the spoon, the glaze should move slowly and deliberately, coating the spoon with a thin, even layer.
Here’s the final sensory test: dip a wooden spoon into the cooled glaze and let a small amount drip back into the pan. If it falls in smooth ribbons and disappears into the surface (rather than plopping like a ball), you’ve nailed the consistency. That ribbon test is your green light to use the glaze immediately.
Troubleshooting: When Things Go Wrong
- Glaze is too thick and won’t spread or drizzle smoothly—This happens when you’ve cooled the mixture too long or added too much powdered sugar. The fix: whisk in heavy cream or whole milk, literally one teaspoon at a time, until you reach the right consistency. Work quickly since it will continue to thicken as it cools.
- Glaze looks grainy or has visible sugar crystals—The brown sugar didn’t dissolve fully during the heating phase. This usually means the heat wasn’t quite hot enough or you didn’t stir enough. Mid-glaze rescue: strain the glaze through a fine mesh sieve to remove crystals, then proceed. Next time, watch for that gentle boil more carefully.
- Glaze tastes too sweet with no caramel flavor depth—You likely added too much powdered sugar early on, or your heat wasn’t sufficient during the boiling stage. You can’t fix this one mid-cook, but next time, follow the gradual powdered sugar addition protocol and ensure you reach that proper low boil.
- Glaze set solid before you could use it—This happens in cool kitchens or if you waited too long between cooking and application. The fix: place the bowl over gently simmering water for 30 seconds while whisking, or add a few drops of cream and whisk vigorously. You can resurrect a set glaze this way.
Can I Store Brown Sugar Cake Glaze Recipe?
One of the best things about this glaze? It keeps beautifully, making it perfect for meal prep and advance baking. Here’s exactly what you need to know.
Room temperature storage: If you’ve already applied the glaze to your cake or pastries, store them in an airtight container at room temperature for up to 2 days. The glaze will remain semi-firm and absolutely delicious.
Refrigerator storage for unglazed glaze: Store leftover glaze in an airtight container in the refrigerator for up to 5 days. When you’re ready to use it again, place the container in warm (not hot) water for 30-60 seconds while stirring, or reheat it gently in a microwave in 15-second intervals, stirring between each interval. The texture will return to perfect spreadability.
Make-ahead freezer option: Yes, you can freeze this glaze! Pour it into a freezer-safe container and freeze for up to 3 months. Thaw overnight in the refrigerator, then gently reheat as described above. The texture reconstitutes beautifully.
Pro tip from my kitchen: I often make a double batch of this glaze on Sunday evening and store it in the fridge. Throughout the week, whenever I bake something that needs a glaze—from quick muffins to simple sheet cakes—I just grab what I need, reheat gently, and I’m done. It’s one of my favorite time-saving strategies.
Nutrition Information
Based on USDA nutrition data, this recipe yields approximately 8 servings (about 2 tablespoons per serving). Each serving contains roughly 150 calories, 6 grams of fat (mostly from butter), 24 grams of carbohydrates, and trace amounts of protein. The primary carbohydrates come from the brown sugar and powdered sugar, which provide quick energy and those delicious caramel flavors.
Here’s what I want you to know from my perspective as a registered dietitian: this is meant to be an indulgent glaze topping, not a primary nutrition source. A small amount goes a long way toward creating satisfaction and joy around your baked goods. The key to healthy eating isn’t eliminating treats like this—it’s enjoying them mindfully and in appropriate portions. Two tablespoons of this glaze transforms a simple cake into something special, and that psychological satisfaction is genuinely part of good nutrition.
The molasses in brown sugar provides trace minerals like potassium and iron, and the butter contains fat-soluble vitamins. When you use this glaze to make baking from scratch (rather than reaching for packaged items), you’re already making a nutritionally sound choice.
Expert’s Nutritional Tip: The Molasses Advantage
Most home bakers don’t realize that brown sugar’s molasses content serves a purpose beyond flavor. The molasses provides moisture that actually helps this glaze achieve that silky, non-grainy texture. It’s also why brown sugar glazes feel more indulgent and satisfying than those made with regular granulated sugar—your taste buds detect more complexity, so a smaller portion feels more luxurious. This is dietetics-approved indulgence: use quality ingredients in thoughtful amounts, and you create something profoundly satisfying.
What Can I Serve With Brown Sugar Cake Glaze Recipe?
The beauty of this glaze is its versatility. It’s equally at home draping over a tender butter cake as it is adorning a plate of warm scones. Let me share my favorite applications and why they work so beautifully together.
- Simple vanilla or yellow cake—This is the classic pairing. The cake’s mild flavor creates a perfect canvas for the glaze’s caramel complexity. Pour it warm over a still-warm cake and watch it set into glossy perfection.
- Warm cinnamon or sugar-spice muffins—Drizzle this glaze over freshly baked muffins while they’re still warm. The warmth of the muffins keeps the glaze at the perfect consistency for a few minutes, and the spices complement the caramel beautifully.
- Tender buttermilk biscuits or scones—Split these warm and drizzle the glaze generously. The biscuit’s buttery richness plays gorgeously against the glaze’s caramel notes.
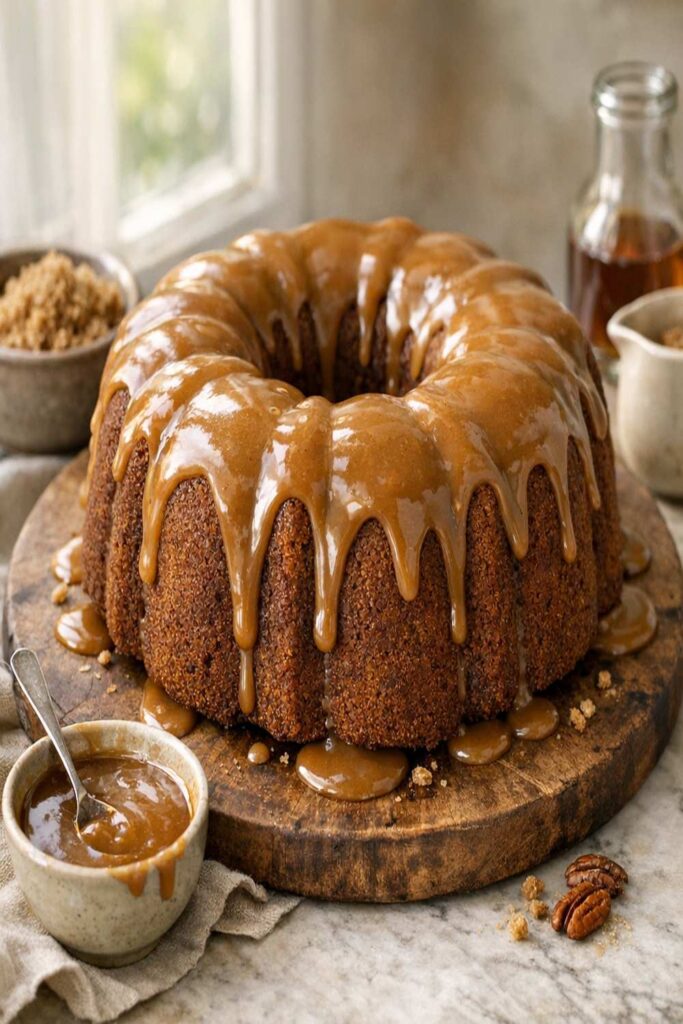
- Pound cake or bundt cake—This glaze is absolutely stunning on a classic pound cake. Drizzle it artfully down the sides and let it pool slightly in the center.
- Apple or pear cake—Fruit cakes pair beautifully with this glaze. The caramel enhances the fruit’s sweetness while the vanilla grounds everything.
- Morning toast or french toast—Try drizzling this glaze over thick, buttery slices of french toast. It’s an absolutely decadent weekend breakfast upgrade.
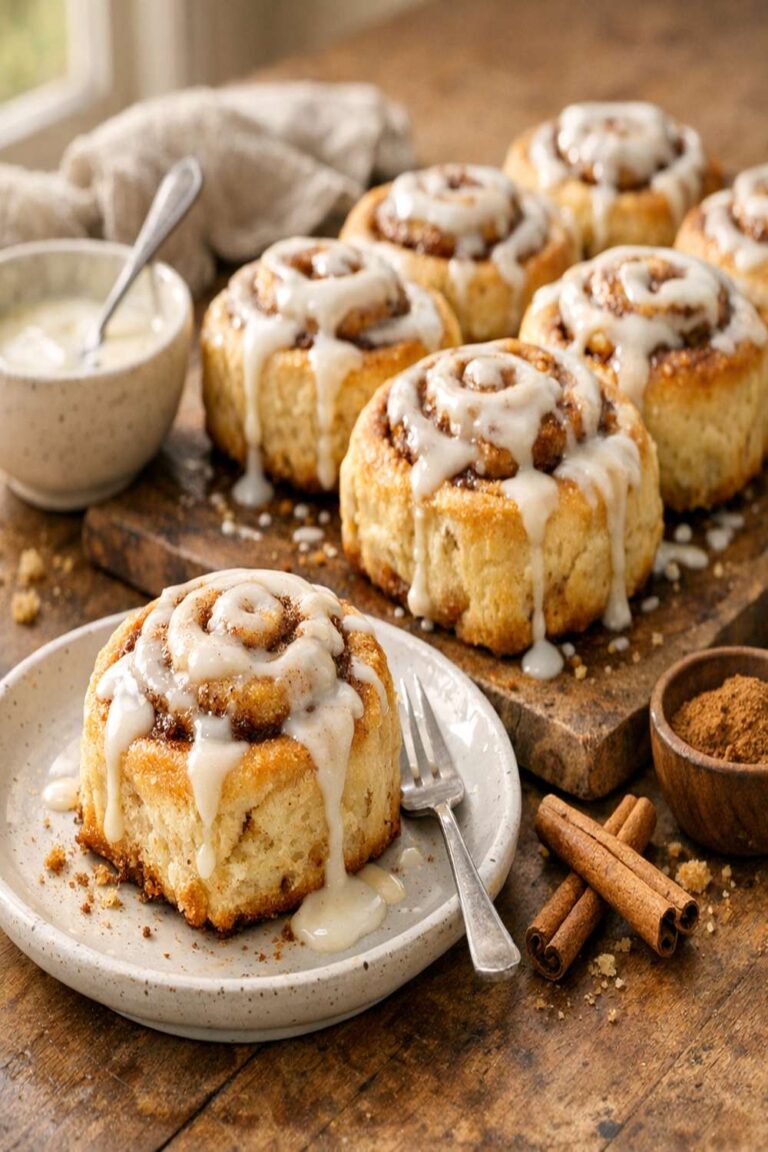
- Homemade donuts or fried pastries—If you’re making Bread Machine Cinnamon Bun Recipe or other yeast-based pastries, this glaze elevates them to bakery-quality.
I also love serving this alongside savory applications. A drizzle over Chicken Asian Wrap Recipe might sound unconventional, but the sweet-savory balance is utterly compelling. Brown sugar glazes work beautifully in balanced dishes where a touch of sweetness grounds spice and richness.

Brown Sugar Cake Glaze Recipe
Ingredients
Method
- Grab a small saucepan (not a large one—this concentrates the heat and helps with even cooking). Add your 5 tablespoons of salted butter, ½ cup of packed brown sugar, and 2 tablespoons of heavy cream directly into the pan. Don't start the heat yet. This matters because combining cold ingredients first prevents splashing and helps you monitor the process from the very beginning. The cream helps the butter and brown sugar incorporate without clumping, and the salted butter adds complexity to your final glaze.
- Turn your heat to medium and grab a wooden spoon or whisk. Stir continuously—this is non-negotiable. What you're watching for is the moment when the mixture comes to a gentle, rolling boil (not a violent, aggressive boil). This takes about 3-4 minutes. The constant stirring serves a critical purpose: it breaks down the brown sugar crystals and helps the molasses distribute evenly throughout the mixture. You'll see the mixture transition from grainy and separated to smooth and unified. Here's what success looks like: The butter melts completely, the brown sugar begins to dissolve, and the whole mixture takes on a warmer, deeper color. The aroma shifts from raw butter and sugar to something warmer and more caramel-forward. Keep your eyes on the consistency—it should look slightly thicker than when you started, with a subtle sheen.
- The moment you see that gentle boil, immediately remove the saucepan from heat. Don't continue cooking—you're looking for that brief boil moment, not an extended cook. Set the pan on a cool surface (not a hot burner). Now here's where patience becomes your ally: let this mixture cool for approximately 2-3 minutes. This cooling window is absolutely critical. Why? If you add powdered sugar to a mixture that's too hot, the sugar will partially melt and create a slick, grainy mess. If you wait too long (beyond 5 minutes), the mixture begins to set and thicken, making it harder to achieve that perfect glaze consistency. You're aiming for that Goldilocks moment—warm enough to be pourable, but cool enough to accept the powdered sugar gracefully.
- Once your mixture has cooled for those crucial 2-3 minutes, add your ¼ teaspoon of vanilla extract and a pinch of cream of tartar (this prevents crystallization and creates a silkier finish—trust me on this). Whisk these in gently but thoroughly, making sure they're fully incorporated. The vanilla disperses quickly and adds a subtle warmth that rounds out the caramel notes beautifully. This is also where a light pinch of sea salt makes a huge difference if you choose to add it.
- This is the step that separates lumpy, gritty glazes from silky-smooth ones. Add the powdered sugar slowly—about a quarter cup at a time—and whisk vigorously after each addition. Watch as the powder integrates into the warm liquid, creating a perfectly smooth, lump-free mixture. After the first addition, you'll have something that looks almost like caramel sauce. After the second addition, it begins to thicken noticeably. By the third addition, you're getting close to your final consistency. The fourth and final addition brings you to the perfect glaze texture. This gradual approach takes maybe 90 seconds total, but it prevents the powdered sugar from clumping and ensures your glaze is absolutely flawless.
- Before you pour or spread, take a moment to evaluate what you have. For a cake topping that you'll spread with a spatula, you want a consistency that's slightly thicker—it should move slowly when you tilt the spoon but still be pourable. For drizzling over scones, muffins, or a bundt cake, you want something slightly thinner that flows more readily. If your glaze is too thick, whisk in a few drops of heavy cream or milk (literally, just 1 teaspoon at a time). If it's too thin, whisk in a tablespoon or so more of sifted powdered sugar. You control the final outcome completely here.
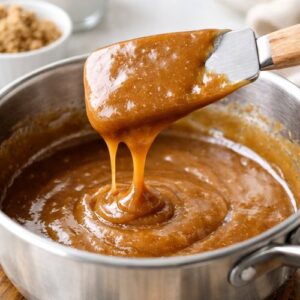
- This glaze sets quickly, which is actually a feature, not a bug. Within minutes of reaching your desired consistency, this glaze will begin to set as it cools to room temperature. If you're frosting a warm cake, the heat from the cake actually helps keep the glaze at the perfect spreadable consistency for a few extra minutes—use this to your advantage. If you're drizzling, work confidently and don't second-guess yourself. A few generous drizzles across the top of warm muffins or scones, and you're done. The glaze will set into a beautiful semi-firm coating that's neither hard nor sticky—it's absolutely perfect.
Notes
FAQs
Can I make this glaze ahead of time?
Absolutely, yes. I actually recommend it if you’re serving baked goods for a gathering. Make the glaze up to 2 days in advance and store it in an airtight container at room temperature. When you’re ready to use it, gently reheat it over a bowl of warm water or in 15-second microwave intervals, stirring between each interval, until it reaches that perfect pourable consistency again. It reconstitutes beautifully every single time.
What if I don’t have heavy cream? Can I use milk instead?
Yes, though the results won’t be quite as silky. Heavy cream has higher fat content, which creates that luxurious mouthfeel. If you’re using whole milk instead, you may need to add slightly less since it’s thinner. Start with 1½ tablespoons of milk and proceed as directed, adding more if needed to reach your desired consistency. The glaze will still be delicious—just slightly less rich.
Why does my glaze keep getting grainy no matter what I do?
This is almost always about insufficient heat during the initial boiling phase. The brown sugar needs to reach that gentle, rolling boil to fully dissolve its crystals. If your heat is too low, the brown sugar stays grainy. Solution: watch more carefully for that low boil (small bubbles breaking the surface steadily), and maintain it for the full 3-4 minutes while stirring. If you’re already at a boil and still seeing graininess, strain the glaze through a fine mesh sieve before adding powdered sugar.
How do I prevent the glaze from hardening too quickly?
The key is understanding that this glaze sets as it cools, which is actually a feature. If you’re working with a warm cake, the residual heat keeps the glaze at working consistency for several minutes. If you’re working with room-temperature items (like scones), work quickly and confidently. If the glaze hardens before you finish, place the bowl over warm (not hot) water for 15-30 seconds while whisking, and it’ll soften right back up.
Can I double or halve this recipe?
Halving works perfectly—just use half of everything. Doubling also works, but you’ll need a slightly larger saucepan to prevent splashing during the boiling phase. The timing and technique remain exactly the same. One note: if you’re doubling, the glaze may take an extra 30-60 seconds to reach that low boil, but proceed with the same confidence.
What’s the difference between this glaze and a frosting?
Glazes are thinner and have a more fluid consistency that either drapes and sets (like this one) or soaks into the cake. Frostings are thicker and spreadable like frosting cream cheese frosting). This particular glaze sits beautifully in the middle—it’s spreadable if you want it to be, but it also drizzles gorgeously. It’s truly the most versatile glaze I know.
Make-Ahead Guide: Getting Ahead in the Kitchen
As someone who’s spent years helping families navigate weeknight cooking while maintaining proper nutrition, I can tell you that make-ahead glaze is a game-changer. Here’s my professional make-ahead strategy.
Sunday evening prep: Make a double batch of this glaze and store it in an airtight container in the refrigerator. Throughout the week, whenever you bake (even if it’s just a simple cake mix), you have glaze ready to elevate it. This transforms ordinary baking into something that feels intentional and special.
For gatherings: Make the glaze the day before your event. Store it in the refrigerator. Thirty minutes before serving, gently reheat it to that perfect consistency. Your baked goods will taste like they came from a professional bakery, but you’ll have made them yourself with zero stress.
Freezing strategy: If you bake frequently, freeze this glaze in ice cube trays, then pop out the cubes and store them in a freezer bag. Each cube is roughly 2 tablespoons—exactly what you need for a muffin or a small cake. Thaw overnight in the fridge and gently reheat.
Seasonal Variations: Making This Glaze Throughout the Year
Spring: Add ½ teaspoon of fresh lemon zest to the glaze after removing from heat. The citrus brightens the caramel beautifully and feels fresh and seasonal.
Summer: Reduce the brown sugar to ⅜ cup and add ⅛ cup of maple syrup instead. This creates a lighter glaze that’s perfect for berry cakes and summer entertaining.
Fall: Add ¼ teaspoon of cinnamon, ⅛ teaspoon of nutmeg, and a pinch of cloves to the cooled mixture (before the powdered sugar). This becomes a gorgeous spiced glaze perfect for apple cakes and pumpkin treats.
Winter: Add ½ teaspoon of espresso powder to the cooled mixture for depth, or incorporate ¼ teaspoon of peppermint extract for a festive twist. Both are stunning on holiday cakes.
More Recipes You’ll Love
- Calzone Dough Recipe—For those who love baking dough from scratch, this pairs beautifully with homemade baked goods that deserve gorgeous glazes.
- Breadmaker Rolls Recipe—Warm, fluffy rolls drizzled with brown sugar glaze transform a simple bread into something bakery-worthy.
- Bread Machine Cinnamon Bun Recipe—This glaze is absolutely stunning over warm cinnamon buns fresh from the oven.
- my favorite salad—For complete meal planning, balance these indulgent baked goods with lighter, fresher sides.
You now have everything you need to create a brown sugar cake glaze that’s silky, delicious, and absolutely foolproof. You understand the why behind every step. You know exactly what to look for and what to do if something goes sideways. You’ve got storage options, flavor variations, and a make-ahead strategy that fits your life. Most importantly, you’ve got the confidence that comes from true understanding, not just following instructions.
This is what I loved about watching my grandmother in that kitchen—she didn’t just make glaze, she taught me that cooking is about respect for ingredients, understanding technique, and the joy of creating something with your own hands. That’s what I’m hoping you feel when you make this glaze. Not stress, not uncertainty, but quiet confidence and maybe even a little kitchen magic.
Cook with confidence!
META DESCRIPTION: Master the perfect brown sugar cake glaze with foolproof technique, detailed troubleshooting, and flavor variations. Silky, professional results in minutes.