Black Bean Breakfast Recipe

Last Updated on August 31, 2026
This post contains affiliate links. As an Amazon Associate I earn from qualifying purchases.

Learning to make this black bean breakfast recipe isn’t just about having a delicious morning meal—it’s about mastering one of the most fundamental cooking techniques in the kitchen: the perfect sauté. Once you understand how to build flavor through proper heat management and layering aromatics, you’ll unlock the ability to create dozens of other dishes with confidence. From chicken kabob marinades to hearty chicken burritos, the technique you’re about to learn is the foundation of real cooking.
Master the Sauté Technique Behind Black Bean Breakfast Recipe (And Never Struggle in the Kitchen Again)
I’ll never forget the morning my grandmother pulled me into her Texas kitchen at dawn. She was making a simple black bean dish for breakfast, and I remember watching her hands move with such intention—the way she waited for the oil to shimmer, how she let the onions and garlic bloom until the kitchen smelled like pure magic. “Mary,” she said, “if you can sauté properly, you can cook anything.” I was maybe ten years old, skeptical about how important a few minutes of onions could possibly be.
Years later, working as a registered dietitian, I realized she was absolutely right. Every transformative recipe I’ve taught—every lightened comfort meal that actually tastes indulgent—starts with this one skill. That morning memory became the foundation of my cooking philosophy: nail the basics, and everything else follows.
The Core Technique Explained
The magic behind this black bean breakfast recipe is the aromatic sauté—a technique where you use fat, heat, and time to develop deep flavor from humble aromatics like onions and garlic. Here’s the science: when you heat aromatic vegetables in oil over medium heat, the natural sugars caramelize slightly, water evaporates, and sulfur compounds transform into complex, savory flavors. This creates what French chefs call the “flavor base” for almost any dish.
But here’s what most home cooks miss: you’re not just heating these ingredients, you’re fundamentally changing their chemistry. The Maillard reaction—a reaction between amino acids and reducing sugars—creates hundreds of new flavor compounds that wouldn’t exist in the raw vegetables. When you then add your protein (in this case, black beans) to that flavor foundation, you’re not starting from scratch. You’re building on layers of intentional flavor.
This isn’t complicated cooking. It’s smart cooking—understanding why each step matters so you can apply it everywhere.
What This Technique Unlocks
Once you master the aromatic sauté, you won’t just make this breakfast. You’ll open doors to countless dishes that rely on this same foundation. Here are just some of the recipes waiting for you:
- Weeknight bean chilis and stews – the sauté base elevates every pot of beans from bland to restaurant-quality
- Flavorful grain bowls – sautéed aromatics transform simple grains into crave-worthy meals
- Quick vegetable sides – learn to sauté aromatics first, then add any seasonal vegetable
- Seasoned ground meat dishes – tacos, taco bowls, and seasoned meat bases all start with this exact technique
- Soup foundations – every great soup begins with properly sautéed aromatics
- Braised proteins – the deeper you understand sautéing, the better your braises become
The Ingredients – Chosen to Teach the Technique
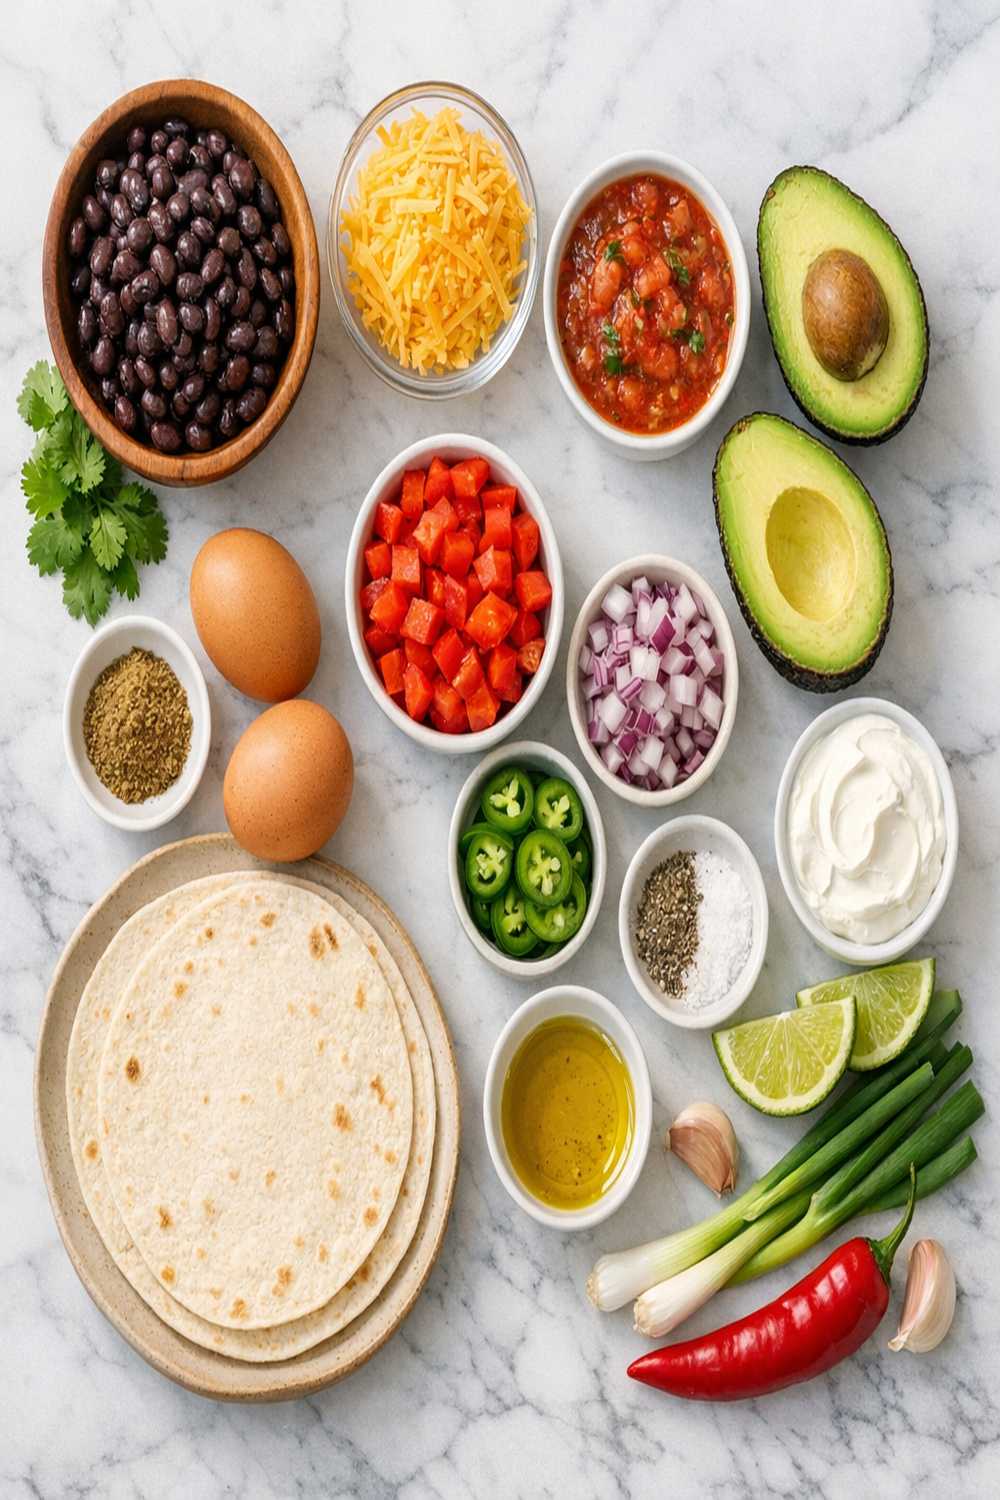
I’ve selected every ingredient in this recipe specifically to demonstrate the sauté technique at its clearest. Each one teaches you something essential about building flavor systematically. Here’s what you’ll be working with:
- 1 can (15 ounces) black beans, drained and rinsed thoroughly (your protein base, absorbing all the sautéed flavor)
- ½ ripe avocado, sliced (healthy fat and silky texture that completes the dish)
- ¼ cup fresh cilantro, roughly chopped (brightness that cuts through richness)
- 2 large cloves fresh garlic, minced (the secondary aromatic that adds pungency and depth)
- ½ teaspoon ground cumin (warm spice that amplifies the earthiness in beans)
- ¼ to ½ cup low-sodium vegetable broth (creates creamy texture through gentle simmering)
- 2 large eggs (the protein and richness that makes this a complete breakfast)
- 3 tablespoons plain Greek yogurt or Mexican crema (cooling element and creaminess without excess fat)
- ½ teaspoon smoked paprika (adds subtle smokiness and visual appeal)
- ½ cup ripe tomato, diced (acidity that balances the meal)
- ¾ to 1 tablespoon extra virgin olive oil (the fat that carries flavor and enables the sauté process)
- 4 corn tortillas, warmed (vehicle for all those beautiful flavors you’ve created)
- ¼ cup yellow onion, finely chopped (the primary aromatic that provides natural sweetness and body)
Expert’s Nutritional Tip: Black beans are nutritional powerhouses—one can provides approximately 15 grams of plant-based protein and 12 grams of fiber. Pairing them with eggs (complete protein with all 9 essential amino acids) and healthy fats from avocado creates a breakfast that stabilizes blood sugar for hours. This combination keeps you full and energized through the morning, which is exactly what registered dietitians recommend for sustainable energy.
The Masterclass: How to Make Black Bean Breakfast Recipe
This is where technique becomes embodied knowledge. I’m walking you through each step not just as instructions, but as teachable moments. By the time you finish, you won’t just have breakfast—you’ll have a skill that transforms how you cook.
Step 1: Prepare Your Ingredients (The Foundation of Successful Sautéing)
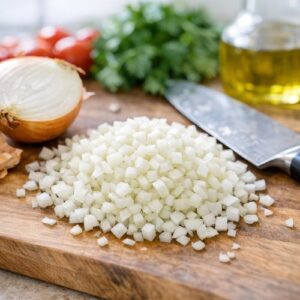
Before any heat touches your skillet, chop your onion into pieces about the size of a lentil—small enough to cook quickly and evenly, large enough that you can still see them. Mince your garlic finely, almost to a paste consistency. Drain and rinse your canned black beans under cool running water, rubbing them gently between your fingers to remove excess starch. This last step is critical—it prevents your final dish from becoming gluey or cloudy.
Measure your broth and combine your cumin and paprika in a small bowl. This preparation step—what chefs call “mise en place”—isn’t busywork. It’s about setting yourself up for confident execution. Once your aromatics hit hot oil, you’re in control mode. You won’t have time to search for ingredients or second-guess measurements.
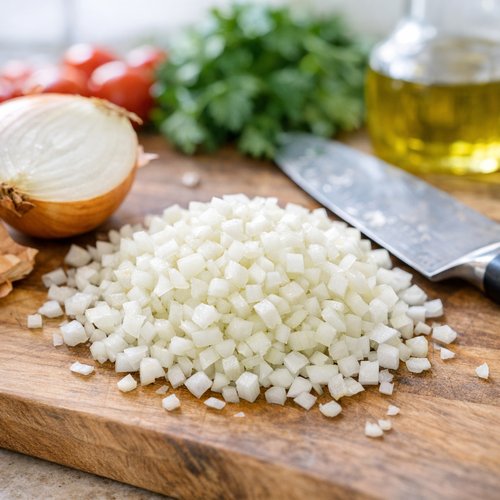
Step 2: Heat Your Oil—The First Sign of Technique Mastery
Place your skillet over medium heat and add your olive oil. Here’s where most home cooks rush: wait for the oil to shimmer. Not smoke—shimmer. That subtle, dancing movement across the surface means the oil has reached approximately 350°F, the perfect temperature for sautéing aromatics without burning them.
How do you know when it’s ready? Hold your hand about 6 inches above the skillet. You should feel consistent warmth, not intense heat. If it’s smoking, your heat is too high—remove it for 30 seconds and try again. This temperature control is what separates confident cooks from frustrated ones.
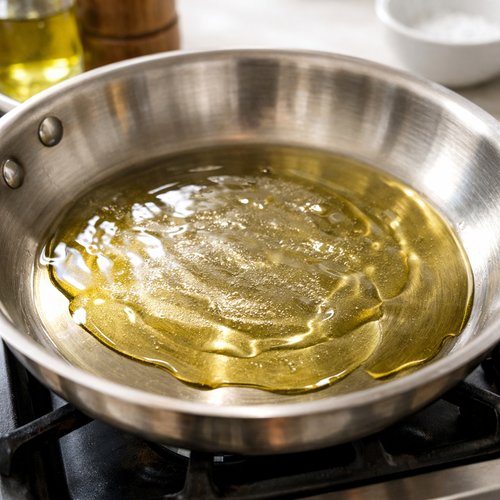
Step 3: Sauté the Onion—Building Your Flavor Foundation
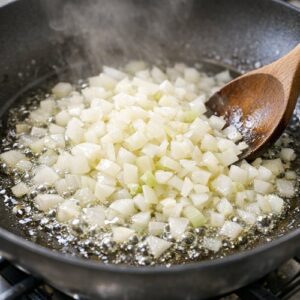
Add your chopped onion to the shimmering oil and listen. You should hear an immediate, gentle sizzle—not a violent pop, not silence. This sizzle tells you the temperature is perfect. Stir the onions immediately to coat them evenly in oil.
Now, this is crucial: resist the urge to stir constantly. Stir every 15-20 seconds, allowing the flat surfaces of the onions to contact the hot pan. This creates the Maillard reaction—the browning that develops real flavor. After about 2 minutes, your onions should begin to soften and turn translucent at the edges, with the very tips showing the faintest hint of golden color.
You’re not making caramelized onions here—that takes 30+ minutes. You’re creating sautéed aromatics, which takes about 2 minutes. The difference is time and temperature. This is the foundation layer of your flavor profile.
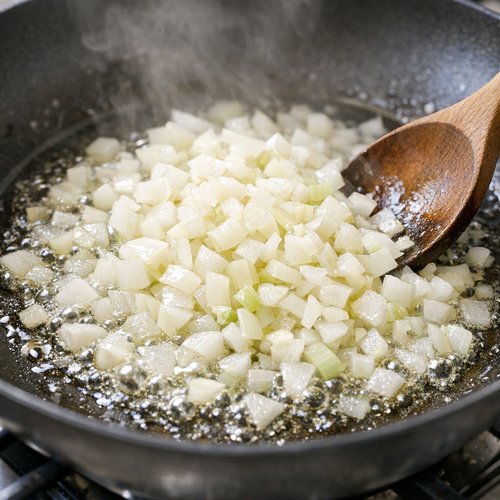
Step 4: Add Garlic—The Secondary Aromatic
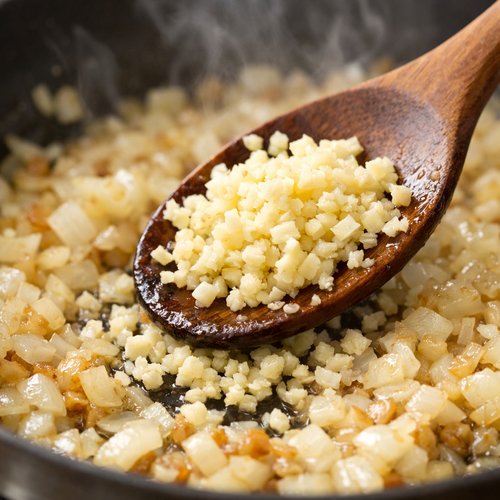
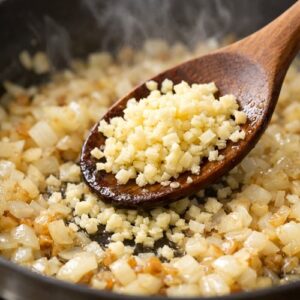
Once your onions are soft and fragrant, add your minced garlic and stir immediately. Garlic cooks faster than onion—in as little as 20-30 seconds, it can go from perfect to burnt. You’re looking for that moment when the raw sharpness disappears and the kitchen smells like toasted garlic. That aroma is your signal—it should smell warm and savory, not acrid or harsh.
This is where timing teaches you about cooking temperatures and ingredient differences. Garlic cooks faster than onion because it has less water content and smaller particle size. Understanding why different ingredients need different timing makes you adaptive in the kitchen.
Cook for just 30-45 seconds, then immediately move to the next step. Waiting too long results in bitter garlic; moving too fast wastes the flavor development. This single decision—knowing when to proceed—is what separates home cooking from restaurant-quality cooking.
Step 5: Add Spices and Toast Them Briefly
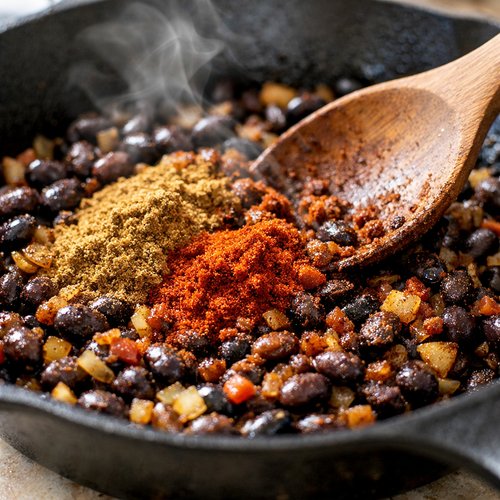
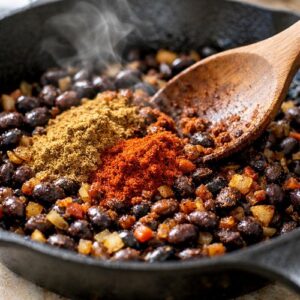
Add your cumin and paprika to the pan and stir constantly for about 15 seconds. You’re doing something important here: blooming the spices. By adding them directly to the hot fat, you’re releasing their essential oils and making their flavors more potent and nuanced. The kitchen aroma will shift—you’ll suddenly smell the warm earthiness of cumin more intensely.
This is why blooming spices in fat transforms a dish. It’s the difference between sprinkling paprika on top (flat, dusty flavor) versus blooming it in hot oil (warm, integrated flavor that tastes intentional). This single technique—blooming—works for every spice-forward dish you’ll ever make.
Step 6: Add Black Beans and Broth—Building Texture Through Technique
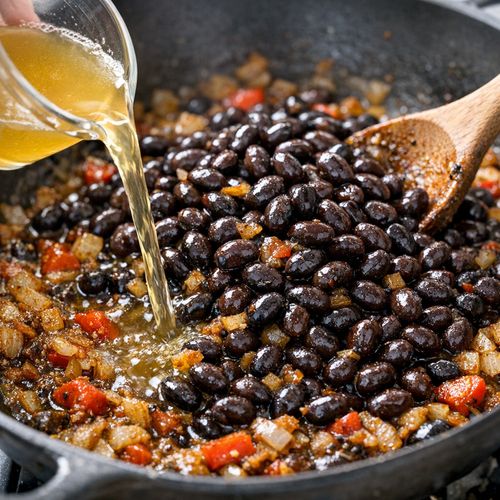
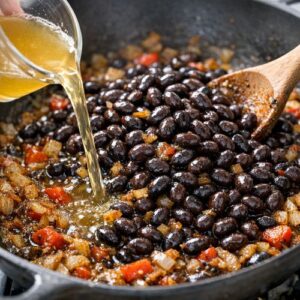
Pour in your rinsed black beans and immediately add ¼ cup of your broth. Stir everything together, making sure the beans coat evenly with the spiced oil. You should see steam rising almost immediately. Let the beans cook, stirring frequently, until they’re warmed through—about 3-4 minutes.
Now comes the technique that creates restaurant-quality texture: using the back of a wooden spoon, gently press about ¼ of the beans against the side of the pan, mashing them into a rough paste. This is optional, but it’s the secret. You’re not puréeing—you’re partially breaking down beans to release their starches, which creates a creamy, luxurious sauce around the whole beans.
If your beans look dry as you cook (they shouldn’t be swimming in liquid, but they shouldn’t be crusty either), add another tablespoon or two of broth and stir. The goal is beans that are creamy, clingy, and deeply flavored—not soupy, not dry.
Step 7: Fry Your Eggs While Beans Finish
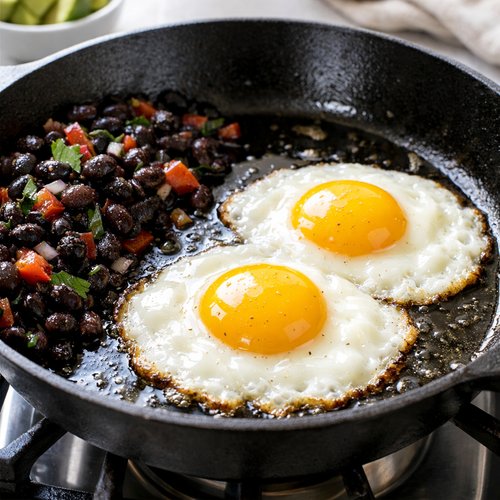
In a separate skillet (or if you have the space, push your beans to the side of your current skillet), heat just a kiss of olive oil over medium-high heat. Crack your eggs directly into the hot oil and cook until the whites set but the yolks remain runny—about 3-4 minutes, depending on your heat. The yolk will become your sauce, running over the beans and tortillas. This is intentional richness.
Alternatively, if you prefer over-easy or over-medium eggs, cook them a bit longer. The only rule: never cook the yolk completely through in this context. It dries out the entire dish.
Step 8: Assemble With Intention
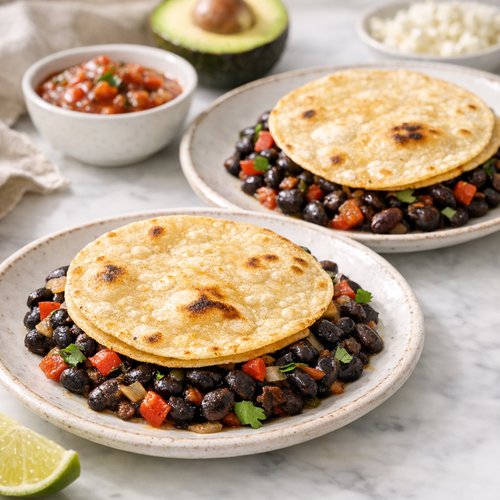
Divide your sautéed beans between two plates. Top each portion with a warm corn tortilla (you can warm them directly over a gas flame for 5 seconds per side, wrapped in foil, or in a dry skillet for 10 seconds per side). Place your fried egg on top of each portion.
Arrange your cilantro, diced tomato, avocado slices, and a dollop of Greek yogurt around the plate. This isn’t just plating—it’s creating flavor contrast. The cool yogurt cools the warm beans, the acid in tomato brightens everything, the cilantro adds herbal notes, and the avocado provides silky richness. Each element teaches your palate something different.
Serve immediately while the beans and egg are still warm, the tortillas still pliable.
How to Know You’ve Mastered the Technique
Mastery isn’t just about following steps—it’s about recognizing when you’ve executed properly. Here are the sensory indicators that tell you you’ve nailed the sauté technique:
- The aroma test – Your kitchen should smell like intentional cooking, not burnt food. The progression should be: raw onion sharpness → sweet, soft onion → toasted garlic → warm spices. If you smell anything acrid or sharp at the end, your heat was too high or you waited too long between steps.
- The visual progression – Onions start crisp and white, become translucent and slightly soft, show golden edges after 2 minutes. Beans look creamy and clingy, not soupy or crusty. Your mashed portion creates a visible sauce around the whole beans. Your egg yolks jiggle slightly when you nudge the plate.
- The taste test – Each element should taste intentional. The beans should taste seasoned throughout, not like beans with spice sprinkled on top. The onion and garlic should be soft and integrated, not crunchy. The spices should taste warm and potent, not dusty or distant.
- The texture confirmation – Beans should be creamy enough to partially coat a spoon, not watery. Tortillas should be warm and pliable. Your egg white should be fully set while the yolk runs easily. The avocado should slice cleanly without browning.
Common Technique Mistakes and How to Fix Them
- Burnt aromatics creating bitter, acrid flavor – This happens when your heat is too high or you wait too long between adding ingredients. If this happens, discard everything and start over—there’s no salvaging burnt aromatics. For future attempts, use medium heat (not medium-high), and work quickly once onions start cooking. The entire aromatic phase should take 2-3 minutes maximum.
- Beans that taste underseasoned or flat – You either didn’t give the spices time to bloom in hot oil, or your broth was too salty and masked the spice flavors. Always bloom spices for at least 15 seconds in fat before adding beans. Use low-sodium broth so you control the salt level completely.
- Beans that are either watery or crusty with no middle ground – You need ¼ to ½ cup broth total, added gradually. Start with ¼ cup, then adjust as you cook. If beans seem dry after 3 minutes, add more broth one tablespoon at a time until you reach creamy consistency. If you overshoot and they’re too soupy, continue cooking without a lid for 2-3 minutes to let liquid evaporate.
- Eggs that are overcooked or undercooked – Watch them constantly in the final minute. The white should be opaque and set, the yolk should still shimmy when you nudge the pan. If you’re unsure, err toward slightly underdone—the residual heat will continue cooking as you plate and assemble.
- Cilantro that tastes soapy or overwhelming – Use less cilantro (roughly ¼ cup per serving is enough), and add it right before eating, not during cooking. Fresh herbs lose their bright qualities when heated, and some people have a genetic variation that makes cilantro taste soapy. If that’s you, substitute flat-leaf parsley or fresh dill.
Practice Variations to Build Your Skill
Mastery comes through repetition with intentional variation. Here are three versions of this recipe, each building on your technique:
Version 1: The Foundation (What You Just Made) – Follow the recipe exactly as written. Focus on recognizing each stage of the sauté: onion translucence, garlic fragrance, spice blooming, bean creaminess. Make this version at least twice until you can execute it without looking at instructions, relying on sensory cues instead.
Version 2: The Herb Variation – After mastering the basic version, add fresh cumin seeds (not ground) to the oil before onions, toasting them for 30 seconds first. Add a pinch of dried oregano with your other spices. Replace cilantro with fresh dill or parsley. This teaches you how different aromatics and herbs create entirely different flavor profiles using the exact same technique.
Version 3: The Sophisticated Version – Sauté 1 jalapeño (minced) alongside the onion. Add a splash of lime juice to the beans at the end. Top with crumbled queso fresco instead of yogurt, and use a poached egg instead of fried. This version teaches you how seasoning, acid, and textural contrast elevate the basic formula. It’s the same technique, but now you’re playing with flavor intentionally.
Make-Ahead Guide: You can prepare the sautéed bean mixture up to 3 days in advance. Store it in an airtight container in the refrigerator. In the morning, reheat it gently in a skillet over medium-low heat (about 3-4 minutes), adding a splash of broth if it’s thickened too much. Fry fresh eggs and assemble with fresh toppings. The flavor actually deepens overnight as spices continue to bloom, making this an excellent meal-prep option for busy mornings.
Can I Store Black Bean Breakfast Recipe?
Yes, but with strategy. The bean mixture stores beautifully; the assembled dish doesn’t. Store the cooked beans in an airtight container for up to 3 days in the refrigerator. The flavors actually deepen and improve over this time as the spices continue to marry.
Reheat gently over medium-low heat with a splash of broth, as the mixture will thicken overnight. Fry fresh eggs each morning—they take 4 minutes and deserve that moment of attention. Store toppings (cilantro, tomato, avocado) separately and add them fresh at assembly.
The corn tortillas are best warmed fresh before serving, but you can store them in a sealed plastic bag for up to 2 days. Avocado is best sliced fresh to prevent browning, though you can slice it in advance and store it in a sealed container with a squeeze of lime juice and a paper towel to absorb excess moisture.
Freezing note: You can freeze the bean mixture (without eggs or fresh toppings) for up to 2 months in a freezer-safe container. Thaw overnight in the refrigerator, then reheat gently. The texture remains excellent, though spices may mellow slightly over time.
Nutrition Information
Based on USDA nutrient database analysis, one serving (1 plate with 1 egg, ½ can beans, 2 tortillas, and toppings as listed) provides approximately: 450 calories, 16 grams of protein, 52 grams of carbohydrates, 18 grams of fat (3 grams saturated), 12 grams of fiber, and 560 milligrams of sodium.
This is a nutritionally complete breakfast that hits every macronutrient category essential for stable blood sugar and sustained energy. The fiber from beans and the protein from both beans and eggs keep you full through mid-morning. The healthy fats from eggs and avocado slow digestion, preventing the energy crash that comes from simple carbohydrates alone.
If sodium is a concern for you, ensure you use low-sodium broth and go light on added salt. The spices provide plenty of flavor without relying on salt. For a lighter version, use one egg instead of two and reduce the avocado to ¼ serving per plate.
What to Serve With Black Bean Breakfast Recipe?
This breakfast stands beautifully on its own, but pairing it with complementary elements elevates it. Think about contrasts: temperature, texture, and flavor. A cool beverage—iced Mexican hot chocolate, fresh-squeezed orange juice, or cold brew coffee—provides cooling contrast to warm beans and egg.
If you’re serving this for brunch rather than breakfast, pair it with a simple side salad dressed with lime vinaigrette, or offer fresh fruit like sliced pineapple or papaya. The brightness of fresh fruit contrasts beautifully with the warm spices in the beans.
For those looking to build a more substantial meal, consider serving this alongside a piece of grilled chicken seasoned with your favorite chicken kabob marinade rub. The technique you’ve learned for sautéing aromatics applies directly to building depth in marinades.
- Fresh lime wedges – Squeeze over the assembled plate for brightness and acid that cuts through richness
- Crispy tortilla chips and salsa – Add textural contrast and a cooling element that complements warm beans
- Mexican crema or additional sour cream – Provides cooling creaminess and slight tang
- Pickled onions or jalapeños – Add vinegar-forward brightness and heat that layers complexity
- Fresh orange juice – The vitamin C aids iron absorption from beans, while citrus brightness pairs naturally with cumin and cilantro

Black Bean Breakfast Recipe
Ingredients
Method
- Before any heat touches your skillet, chop your onion into pieces about the size of a lentil—small enough to cook quickly and evenly, large enough that you can still see them. Mince your garlic finely, almost to a paste consistency. Drain and rinse your canned black beans under cool running water, rubbing them gently between your fingers to remove excess starch. This last step is critical—it prevents your final dish from becoming gluey or cloudy. Measure your broth and combine your cumin and paprika in a small bowl. This preparation step—what chefs call "mise en place"—isn't busywork. It's about setting yourself up for confident execution. Once your aromatics hit hot oil, you're in control mode. You won't have time to search for ingredients or second-guess measurements.
- Place your skillet over medium heat and add your olive oil. Here's where most home cooks rush: wait for the oil to shimmer. Not smoke—shimmer. That subtle, dancing movement across the surface means the oil has reached approximately 350°F, the perfect temperature for sautéing aromatics without burning them. How do you know when it's ready? Hold your hand about 6 inches above the skillet. You should feel consistent warmth, not intense heat. If it's smoking, your heat is too high—remove it for 30 seconds and try again. This temperature control is what separates confident cooks from frustrated ones.

- Add your chopped onion to the shimmering oil and listen. You should hear an immediate, gentle sizzle—not a violent pop, not silence. This sizzle tells you the temperature is perfect. Stir the onions immediately to coat them evenly in oil. Now, this is crucial: resist the urge to stir constantly. Stir every 15-20 seconds, allowing the flat surfaces of the onions to contact the hot pan. This creates the Maillard reaction—the browning that develops real flavor. After about 2 minutes, your onions should begin to soften and turn translucent at the edges, with the very tips showing the faintest hint of golden color. You're not making caramelized onions here—that takes 30+ minutes. You're creating sautéed aromatics, which takes about 2 minutes. The difference is time and temperature. This is the foundation layer of your flavor profile.
- Once your onions are soft and fragrant, add your minced garlic and stir immediately. Garlic cooks faster than onion—in as little as 20-30 seconds, it can go from perfect to burnt. You're looking for that moment when the raw sharpness disappears and the kitchen smells like toasted garlic. That aroma is your signal—it should smell warm and savory, not acrid or harsh. This is where timing teaches you about cooking temperatures and ingredient differences. Garlic cooks faster than onion because it has less water content and smaller particle size. Understanding why different ingredients need different timing makes you adaptive in the kitchen. Cook for just 30-45 seconds, then immediately move to the next step. Waiting too long results in bitter garlic; moving too fast wastes the flavor development. This single decision—knowing when to proceed—is what separates home cooking from restaurant-quality cooking.
- Add your cumin and paprika to the pan and stir constantly for about 15 seconds. You're doing something important here: blooming the spices. By adding them directly to the hot fat, you're releasing their essential oils and making their flavors more potent and nuanced. The kitchen aroma will shift—you'll suddenly smell the warm earthiness of cumin more intensely. This is why blooming spices in fat transforms a dish. It's the difference between sprinkling paprika on top (flat, dusty flavor) versus blooming it in hot oil (warm, integrated flavor that tastes intentional). This single technique—blooming—works for every spice-forward dish you'll ever make.
- Pour in your rinsed black beans and immediately add ¼ cup of your broth. Stir everything together, making sure the beans coat evenly with the spiced oil. You should see steam rising almost immediately. Let the beans cook, stirring frequently, until they're warmed through—about 3-4 minutes. Now comes the technique that creates restaurant-quality texture: using the back of a wooden spoon, gently press about ¼ of the beans against the side of the pan, mashing them into a rough paste. This is optional, but it's the secret. You're not puréeing—you're partially breaking down beans to release their starches, which creates a creamy, luxurious sauce around the whole beans. If your beans look dry as you cook (they shouldn't be swimming in liquid, but they shouldn't be crusty either), add another tablespoon or two of broth and stir. The goal is beans that are creamy, clingy, and deeply flavored—not soupy, not dry.
- In a separate skillet (or if you have the space, push your beans to the side of your current skillet), heat just a kiss of olive oil over medium-high heat. Crack your eggs directly into the hot oil and cook until the whites set but the yolks remain runny—about 3-4 minutes, depending on your heat. The yolk will become your sauce, running over the beans and tortillas. This is intentional richness. Alternatively, if you prefer over-easy or over-medium eggs, cook them a bit longer. The only rule: never cook the yolk completely through in this context. It dries out the entire dish.

- Divide your sautéed beans between two plates. Top each portion with a warm corn tortilla (you can warm them directly over a gas flame for 5 seconds per side, wrapped in foil, or in a dry skillet for 10 seconds per side). Place your fried egg on top of each portion. Arrange your cilantro, diced tomato, avocado slices, and a dollop of Greek yogurt around the plate. This isn't just plating—it's creating flavor contrast. The cool yogurt cools the warm beans, the acid in tomato brightens everything, the cilantro adds herbal notes, and the avocado provides silky richness. Each element teaches your palate something different. Serve immediately while the beans and egg are still warm, the tortillas still pliable.

Notes
FAQs
Why is my oil not shimmering—should I wait longer or increase heat?
Patience is your friend here. Medium heat takes longer than medium-high, but it’s worth waiting for. If you increase heat to speed up the process, you risk burning your aromatics before they can develop properly. Give the oil a full 2-3 minutes over medium heat. If it’s still not shimmering after that time, your stove may run cool—you can bump it to medium-high, but watch carefully. The moment you see shimmer and smell the faintest hint of warm oil, add your onions immediately.
Can I use fresh garlic versus minced jarred garlic?
Always choose fresh garlic. Jarred minced garlic contains preservatives and loses potency quickly. Fresh garlic has more pronounced flavor and better texture. It’s worth the 30 seconds to mince it yourself with a sharp knife or microplane grater. The flavor difference is remarkable—jarred garlic tastes hollow compared to fresh.
What if I don’t like cilantro—what should I substitute?
Cilantro’s role here is adding herbal brightness. If cilantro tastes soapy to you (a genetic thing, not a mistake), use fresh flat-leaf parsley, dill, or even fresh oregano. Some people love a combination of parsley and a tiny bit of fresh mint. The goal is that fresh, herbal note that contrasts warm spices and richness. Choose whatever herb makes you happy.
Can I make this recipe with dried beans instead of canned?
Absolutely, and it’s actually more economical. Use ¾ cup dried beans, soaked overnight and cooked until tender (about 45 minutes to 1 hour), then drained. You’ll need the same amount of finished beans—approximately 1½ cups. The technique remains identical. In fact, using beans you’ve cooked yourself gives you more control over texture and salt, making the final dish even better.
Should I use extra-virgin or regular olive oil?
For sautéing aromatics, either works fine. Extra-virgin has a lower smoke point, but at medium heat for this application, it’s not an issue. Use extra-virgin if you prefer the deeper olive flavor; use regular olive oil if you want a more neutral taste. The sauté technique itself remains unchanged—focus on heat management rather than oil choice. Save your finest extra-virgin olive oil for drizzling over finished dishes, where its flavor shines more.
Seasonal Variations
Spring Version: Replace ¼ cup of your broth with fresh lemon juice. Add sautéed asparagus or fresh peas alongside the beans. Top with a soft poached egg and fresh dill. The brightness of spring vegetables and lemon cuts beautifully through rich beans and egg.
Summer Version: Add fresh corn kernels (about ½ cup, sautéed briefly with the onions) and jalapeños for heat. Use fresh lime juice instead of additional broth. Top with crispy cotija cheese and lots of cilantro. This version celebrates summer’s abundance while maintaining the core sauté technique.
Fall Version: Add roasted sweet potato cubes (tossed with cumin and served alongside) and increase paprika to ¾ teaspoon. Top with crispy sage leaves and a drizzle of maple syrup mixed with a dash of hot sauce. The sweetness of sweet potato and maple grounds the flavors in autumn warmth.
Winter Version: Add sautéed mushrooms and a pinch of dried thyme with your other spices. Replace cilantro with fresh parsley. Top with a generous dollop of sour cream and crispy bacon bits if desired. This version feels more grounding and substantial, perfect for cold mornings.
More Recipes Using This Technique
- Burrito Beef Recipe – uses the same aromatic sauté foundation to build seasoned ground meat
- Chicken Asian Wrap Recipe – applies sauté technique to quickly cook protein with aromatics and ginger
- Burrito Recipe Chicken – builds on the same flavor-layering technique with different proteins
You’ve just learned one of cooking’s most essential skills. The aromatic sauté is the foundation that separates home cooking from restaurant-quality cooking, and you now understand not just the steps, but the science and sensory cues behind them. You can build confidence in the kitchen knowing that this technique works in countless contexts—from quick weeknight dinners to more sophisticated meals.
Every time you cook going forward, remember my grandmother’s hands in that Texas kitchen, moving with intention and patience. She was teaching me that cooking isn’t about perfection—it’s about understanding fundamentals deeply enough to adapt confidently. You’ve taken that journey this morning. You’ve learned to listen to your oil shimmer, to recognize when garlic reaches its peak, to feel when beans become creamy. These sensory skills are what make you a real cook.
Cook with confidence!