Bisquick Cinnamon Roll Recipe

Last Updated on September 5, 2026
This post contains affiliate links. As an Amazon Associate I earn from qualifying purchases.
Getting kids to eat warm, gooey cinnamon rolls feels impossible—until you realize that homemade versions from scratch actually come together faster than you’d think, and taste infinitely better than anything from a tube. I’m talking about a real cinnamon roll experience in under 45 minutes, with ingredients you already have in your Texas kitchen. When my nephew Marcus refused breakfast for three solid weeks (a picky eater’s protest, if you will), I whipped up this Bisquick cinnamon roll magic one Saturday morning, and suddenly he was asking for seconds before his milk was even cold. That’s the power of simple, honest baking that doesn’t require fancy equipment or hours of rising time.
Bisquick Cinnamon Roll Recipe the Whole Family Will Actually Eat (Picky Eaters Included)
I grew up watching my mama transform humble ingredients into meals that made everyone pause mid-conversation just to savor them. She taught me that the best family food isn’t about complexity—it’s about intention and love baked right in. When my own kids hit those picky-eating phases, I realized I needed recipes that felt like indulgence but came together in everyday kitchen moments. This cinnamon roll recipe became my secret weapon for turning breakfast into celebration without the stress of yeast, proofing times, or kitchen disasters.
The beauty? Using Bisquick mix as your foundation means you’re literally minutes away from warm, spiraled perfection. There’s no waiting for dough to rise, no temperature anxiety, no failed batches. Just roll, fill, swirl, and bake. My registered dietitian background taught me to spot where nutrition hides in comfort food, and these rolls deliver soft, tender cake with a warm spice profile that makes kids feel like they’re eating dessert for breakfast—when really, you’ve built in wholesome ingredients they’ll actually digest well.
Why Kids Love This Version
Here’s what I’ve learned working with families across Texas: picky eaters respond to meals that involve them, look impressive, and deliver on the promise of indulgence without being intimidating. This cinnamon roll recipe checks every box.
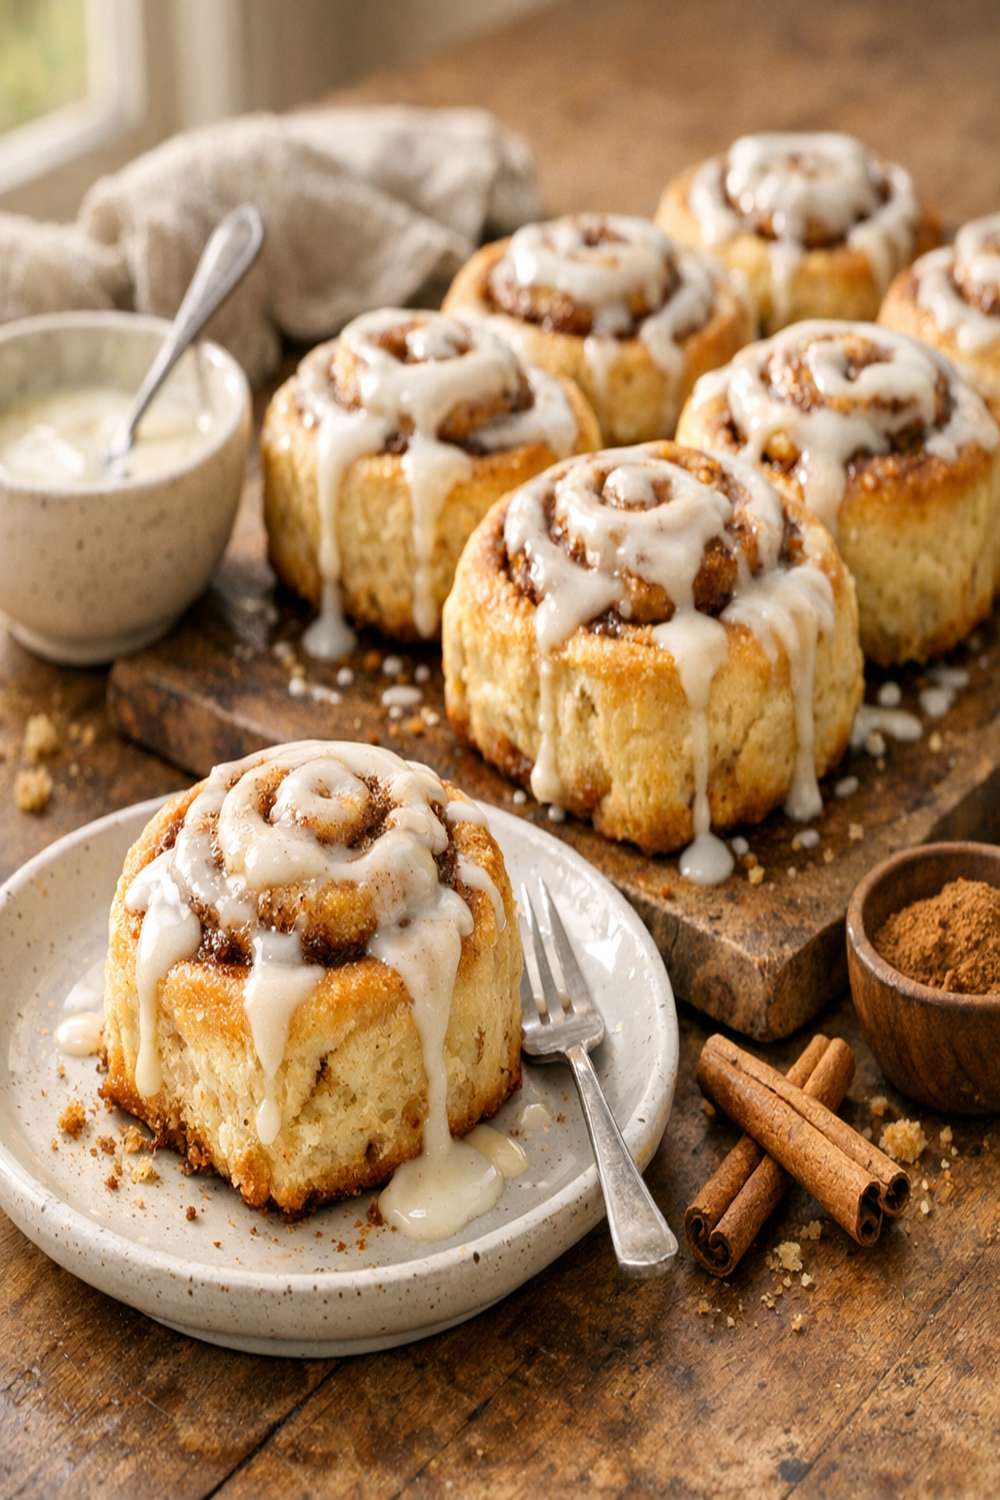
- Visual Appeal and Spiral Magic – Children are drawn to food that looks special. Those gorgeous cinnamon swirls visible on every cross-section make kids feel like they’re eating a treat, not a breakfast item. They’ll actually want to photograph it.
- Hands-On Involvement Possible – Unlike many baked goods, your kids can participate in every major step without needing advanced skills or risking safety. Rolling, sprinkling, and arranging rolls in the pan become ownership moments that translate directly into enthusiasm for eating.
- Soft, Familiar Texture – Picky eaters often struggle with texture concerns. These rolls are uniformly tender and easy to chew, with no crunchy exterior or dense crumb to trigger sensory resistance. The cream glaze adds moisture that prevents any dryness.
- Familiar Warm Spice Profile – Cinnamon isn’t overpowering or “weird” to most kids. The sweet brown sugar balance means you’re not introducing challenging flavors, just elevating the comfort factor.
How to Get Kids Involved in Making This
This is where the magic really happens. When kids build the food themselves, they become invested in the outcome. Here’s how I stage this recipe by age:
- Ages 3-5: The Sprinkle Station – After you’ve rolled and spread the dough, let your littlest helpers sprinkle the cinnamon-sugar mixture across the surface. They’re contributing something visible, staying safe away from hot appliances, and creating memories of “I made this.” Supervise hand-washing first, and use a small spoon so they can control the flow.
- Ages 6-9: Rolling and Slicing – School-age kids can handle rolling the dough (with your guiding hands over theirs initially) and using a butter knife or dental floss to slice the spirals into individual rolls. This is where they truly feel like bakers. Teach them the jelly-roll technique: starting from the long edge, rolling tightly but not aggressively, and how to slice with gentle downward pressure rather than aggressive sawing.
- Ages 10+: Near-Complete Independence – Older kids can follow the entire recipe with minimal supervision. They can mix the dough, roll it out, apply fillings, arrange in the pan, and even whisk the glaze together. This is genuine cooking responsibility that builds real kitchen confidence. Have them check for doneness at the 20-minute mark by gently pulling up a center roll.
The Ingredients – Hidden Nutrition, Visible Deliciousness
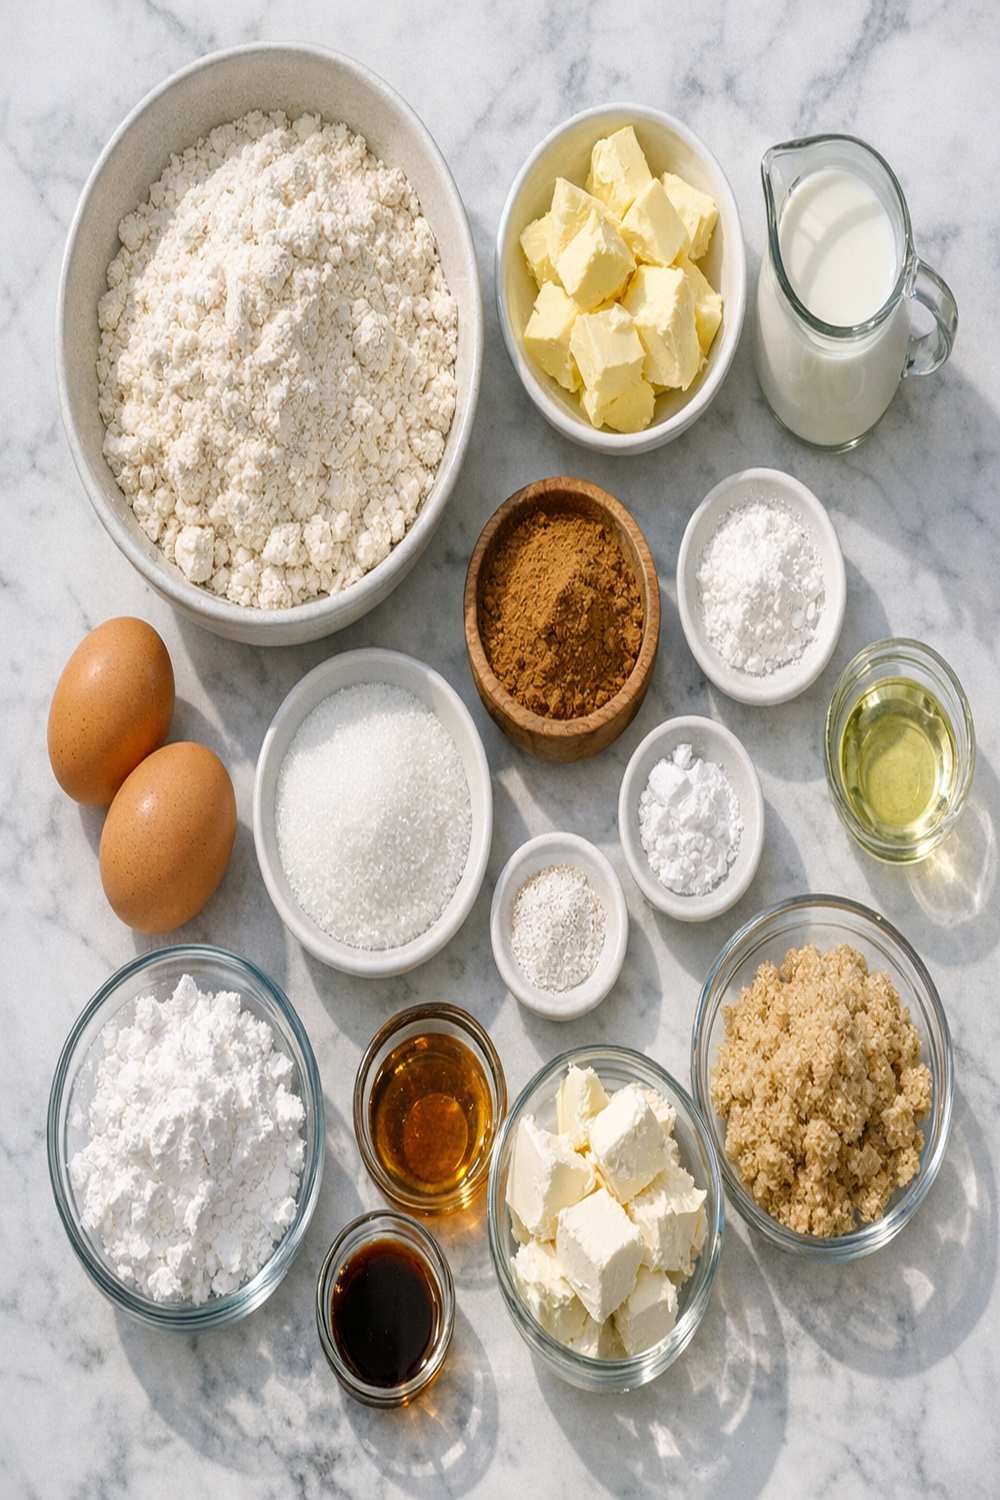
I love that this recipe doesn’t hide nutrition—it simply builds it in naturally. The Bisquick mix provides refined grains, yes, but the buttermilk adds probiotics for digestive health, and those warm spices deliver antioxidants. The cream components add fat-soluble vitamins for nutrient absorption. This is comfort food that actually serves your body, not fights against it.
For the Rolls
- 1/3 cup light brown sugar (packed firmly to measure correctly)
- 2 1/4 cups Bisquick baking mix (all-purpose blend containing flour, leavening agents, and salt)
- 1/4 cup salted butter (softened to room temperature, about 15 minutes out of refrigeration)
- 2/3 cup low-fat buttermilk (room temperature for better dough development)
- 2 teaspoons ground cinnamon (fresh from a sealed container, not stale)
- 1/4 teaspoon sea salt (enhances sweetness without adding obvious saltiness)
For the Cream Glaze
- 1 cup powdered sugar (spooned and leveled, never packed)
- 3 to 4 tablespoons heavy cream (warmed slightly, added gradually until you reach desired consistency)
- 1/2 teaspoon pure vanilla extract (not imitation—the flavor difference matters here)
- 1 tablespoon salted butter (melted and slightly cooled)
For Assembly
- 1/3 cup heavy cream (warmed gently, poured over rolls before baking for moisture and richness)
- Non-stick cooking spray (for your 8-inch round cake pan or 9-inch pie plate)
Recipe yields: 6 large, generous cinnamon rolls (one roll per person for a family of four, with two extras for seconds or freezer storage)
How to Make Bisquick Cinnamon Roll Recipe for the Whole Family
This is where we turn the kitchen into a family project, not a solo performance. I want you feeling confident and excited, not stressed. Read through all the steps once, gather your ingredients and equipment, and remember: the most important ingredient in any family meal is the presence of the people around your table.
Step 1: Heat Your Oven and Prep Your Pan
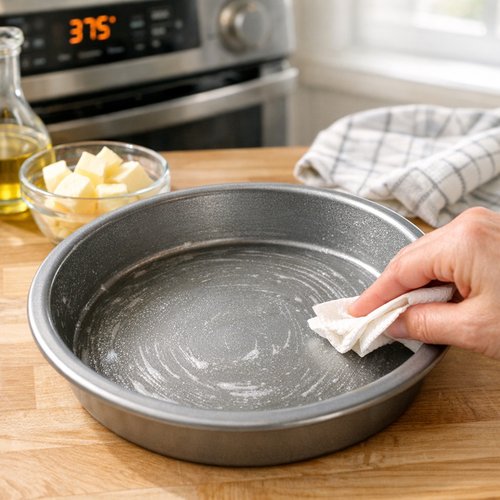
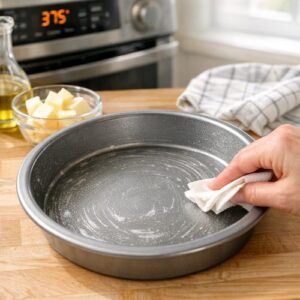
Turn your oven to 375 degrees Fahrenheit. While it’s preheating (this takes about 8 minutes), grab your 8-inch round cake pan or 9-inch pie plate and coat it generously with non-stick cooking spray. Spray the bottom and all sides—this prevents any sticking and means cleanup is genuinely easy. If kids are helping, this is their moment to take ownership of the pan preparation. Supervise spray use, keeping it away from their faces.
Step 2: Mix Your Dough Base
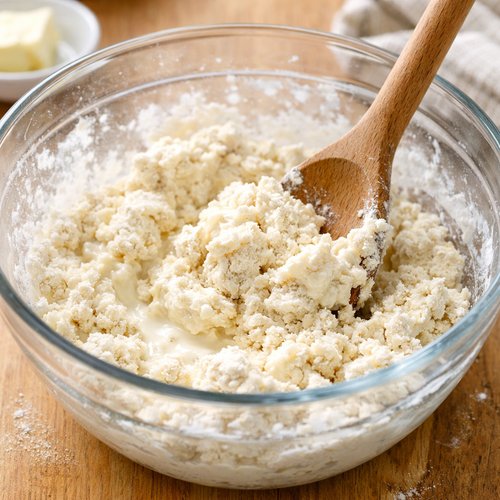
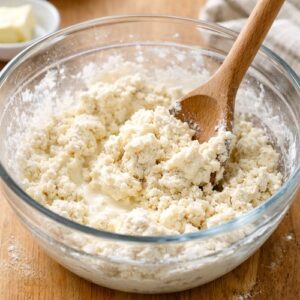
In a medium mixing bowl, combine your 2 1/4 cups Bisquick mix with your 2/3 cup room-temperature buttermilk. Using a wooden spoon or sturdy spatula, stir until a soft dough forms. This should take about 1 minute of gentle mixing. Don’t overmix—overmixing activates gluten and creates toughness. You want a slightly shaggy dough that just comes together. The dough will be soft and slightly sticky, and that’s exactly right. If it feels too sticky, you can add a tablespoon more Bisquick mix, but resist the urge to add flour from your pantry (which has a different protein content and will throw off your texture).
Pro tip from my dietitian perspective: The buttermilk here isn’t just for flavor—it’s delivering live cultures that support gut health, and its acidity reacts with the leavening in Bisquick to create lift without yeast. Kids eating this are getting digestive support baked right in.
Step 3: Flour Your Surface and Roll the Dough
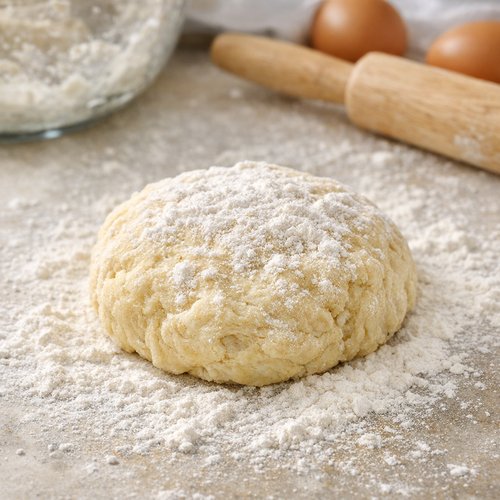
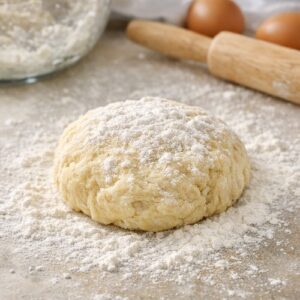
Sprinkle Bisquick mix lightly onto your counter or pastry mat (a silicone mat works beautifully here). Turn your dough out onto the floured surface. Using a rolling pin, gently roll the dough into a rectangle approximately 8 inches wide by 12 inches long. You’re aiming for even thickness throughout—about 1/4 inch thick is perfect. If kids are rolling, have them use both hands and gentle pressure rather than aggressive rolling, which can create uneven thickness. The dough will cooperate beautifully; if it’s resisting, let it rest for 2 minutes and it’ll relax.
Step 4: Spread and Season Your Filling
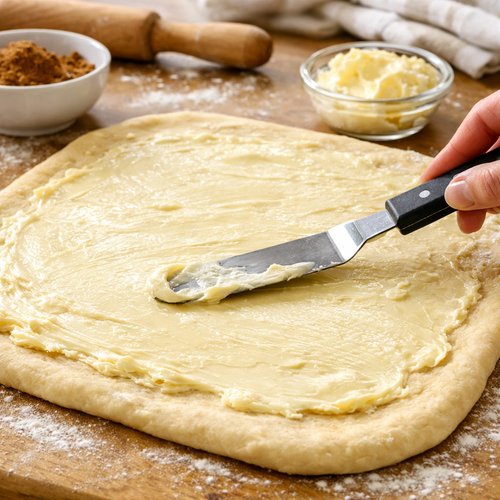
This is where the magic happens. Take your 1/4 cup softened butter and spread it evenly across the entire dough rectangle, right to the edges. You’re creating a thin, even layer—about 1/8 inch thick. The softened butter spreads like a dream without tearing the dough. In a small bowl, combine your 1/3 cup packed light brown sugar with your 2 teaspoons ground cinnamon and 1/4 teaspoon sea salt. Mix these together until evenly distributed. Now sprinkle this cinnamon-sugar mixture evenly across the buttered dough surface.
This is the perfect moment for your 3-5 year olds to participate. They can sprinkle the cinnamon mixture while you’ve handled the butter spreading. Give them a small spoon and let them control the flow across the rectangle. This builds ownership and keeps their energy invested in the outcome.
Step 5: Roll Jelly-Roll Style and Slice
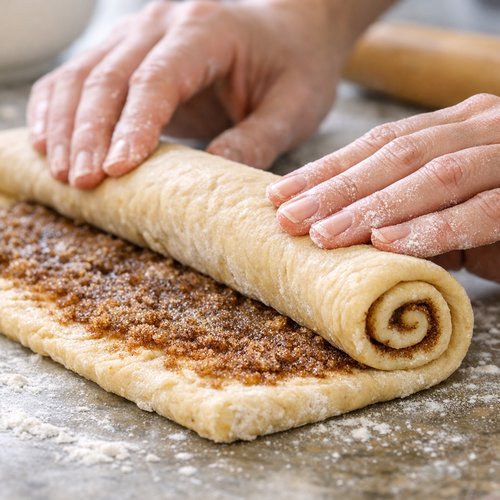
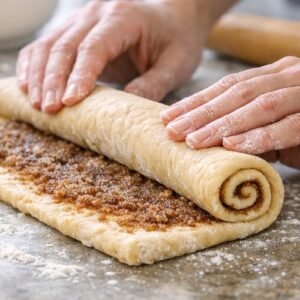
Starting at the long end of your rectangle (the 12-inch side), begin rolling the dough tightly toward you, like you’re rolling a jelly roll. Roll firmly but not aggressively—you want the spiral to be snug without squeezing out the filling. When you reach the end, you’ll have a long log approximately 12 inches long and about 2 inches in diameter. Using a sharp knife or a piece of dental floss (yes, really—floss creates cleaner cuts without compressing the dough), slice this log into 6 equal pieces. Each roll should be about 2 inches wide.
Dental floss trick: If using floss, hold it taut with both hands and press downward with a gentle sawing motion. This prevents compression better than a knife and creates beautiful, clean spiral cross-sections.
Step 6: Arrange Rolls in Pan and Pour Cream
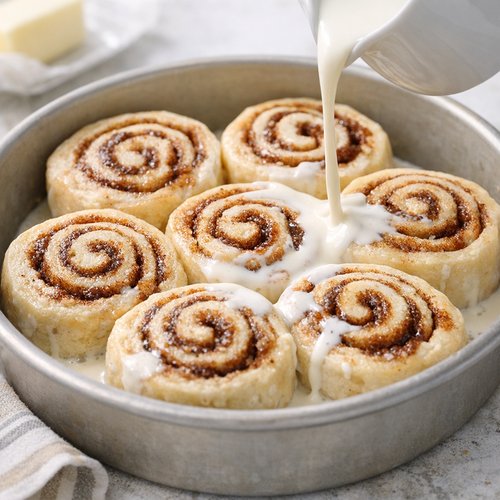
Place all 6 sliced rolls cut-side up into your prepared baking pan, arranging them so they’re touching slightly but not cramped. They’ll expand as they bake and create a beautiful connected pull-apart effect. Now, slowly pour your 1/3 cup warmed heavy cream over all the rolls, distributing it as evenly as possible. This cream does two things: it provides moisture for tender crumb development, and it creates a luxurious base that prevents any dryness. Warm the cream by heating it in a small saucepan over medium heat for about 2 minutes, or microwave it for 30-45 seconds—you want it warm to the touch, not hot.
Step 7: Bake Until Golden and Cooked Through
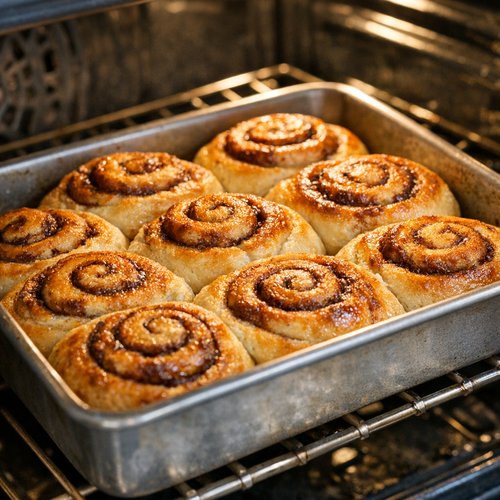
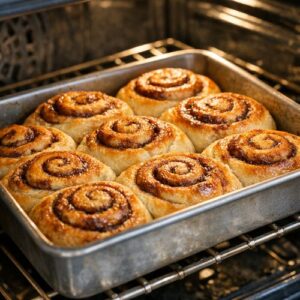
Slide your pan into your preheated 375-degree oven. Set a timer for 20 minutes, then check for doneness. The rolls should be golden brown on top and the center roll should be cooked through (not doughy in the middle). A simple test: gently pull up on the edge of the center roll with a fork. If it looks firm and set rather than wet and undercooked, you’re done. If it still looks doughy, give them another 3-5 minutes. If the tops are browning too quickly before the centers are cooked, loosely tent the pan with aluminum foil and continue baking. Total baking time is typically 20-25 minutes.
Step 8: Make Your Glaze While Rolls Cool Slightly
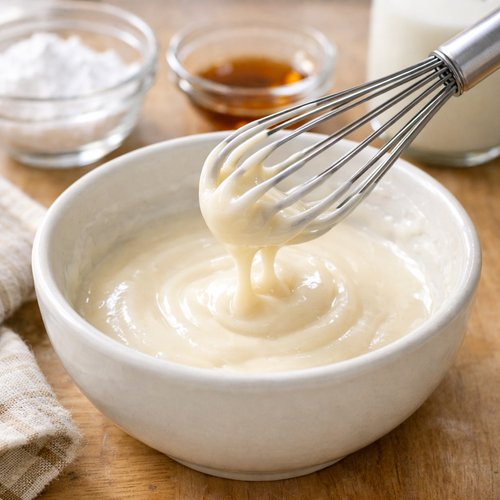
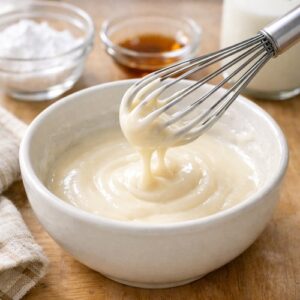
While the rolls cool in the pan for exactly 3 minutes (no more, or the glaze won’t meld), prepare your glaze. In a small bowl, whisk together your 1 cup powdered sugar, 1 tablespoon melted butter, 1/2 teaspoon vanilla extract, and 3 tablespoons of heavy cream. Mix until smooth and pourable. If the glaze seems too thick, add another tablespoon of heavy cream and whisk again. You’re aiming for a consistency that drizzles easily but isn’t runny. If glaze accidentally gets too thin, just stir in another tablespoon of powdered sugar.
Step 9: Glaze and Serve
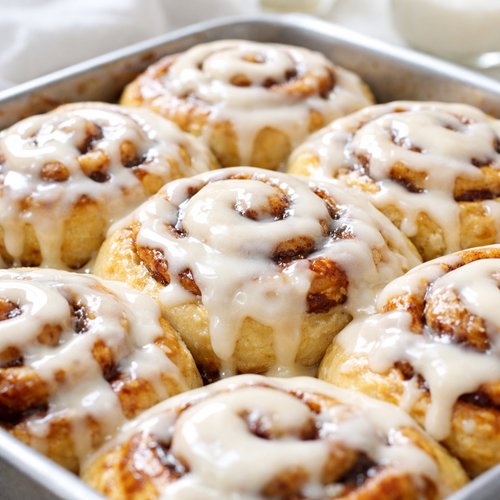
After those 3 minutes of cooling, drizzle or spread the glaze generously over all the warm rolls. The warmth of the rolls will help the glaze melt into all the nooks and crannies. Let them rest for another 2 minutes, then serve warm. This is the moment when every kid at your table becomes a believer.
Customization Station: Let Everyone Build Their Own
Want to transform this from a recipe into an interactive family experience? Set up a customization station where everyone participates in building their own rolls. This approach absolutely works with picky eaters because they feel control over their food.
- Spice Level Selection – Prepare two dough rectangles, one with the full 2 teaspoons cinnamon and one with just 1 teaspoon. Some kids find strong cinnamon overwhelming; letting them choose empowers them. You can even have a “no-spice” option where they use just brown sugar and butter.
- Glaze Customization – Mix a basic glaze and offer mix-ins: a pinch of cinnamon, a drop of maple extract, or even a tiny drizzle of honey. Let kids customize their own glaze drizzle. This turns the final step into creative play.
- Topping Station – After rolling and before baking, offer optional toppings: chopped pecans (if no nut allergies), a sprinkle of nutmeg, or a tiny pinch of sea salt. Some kids love the added texture; others prefer classic simplicity. Giving choice removes the “I don’t like this” defense before it happens.
Scaling for Different Family Sizes
This recipe as written makes 6 large rolls, perfect for a family of four with leftovers, or a family of six with one extra. Need to adjust?
For a couple or family of two: Make the full recipe and freeze 3-4 rolls individually wrapped in plastic wrap, then foil. Thaw and reheat when you want fresh cinnamon rolls without making a full batch. This is genuinely easier than making a half batch because scaling Bisquick recipes smaller can affect leavening.
For a family of six to eight: Make one and a half times the recipe (about 3 3/8 cups Bisquick mix, 1 cup buttermilk, and proportionally larger fillings). You’ll create 9 rolls, which fits perfectly in a 9×13 inch baking dish. Bake at the same temperature for 25-30 minutes, checking at 25 minutes since there’s more volume.
For a crowd or special breakfast: Double the entire recipe and use two 8-inch round pans or one large 9×13 baking dish. Both pans can bake simultaneously on different racks (stagger them—one on the middle rack, one on the upper-middle). They may bake in 22-26 minutes depending on oven hot spots, so check both at 22 minutes.
Can I Store Bisquick Cinnamon Roll Recipe?
Here’s my favorite part: these rolls store beautifully, which means you’re not locked into eating them all immediately. I’m sharing storage strategies from my dietitian and meal-prep experience.
Room Temperature Storage: In an airtight container at room temperature, these rolls stay fresh for 2 days. Cover the container to prevent them from drying out. This is perfect for the day you bake them plus the next morning breakfast.
Refrigerator Storage: Store in an airtight container in the refrigerator for up to 5 days. Before serving, warm them gently in the microwave (20-30 seconds) or in a 300-degree oven for about 5 minutes. The glaze will have set but will soften slightly with warming.
Freezer Storage: This is where these rolls become your secret weapon for future breakfast success. Store individually wrapped rolls in a freezer-safe bag or container for up to 3 months. Freeze them after they cool completely but before glazing. When you want them, thaw overnight in the refrigerator, then warm and glaze fresh. Alternatively, freeze them after glazing (they freeze beautifully), and thaw and warm without re-glazing, or add fresh glaze if you prefer maximum decadence.
Lunchbox Tip: A room-temperature cinnamon roll wrapped in parchment paper makes a beautiful, special lunchbox treat that most kids won’t trade away. Pack the glaze on the side in a small container if you’re concerned about it making the lunch box sticky.
Nutrition Information
Per roll (based on USDA nutrition data and using standard serving assumptions): approximately 285 calories, 11g total fat (6g saturated fat), 42g carbohydrates, 2g fiber, 18g sugar, 3g protein, and 220mg sodium. Each roll delivers about 8% of daily recommended calcium and 6% of daily recommended iron for children ages 4-8.
From my registered dietitian perspective: I want parents to see this nutrition clearly. Yes, these are indulgent—that’s the point. They’re meant to feel like celebration food. But they’re built from real ingredients without artificial additives. The buttermilk provides probiotics for digestive health. The whole-grain content in many Bisquick formulations adds fiber. The cinnamon delivers polyphenols, powerful antioxidants that support immune function. When we examine comfort food closely, we often find it delivers nutrition alongside joy. These rolls do both. The sugar content is absolutely worth noting for families managing diabetes or similar conditions, in which case you might explore sugar-free brown sugar alternatives or reduce the sweetness overall.
What to Serve Alongside for a Complete Family Meal
While cinnamon rolls can stand alone as a special breakfast, pairing them with complementary sides creates a more balanced meal that keeps everyone satisfied longer. Here’s what works beautifully with this recipe:
- Scrambled Eggs or Egg Casserole – The protein balance is essential, especially for kids who need sustained energy for school. Eggs provide choline for brain development and pair beautifully with warm spices.
- Fresh Fruit Salad – Keep it simple with diced strawberries, grapes, and melon. The fresh acidity cuts through the richness of the rolls, and kids get vitamins and fiber alongside the indulgence.
- Breakfast Sausage Links – Small, mild sausage links provide protein and satisfy kids who prefer savory elements alongside their sweet rolls.
- Greek Yogurt with Granola – A simple side where kids can customize their own bowl. The tanginess of yogurt complements the sweetness perfectly, and you’re building in probiotics and protein.
- 5 Cup Ambrosia Salad – If you’re looking for something slightly more indulgent that still feels celebratory, this refreshing ambrosia salad recipe offers sweetness with fruit and coconut, creating a beautiful balanced meal.
Expert’s Nutritional Tip
Here’s something only a registered dietitian who works with families will tell you: the fat in these rolls (from butter and cream) isn’t the enemy you’ve been taught to fear. Fat is essential for absorbing fat-soluble vitamins (A, D, E, and K), for building healthy cell membranes, and for creating satiety so kids actually feel full and satisfied. A child who eats a cinnamon roll with full-fat cream glaze and feels genuinely satisfied is less likely to graze on empty-calorie snacks two hours later than a child eating a “low-fat” alternative that leaves them hungry. Nutrition isn’t just about counting calories—it’s about feeding actual bodies with actual needs. These rolls do that beautifully.
Make-Ahead Guide: The Busy Parent’s Dream
This recipe transforms into a make-ahead powerhouse when you understand the timing windows. Here’s my professional meal-prep strategy:
Prepare Through Step 5 (up to 8 hours ahead): Mix your dough, roll, fill, and slice into individual rolls. Arrange them in your prepared, covered pan. Cover the entire pan tightly with plastic wrap and refrigerate. When you’re ready to bake, remove from the refrigerator 15 minutes before baking (this brings dough to closer to room temperature for more even baking), then pour the warmed cream and bake as directed. Baking time may extend 2-3 minutes since the dough starts cooler.
Freeze Fully Baked Rolls: Bake completely, cool, then freeze individual rolls wrapped in plastic wrap. When needed, thaw overnight in the refrigerator and warm in a 300-degree oven for 5 minutes. Glaze fresh for maximum impact, or serve with stored glaze.
Freeze Unbaked Rolls: This is my favorite strategy for maximum flexibility. After slicing into the pan but before adding cream, cover tightly and freeze for up to 3 months. On baking day, remove from freezer, let rest 15 minutes at room temperature, pour the warmed cream, and bake for 25-28 minutes (a few minutes longer than fresh since you’re starting from frozen).
Common Mistakes to Avoid (So Your First Batch Is Your Best Batch)
I’ve made every mistake in this recipe at least once, so let me save you the frustration:
- Overmixing the Dough – I see this constantly. Parents think more mixing means better texture, but with Bisquick recipes, overmixing activates gluten and creates toughness instead of tenderness. Mix just until combined, then stop. Trust the process. Your dough should look slightly shaggy, not perfectly smooth.
- Rolling Unevenly – If your dough rectangle has thin spots and thick spots, your rolls will bake unevenly. Some will be done while others are still doughy. Take your time rolling to even thickness throughout. If dough resists, let it rest 2 minutes and it’ll cooperate beautifully.
- Using Cold Butter for Spreading – Cold butter tears the dough because it doesn’t spread. Room-temperature butter (about 15 minutes out of the fridge) spreads like a dream. If you forget and your butter is cold, soften it in the microwave for 5-10 second bursts, stirring between bursts, until it’s spreadable but not melted.
- Adding Cream That’s Too Hot – Boiling hot cream can actually start cooking the dough before it hits the oven, creating uneven texture. Warm the cream gently (just warm to the touch, not steaming), then pour. This gives you moisture without disrupting the dough structure.
Seasonal Variations: Keep This Recipe Relevant Year-Round
The beauty of this recipe is its flexibility for seasonal twists:
- Spring: Lemon-Poppy Version – Replace 1/2 teaspoon of the cinnamon with 1 teaspoon of lemon zest mixed into your brown sugar filling, and add 1/4 teaspoon poppy seeds. The brightness feels fresh and spring-appropriate while maintaining the familiar structure kids expect.
- Summer: Peach Cobbler Variation – Before baking, sprinkle 1/4 cup finely diced fresh peaches over the cinnamon-sugar filling. You’re adding seasonal fruit without changing the core recipe. Peach + cinnamon is a classic pairing that feels summery.
- Fall: Pumpkin Spice Upgrade – Replace the 2 teaspoons cinnamon with 1 1/2 teaspoons cinnamon, 1/4 teaspoon nutmeg, 1/8 teaspoon ginger, and 1/8 teaspoon ground cloves. If you want to make it explicitly pumpkin, you can brush 2 tablespoons of canned pumpkin puree (mixed with a pinch of cinnamon and sugar) onto the buttered dough before adding the cinnamon-sugar layer. Fall families will feel seen.
- Winter: Spiced Eggnog Glaze – Keep the rolls identical but change your glaze completely. Mix your powdered sugar with 1 tablespoon melted butter, 1/2 teaspoon vanilla, and 3-4 tablespoons of eggnog instead of heavy cream. The nutmeg notes in quality eggnog transform the glaze into something winter-holiday appropriate.

Bisquick Cinnamon Roll Recipe
Ingredients
Method
- Turn your oven to 375 degrees Fahrenheit. While it's preheating (this takes about 8 minutes), grab your 8-inch round cake pan or 9-inch pie plate and coat it generously with non-stick cooking spray. Spray the bottom and all sides—this prevents any sticking and means cleanup is genuinely easy. If kids are helping, this is their moment to take ownership of the pan preparation. Supervise spray use, keeping it away from their faces.
- In a medium mixing bowl, combine your 2 1/4 cups Bisquick mix with your 2/3 cup room-temperature buttermilk. Using a wooden spoon or sturdy spatula, stir until a soft dough forms. This should take about 1 minute of gentle mixing. Don't overmix—overmixing activates gluten and creates toughness. You want a slightly shaggy dough that just comes together. The dough will be soft and slightly sticky, and that's exactly right. If it feels too sticky, you can add a tablespoon more Bisquick mix, but resist the urge to add flour from your pantry (which has a different protein content and will throw off your texture). Pro tip from my dietitian perspective: The buttermilk here isn't just for flavor—it's delivering live cultures that support gut health, and its acidity reacts with the leavening in Bisquick to create lift without yeast. Kids eating this are getting digestive support baked right in.
- Sprinkle Bisquick mix lightly onto your counter or pastry mat (a silicone mat works beautifully here). Turn your dough out onto the floured surface. Using a rolling pin, gently roll the dough into a rectangle approximately 8 inches wide by 12 inches long. You're aiming for even thickness throughout—about 1/4 inch thick is perfect. If kids are rolling, have them use both hands and gentle pressure rather than aggressive rolling, which can create uneven thickness. The dough will cooperate beautifully; if it's resisting, let it rest for 2 minutes and it'll relax.
- This is where the magic happens. Take your 1/4 cup softened butter and spread it evenly across the entire dough rectangle, right to the edges. You're creating a thin, even layer—about 1/8 inch thick. The softened butter spreads like a dream without tearing the dough. In a small bowl, combine your 1/3 cup packed light brown sugar with your 2 teaspoons ground cinnamon and 1/4 teaspoon sea salt. Mix these together until evenly distributed. Now sprinkle this cinnamon-sugar mixture evenly across the buttered dough surface. This is the perfect moment for your 3-5 year olds to participate. They can sprinkle the cinnamon mixture while you've handled the butter spreading. Give them a small spoon and let them control the flow across the rectangle. This builds ownership and keeps their energy invested in the outcome.

- Starting at the long end of your rectangle (the 12-inch side), begin rolling the dough tightly toward you, like you're rolling a jelly roll. Roll firmly but not aggressively—you want the spiral to be snug without squeezing out the filling. When you reach the end, you'll have a long log approximately 12 inches long and about 2 inches in diameter. Using a sharp knife or a piece of dental floss (yes, really—floss creates cleaner cuts without compressing the dough), slice this log into 6 equal pieces. Each roll should be about 2 inches wide. Dental floss trick: If using floss, hold it taut with both hands and press downward with a gentle sawing motion. This prevents compression better than a knife and creates beautiful, clean spiral cross-sections.
- Place all 6 sliced rolls cut-side up into your prepared baking pan, arranging them so they're touching slightly but not cramped. They'll expand as they bake and create a beautiful connected pull-apart effect. Now, slowly pour your 1/3 cup warmed heavy cream over all the rolls, distributing it as evenly as possible. This cream does two things: it provides moisture for tender crumb development, and it creates a luxurious base that prevents any dryness. Warm the cream by heating it in a small saucepan over medium heat for about 2 minutes, or microwave it for 30-45 seconds—you want it warm to the touch, not hot.
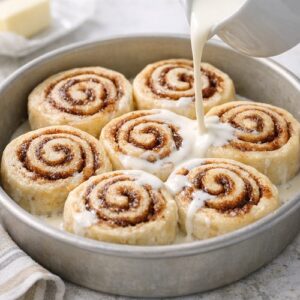
- Slide your pan into your preheated 375-degree oven. Set a timer for 20 minutes, then check for doneness. The rolls should be golden brown on top and the center roll should be cooked through (not doughy in the middle). A simple test: gently pull up on the edge of the center roll with a fork. If it looks firm and set rather than wet and undercooked, you're done. If it still looks doughy, give them another 3-5 minutes. If the tops are browning too quickly before the centers are cooked, loosely tent the pan with aluminum foil and continue baking. Total baking time is typically 20-25 minutes.
- While the rolls cool in the pan for exactly 3 minutes (no more, or the glaze won't meld), prepare your glaze. In a small bowl, whisk together your 1 cup powdered sugar, 1 tablespoon melted butter, 1/2 teaspoon vanilla extract, and 3 tablespoons of heavy cream. Mix until smooth and pourable. If the glaze seems too thick, add another tablespoon of heavy cream and whisk again. You're aiming for a consistency that drizzles easily but isn't runny. If glaze accidentally gets too thin, just stir in another tablespoon of powdered sugar.
- After those 3 minutes of cooling, drizzle or spread the glaze generously over all the warm rolls. The warmth of the rolls will help the glaze melt into all the nooks and crannies. Let them rest for another 2 minutes, then serve warm. This is the moment when every kid at your table becomes a believer.

Notes
FAQs
Can I use regular all-purpose flour instead of Bisquick mix?
Technically yes, but I wouldn’t recommend it without adjustments. Bisquick contains leavening agents and salt already mixed in. If you substitute all-purpose flour, you’d need to add 1 tablespoon baking powder and 1/2 teaspoon salt per cup of flour, and the texture may vary. My honest advice: get the Bisquick. It’s inexpensive, stores well, and gives you foolproof results. I use it for so many quick breakfast items that it lives permanently in my pantry.
My picky eater won’t eat anything with “chunks” of cinnamon—help!
This is more common than you’d think. The solution is pre-mixing your cinnamon and brown sugar extremely thoroughly so there aren’t visible granules, or switching to ground cinnamon whisked into melted butter before spreading (this creates a more uniform coating). You could also reduce cinnamon to 1 teaspoon and increase brown sugar to 1/2 cup, which masks the visible spice. Some kids outgrow texture sensitivities around spices; introducing it in smaller amounts builds tolerance gently.
How do I prevent my rolls from sticking to the pan?
The non-stick cooking spray is essential, but here’s the insider trick: after spraying the pan, I use a small piece of parchment paper cut to fit the bottom and lower sides, then spray over that too. The parchment creates an additional protective barrier. You can also grease the pan with softened butter instead of spray (it actually works brilliantly). Avoid flouring the pan directly, as the flour can create a gritty texture on the bottom.
Can I make these rolls dairy-free for my child with a milk allergy?
Yes, though you’ll need substitutions at multiple points. Use unsweetened almond milk mixed with 1 tablespoon of lemon juice or white vinegar as a buttermilk substitute (let sit 5 minutes before using). Replace the butter with dairy-free butter (Earth Balance works beautifully). For the glaze, use dairy-free butter and substitute heavy cream with full-fat coconut milk (canned, the thicker part). The texture will be slightly different—slightly less tender perhaps—but completely workable and delicious. Kids with dairy allergies deserve cinnamon roll magic too.
Why do my rolls sometimes come out dry even though I followed the recipe exactly?
Three likely culprits: (1) You’re overbaking them by 3-5 minutes. The center roll will look set before the dough has fully cooked through, so pull up that center roll gently and check the texture rather than relying only on color. (2) Your heavy cream was too hot or too much evaporated during baking. Use the measurement precisely and warm it gently. (3) Your oven runs hot—many ovens are 15-25 degrees hotter than displayed. Invest in an oven thermometer ($12-15) to check your actual temperature. One picky eater’s dry roll complaint is your signal to troubleshoot temperature next time.
More Family-Friendly Recipes
- Breadmaker Rolls Recipe – When you want a less hands-on approach to fresh-baked rolls and need to feed a crowd
- Broccoli Bites Recipe – A sneaky vegetable option that actually appeals to picky eaters when served alongside sweet breakfasts
- Calzone Dough Recipe – Use the same Bisquick dough technique for savory filled bread that kids can build themselves
Final Thoughts: Building Food Memories That Last
Food is memory. It’s presence. It’s the moment your kid stops mid-complaint to taste something warm and real and made by someone who loves them. These cinnamon rolls, made from scratch in under 45 minutes, are worth every minute. They’re proof that you don’t need complexity to create celebration, that texture and spice and warmth speak to kids in languages they understand, and that the best kitchen magic happens when everyone at your table knows they helped create something special.
I grew up believing that feeding people well was its own love language, and that belief hasn’t wavered. Whether your kids are picky eaters working through food phases or adventurous tasters ready for anything, this recipe meets them where they are. It invites their hands into the kitchen, their creativity into the customization, their confidence into the baking