Banana Cream Pie Graham Cracker Crust Recipe
Last Updated on July 18, 2026
This post contains affiliate links. As an Amazon Associate I earn from qualifying purchases.
You’ve probably tried the traditional baked meringue version, watched someone labor over a from-scratch pastry crust, or maybe even attempted that complicated custard-cooked-on-the-stove approach. Here’s what I discovered after years of testing: the no-bake method with instant pudding and whipped cream transforms this classic into something equally indulgent—but infinitely more achievable. My Texas kitchen has seen a lot of pie variations, but this one consistently earns the standing ovation at family gatherings. The secret isn’t fancy technique; it’s understanding why each ingredient matters and executing with precision.
Banana Cream Pie with Graham Cracker Crust: Which Method Actually Works Best?
I’ve spent more hours than I care to admit testing different approaches to banana cream pie. The traditional baked custard method, the stovetop pudding route, and this no-bake instant pudding version all have their moments. But after watching my family—and countless home cooks—struggle with temperamental egg-based custards and burnt cream on the bottom of saucepans, I became convinced that the no-bake method deserves serious consideration. As a registered dietitian, I appreciate how this version gives you control over ingredients while delivering foolproof results.
The Methods Compared: A Honest Breakdown
Let me walk you through the three most common approaches I’ve tested, because understanding the tradeoffs helps you pick the right method for your situation.
- Traditional Baked Custard Method – This is the showstopper pie that requires cooking an egg-based custard, carefully tempering eggs so they don’t scramble, pouring into a pre-baked crust, and often topping with meringue. Pros: absolutely silky texture, impressive presentation, classic flavor. Cons: time-intensive (easily 3+ hours including cooling), requires confident egg-handling skills, meringue can weep or brown unevenly, temperature control is critical. Best for: bakers with experience and time to spare, special occasions where traditional matters more than convenience.
- Stovetop Pudding Method – You cook cornstarch-based pudding directly on the stove, pour it into a crust, chill, then top with whipped cream. Pros: slightly more “homemade” than instant pudding, good flavor control, moderate difficulty. Cons: requires constant stirring to prevent lumps and scorching, takes 20-30 minutes of active attention, cleanup involves multiple pots and pans, risk of a grainy texture if something goes wrong. Best for: cooks who enjoy the stovetop process and don’t mind active supervision.
- No-Bake Instant Pudding Method (This Recipe) – You whip heavy cream to stiff peaks, fold it into instant pudding mixed with cold milk, layer with bananas in a prepared crust, and refrigerate. Pros: ready in 15 minutes of active time, foolproof chemistry, incredibly stable texture, minimal cleanup, no cooking required, tastes every bit as indulgent as traditional versions. Cons: relies on instant pudding (though quality has improved dramatically), requires cold ingredients for proper whipping. Best for: Anyone who wants foolproof elegance without fussing, weeknight entertaining, beginners building confidence, families with dietary restrictions around eggs.
Why This Version Beats the Rest
I’m going to be honest: this no-bake method doesn’t win on “homemade points” if you’re comparing it to a custard made from scratch. But here’s what it does win on: reliability, texture consistency, and the reality of modern life. When I make this pie, I know exactly what I’m getting—a silky, creamy filling that stays perfectly stable for days. There’s no risk of a broken custard, no meringue that weeps into the filling, no scrambled eggs hiding in the cream layer.
The sensory experience is exceptional. Modern instant vanilla pudding mixes have evolved far beyond what they were 20 years ago—the flavor is genuinely vanilla-forward, and when you fold in freshly whipped heavy cream, you’re creating an airy, luxurious texture that feels indulgent without being heavy. The cold milk and cold whipped cream combined with the instant pudding creates a mousse-like filling with incredible body and structure.
Most importantly, the bananas stay bright and fresh-looking when you layer them right before serving, and the crust stays crispy throughout the entire chill time. Try that with a traditional custard and watch how condensation makes the crust soggy after a few hours. This method respects both components and treats them with individual care.
The Ingredients
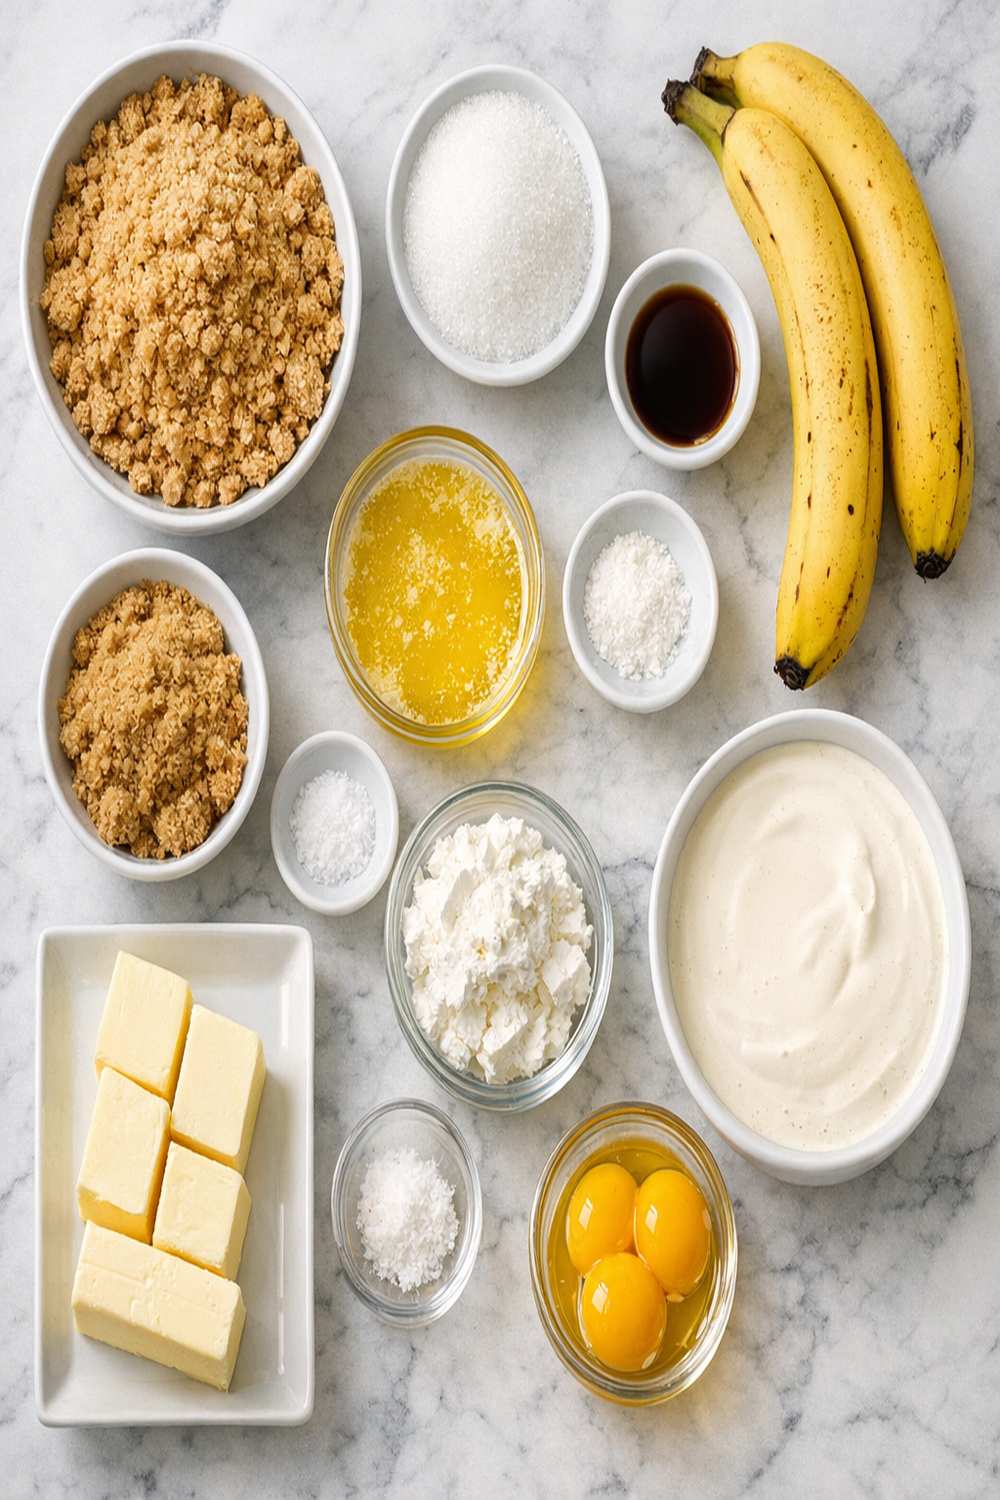
I’ve selected each ingredient deliberately because this pie lives or dies by the quality of what you use. The heavy cream needs to be genuinely cold—this isn’t where you save money on store brands that taste like nothing. The instant pudding mix is non-negotiable; homemade pudding takes 30 minutes, this takes 2 minutes, and texture-wise they’re nearly identical once folded with whipped cream. Fresh bananas matter enormously for color and flavor.
For the Filling
- 2 cups heavy whipping cream (must be properly chilled—store in the coldest part of your refrigerator for at least 2 hours before whipping)
- 2 medium bananas (sliced just before assembly, about ¼-inch thick—thinner slices integrate better)
- 2 tablespoons granulated sugar (superfine sugar whips slightly faster, but standard granulated works perfectly)
- 1 box (3.4 ounces) vanilla instant pudding mix (the standard box size, not the larger packages)
- 1 teaspoon pure vanilla extract (not imitation—the difference matters in a minimalist recipe like this)
- 1 cup whole milk (cold, full-fat for richest flavor and proper pudding setting)
- ½ teaspoon pure vanilla extract (for the pudding layer, adds depth to instant mix)
For Assembly
- 1 prepared 9-inch graham cracker crust (store-bought is absolutely fine, or homemade if you prefer)
- ¼ teaspoon sea salt (a pinch added to the whipped cream layer rounds out flavors brilliantly)
Expert’s Nutritional Tip: I make this pie regularly because despite being a classic indulgence, one slice (when cut into 8 pieces) provides roughly 380 calories with 22 grams of protein from the dairy—making it more satisfying than the numbers alone suggest. The banana contributes potassium and natural carbohydrates that pair beautifully with the cream, creating balanced satiation rather than a sugar crash.
How to Make the Best Version of Banana Cream Pie with Graham Cracker Crust
I’m going to walk you through each step with the precision that comes from teaching hundreds of home cooks how to master this pie. The order matters, the temperatures matter, and the timing matters. But here’s the encouraging part: when you follow these steps exactly, the chemistry handles itself. You’re not fighting against the recipe; you’re working with it.
Step 1: Chill Your Equipment
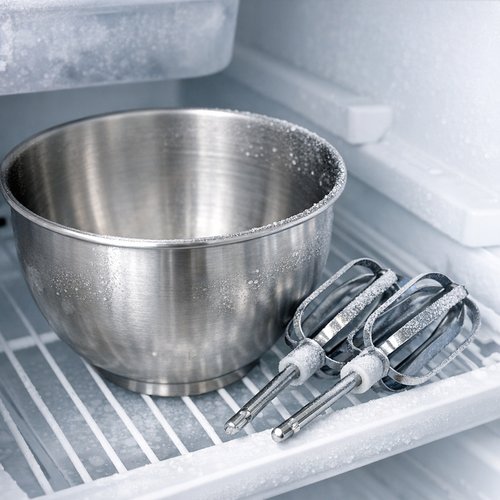
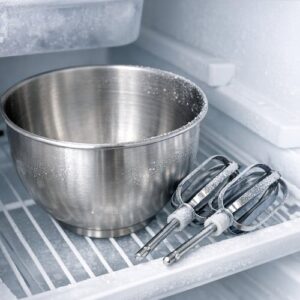
This is the foundation step that separates successful whipped cream from a weeping puddle. Place your mixing bowl and beaters in the freezer for 10-15 minutes while you gather everything else. Cold equipment keeps the cream’s fat molecules stable as you whip, creating those gorgeous stiff peaks. I learned this from my mother, who insisted that shortcuts on equipment setup guarantee failure—and she was absolutely right. Remove your heavy cream from the refrigerator at the same time; it needs to be genuinely cold (around 35°F) before you begin.
Step 2: Create the Whipped Cream Layer
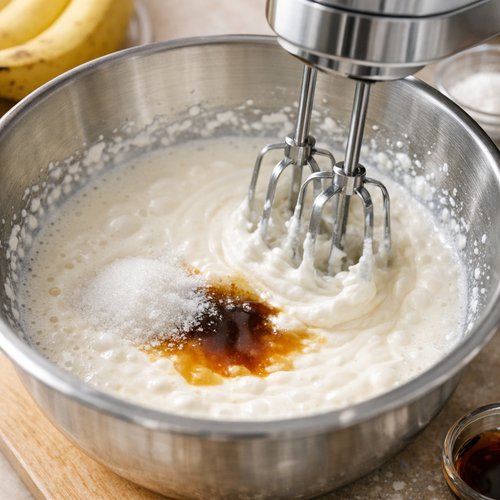
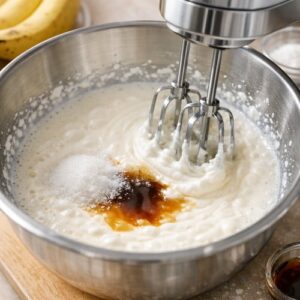
Pour your cold heavy cream into the chilled bowl. Add the 2 tablespoons of granulated sugar and 1 teaspoon of vanilla extract. Begin beating on medium-high speed. You’re looking for specific texture progression here: first you’ll see it begin to thicken (about 1-2 minutes), then soft peaks will form (when you lift the beaters, the cream holds a shape but the peak folds over), then medium peaks (peaks stand taller but still have a slight bend), then stiff peaks (where peaks stand completely upright).
Stop at medium-to-stiff peaks—not beyond. Over-whipping creates grainy texture and breaks the cream structure. This takes about 3-5 minutes total depending on your mixer’s power. Set this aside in your mixing bowl (don’t transfer it yet) and move to the next step immediately while the cream is at peak freshness.
Step 3: Prepare the Pudding Base
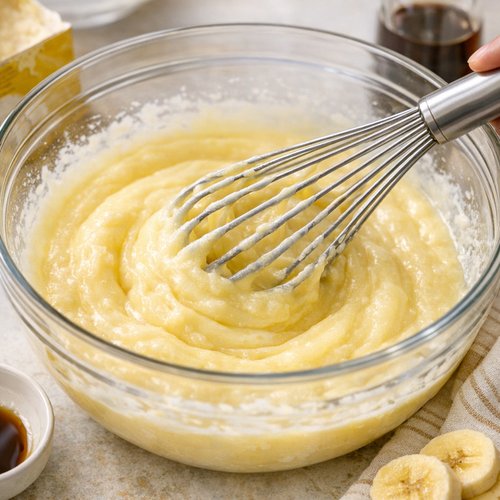
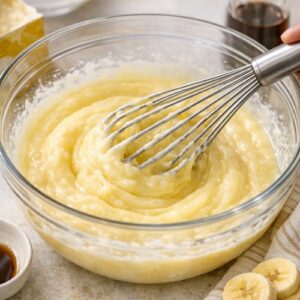
In a separate large bowl, combine 1 cup of cold whole milk with ½ teaspoon vanilla extract and the entire 3.4-ounce box of instant pudding mix. Whisk by hand for about 60 seconds—you’re looking for the mixture to thicken and become smooth. This happens faster than you’d expect; instant pudding sets almost immediately when whisked with cold liquid. The pudding should be uniform in color with no white streaks of unmixed powder remaining.
Here’s a critical detail: if you whisk for longer than 90 seconds, the pudding becomes too thick to fold gracefully. It’ll still taste wonderful, but it’s harder to incorporate the whipped cream evenly. Conversely, if you whisk for only 30 seconds, it stays too thin and won’t hold its structure in the pie. Aim for that 60-second sweet spot where everything thickens into mousse-like consistency.
Step 4: The Folding Technique (This Matters)
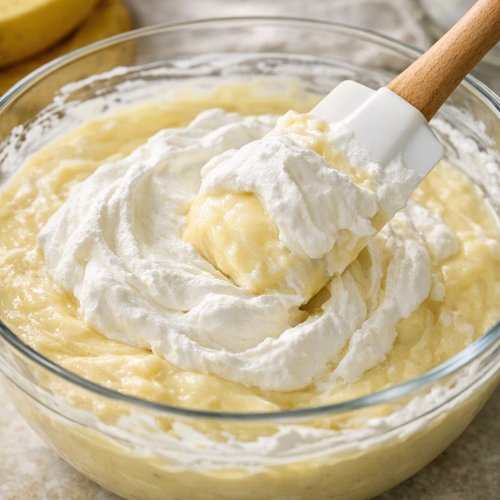
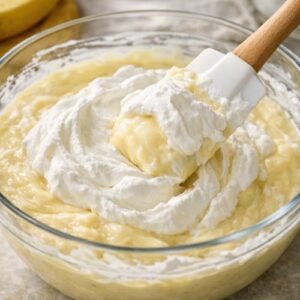
Gently fold approximately 3 cups of your whipped cream into the pudding mixture using a rubber spatula. Folding isn’t stirring—it’s a specific technique that preserves the whipped cream’s airiness while combining it with the pudding. Here’s exactly how: cut down the center of the bowl with your spatula, sweep along the bottom, and fold the pudding mixture over the whipped cream. Rotate the bowl slightly and repeat until no white streaks of whipped cream remain visible, about 8-10 folds total.
You’re building what I call a “cloud-like mousse”—it should be pale, fluffy, and hold its shape when you scoop it. Do not beat or over-mix, as this deflates all your hard work whipping the cream. This folding process takes maybe 30 seconds of gentle, deliberate movement. If you rushed the whipped cream too far (to stiff peaks that are grainy), this folding step is more forgiving. If you under-whipped, the mixture stays a bit thinner but still works.
Step 5: Layer One: Foundation
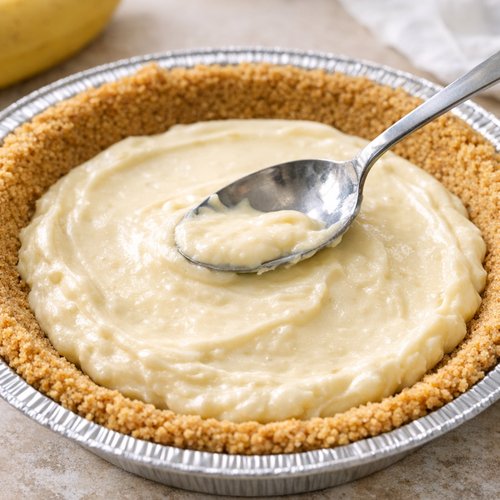
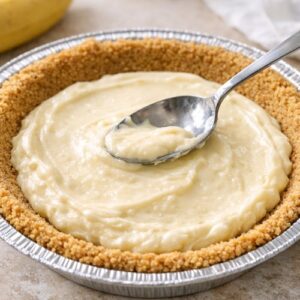
Spoon approximately half of your pudding-cream mixture into the 9-inch prepared graham cracker crust, spreading it gently to create an even layer across the bottom. Use the back of your spatula to level it—this helps the banana layer sit evenly. The foundation layer should be about ¾-inch thick. This base layer acts as a shock absorber, preventing the bananas from settling directly against the crust (which would make it soggy) and distributing them evenly throughout the pie.
Step 6: Layer Two: Fresh Bananas
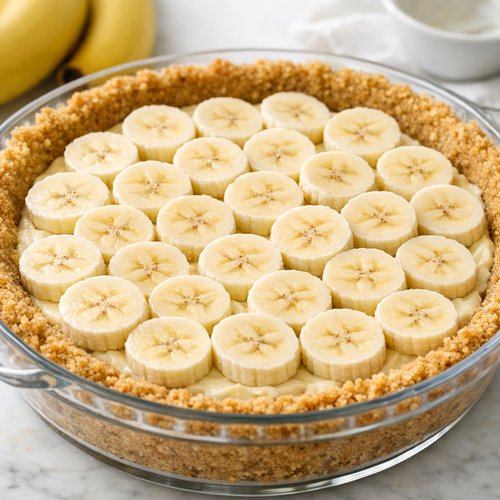
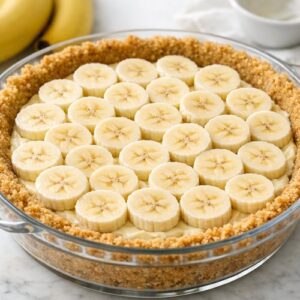
Slice your medium bananas just moments before this step—fresh banana slices stay bright and don’t oxidize brown. Arrange them in a single, slightly overlapping layer across the pudding base. You’ll fit approximately 12-15 slices depending on how thin you cut them. The bananas should cover most of the surface without stacking. This single-layer approach means every slice gets a supporting cradle of pudding underneath and above, ensuring they stay suspended rather than settling or floating.
Step 7: Layer Three: Second Pudding Layer
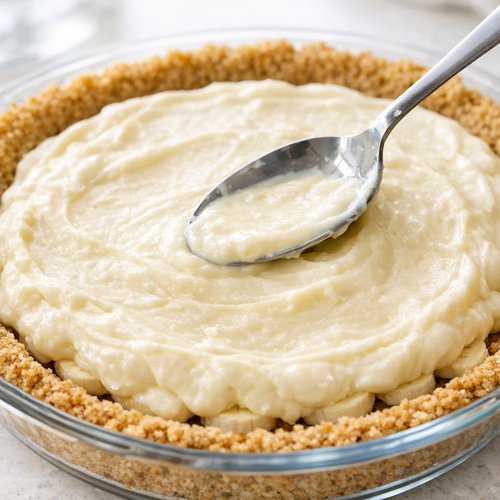
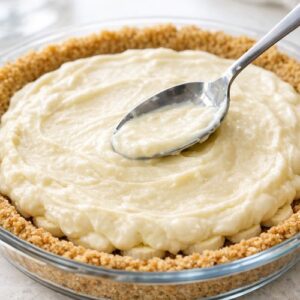
Spoon your remaining pudding-cream mixture evenly across the banana layer, gently spreading it to seal the bananas in place. This layer should be about ½-inch thick and completely cover the banana slices. As this layer chills and sets, it creates a protective seal around the bananas, slowing oxidation and keeping them moist and protected. The result is bananas that stay fresh and bright rather than darkening throughout storage.
Step 8: The Crown: Final Whipped Cream Layer
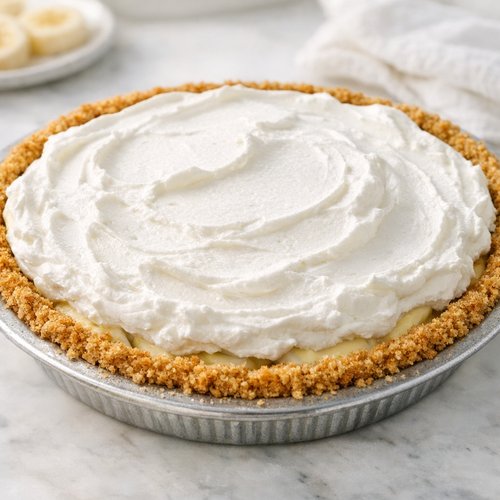
Top the entire pie with your reserved whipped cream, creating a generous, rustic layer across the surface. You can spread it smoothly with an offset spatula for a refined look, or leave it in soft, natural peaks for a homestyle appearance. Reserve any remaining whipped cream for serving—it’s wonderful as an additional dollop on individual slices. If desired, slice another fresh banana and arrange thin slices around the top perimeter just before serving for a beautiful presentation.
Step 9: Chill and Set
Refrigerate the completed pie for at least 4 hours, but ideally overnight. During this time, the pudding mixture continues to set slightly, the layers meld together, and flavors deepen. The pie is technically ready to serve after 2 hours, but the texture becomes noticeably more stable after the full overnight chill. This makes it perfect for baking the night before a gathering.
Side-by-Side Results: What to Expect
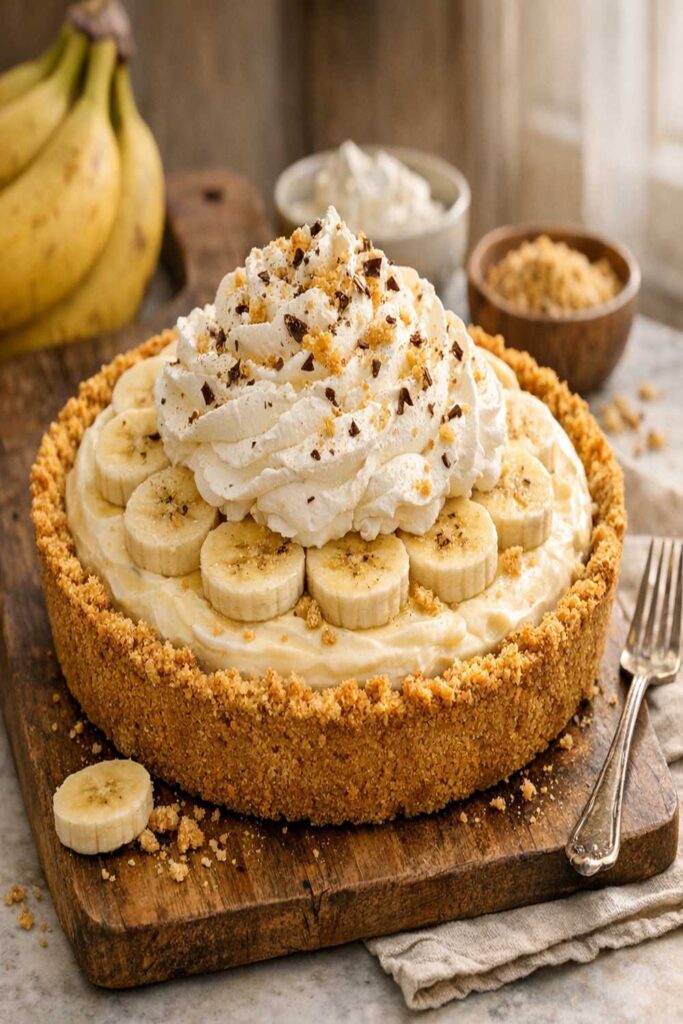
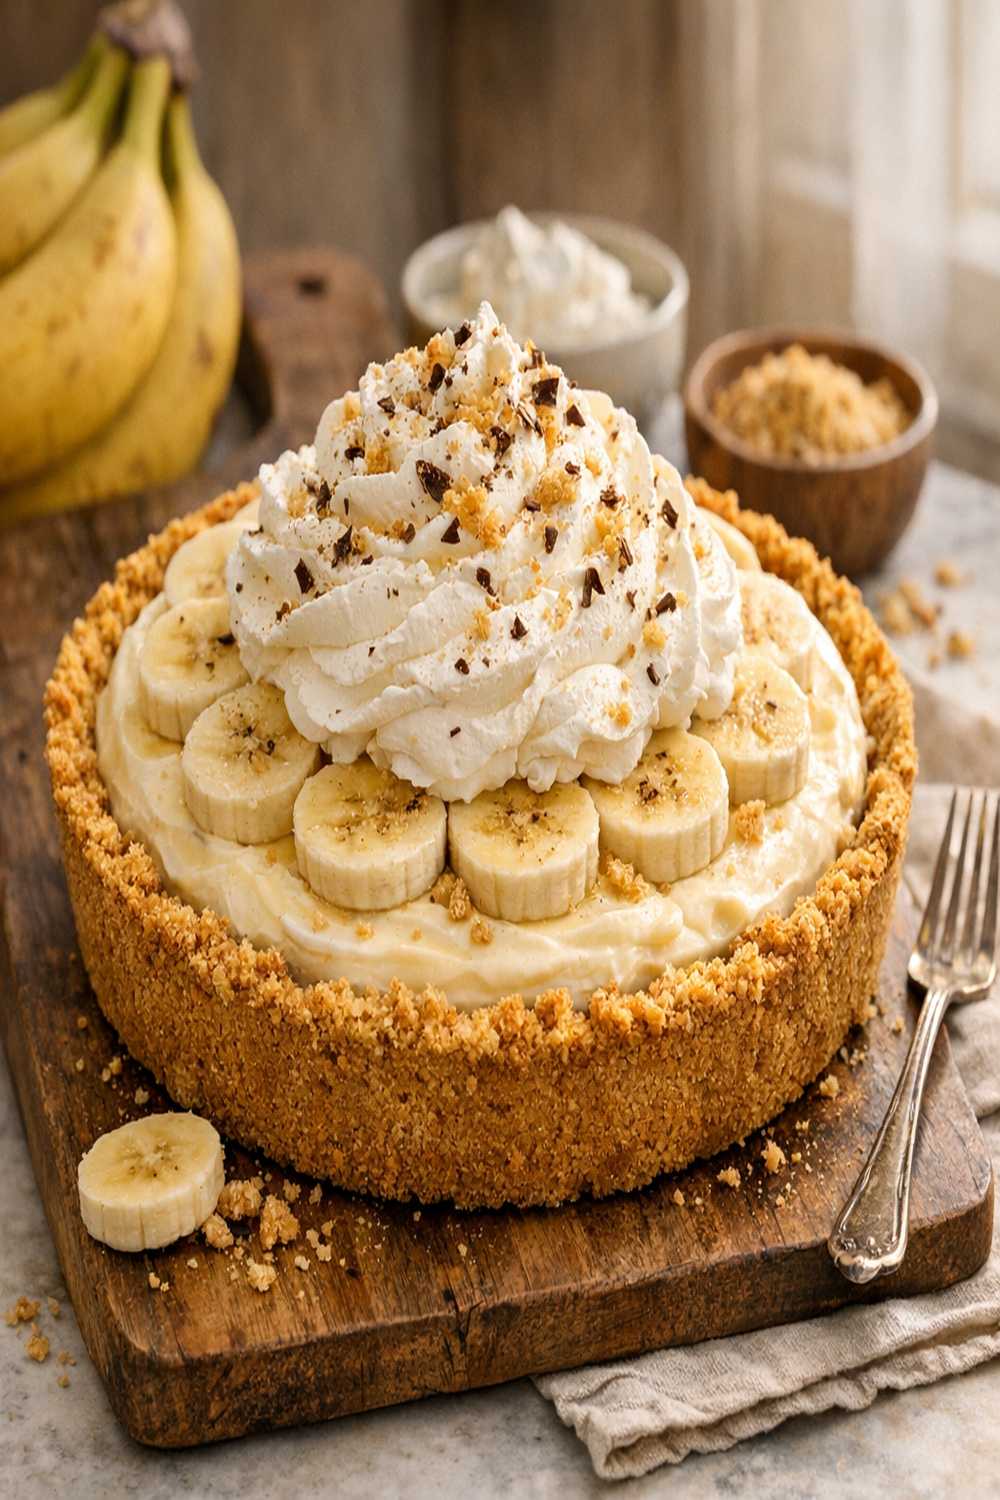
When you pull this pie from the refrigerator after proper chilling, here’s exactly what you’re getting: a clean cross-section showing distinct but integrated layers—the tan graham cracker crust on the bottom, a layer of fluffy pudding mousse studded with banana slices, another layer of creamy pudding, and a generous crown of whipped cream on top.
Texture-wise, the filling is silky and mousse-like, never grainy or gluey. The banana slices maintain their firm integrity while absorbing the pudding’s vanilla flavor. The whipped cream layer stays fluffy and separate from the pudding layers rather than melting into them. Flavor-wise, you get vanilla on top of vanilla, but they’re different expressions—the whipped cream is sweet and light, the pudding is deeper and more custard-like, and the banana threads through with natural sweetness and subtle nuttiness.
Compared to the baked custard method, this pie feels slightly lighter and airier (not a bad thing). Compared to the stovetop pudding version, it’s less labor-intensive but equally creamy. The banana flavor shines because you’re not masking it with complicated layers of technique.
When to Use Each Method
- Traditional Baked Custard: When you’re making pie for a wedding, milestone birthday, or event where visual drama and “homemade from every angle” matters more than convenience. You have an extra 2 hours and want the absolute creamiest texture imaginable. Best method for impressing experienced pie judges.
- Stovetop Pudding: When you want to feel like you cooked the pudding from scratch (which has real merit and satisfaction), but you’re not committed to full custard-making labor. Best for home cooks who find active cooking meditative and enjoy the small batch feel of a single saucepan.
- No-Bake Instant Pudding (This Recipe): When you want foolproof results without equipment failure or scrambled eggs in your filling. Perfect for weeknight entertaining, your first pie-making experience, situations where you’re making it the night before, dietary restrictions against raw eggs, or when you simply want to spend 15 minutes on assembly rather than 2 hours. Best for building confidence and creating reliable magic.
Can I Store Banana Cream Pie with Graham Cracker Crust?
This pie has excellent keeping qualities—better than the traditional baked version, actually. Refrigerate your completed pie covered loosely with plastic wrap for up to 3 days. The filling remains stable, the crust stays crisp, and the flavors actually deepen slightly after the first day.
The only component that changes is the banana slices, which gradually oxidize and darken slightly. To minimize this, don’t slice your banana topping until just before serving—keep whole bananas on hand and slice fresh ones right before plate-up. If you’ve already sliced them into the pie, the darkening is purely cosmetic and doesn’t affect flavor.
Do not freeze this pie. The whipped cream texture breaks down when frozen and thawed, creating a weeping, separated mess. The banana also becomes mealy. This is one dessert best enjoyed fresh, which is wonderful—it gives you an excellent excuse to make it frequently.
Leftover individual slices keep covered in the refrigerator for up to 2 days. The cream layer and pudding hold beautifully; the crust gradually softens as it absorbs moisture, which some people prefer and others find less appealing. If you prefer crust texture, consume within 24 hours.
Nutrition Information
According to USDA food composition data, one slice of this pie (calculated as 1/8 of the whole pie) provides approximately 380 calories, 22 grams of total fat, 42 grams of carbohydrates, 15 grams of protein, and 210 milligrams of calcium. The milk and heavy cream contribute dairy calcium and protein, making this more nutritionally balanced than pure cream-based desserts.
The banana contributes about 105 calories per medium banana along with potassium (around 420 milligrams), dietary fiber (about 3 grams), and vitamin B6. When calculated per serving, you’re getting meaningful micronutrients alongside the indulgence. The sugar content is approximately 32 grams per slice, primarily from the pudding mix and added sugar, plus about 12 grams from the banana’s natural sugars.
If you’re managing sugar intake, you could reduce the granulated sugar in the whipped cream layer by half (using only 1 tablespoon)—you won’t notice the difference in sweetness because the pudding mix and bananas provide plenty. Some home cooks substitute sugar-free vanilla pudding mix, though I find it slightly thinner in mouthfeel; if you go that route, whip your cream to slightly stiffer peaks to compensate for the texture difference.
What Can I Serve With Banana Cream Pie with Graham Cracker Crust?
This pie is legitimately perfect on its own, but here’s where my dietitian background meets my cook’s heart: strategic serving choices elevate the experience without overwhelming it.
- Strong Black Coffee: The bitterness cuts through the sweetness beautifully, and the cream in your coffee echoes the pie’s richness. This is my go-to pairing for after-dinner dessert.
- Fresh Whipped Cream (Extra): Keep additional whipped cream on hand for generous dollops on each slice. The contrast between the cold pie and fresh cold cream is genuinely luxurious.
- Brewed Iced Tea: Unsweetened or lightly sweetened tea with lemon provides refreshing balance, especially in warm weather. The tartness of lemon pairs surprisingly well with banana and vanilla.
- A Simple Fruit Salad: Something like fresh strawberries, blueberries, and a squeeze of lime juice provides brightness and prevents pie-only indulgence from feeling heavy. The acidity wakes up your palate between bites of cream.
- Complementary Desserts: Pair a slice of this pie alongside something lighter—maybe these homemade cookies for texture contrast, or Stewed Plums for tart fruit balance. The plums’ tartness particularly complements the vanilla-banana flavor profile.
Expert’s Make-Ahead Guide
One of my favorite secrets about this pie is how beautifully it accommodates busy schedules. Here’s my professional make-ahead strategy: Prepare the entire pie up to 2 days ahead, minus the fresh banana topping.
Day 1 (Preparation Day): Make the complete pie exactly as written, but don’t top it with fresh banana slices yet. Once assembled and chilled overnight, cover it loosely with plastic wrap and refrigerate. The pudding mixture and whipped cream layers benefit from extra chill time and actually taste slightly better after sitting for 24 hours—flavors integrate and deepen.
Serving Day: About 30 minutes before serving, slice fresh bananas and arrange them on top of the pie as your garnish. This ensures bright color and the freshest possible texture. Alternatively, keep whole bananas on hand and slice them directly onto individual plates as you serve.
For Entertaining: Make the pie the day before your gathering. On serving day, you can slice and plate individual pieces 2-3 hours before guests arrive, covering them loosely with plastic wrap in the refrigerator. The pie holds beautifully through room-temperature serving (up to 3 hours in a cool room), so you’re never stressed about timing.
Common Mistakes to Avoid
Mistake #1: Using Warm or Room-Temperature Heavy Cream – The cream won’t whip to proper peaks, leaving you with a thin, separated filling that weeps liquid by the next day. Always chill your cream for at least 2 hours, and preferably overnight. Store it in the coldest part of your refrigerator (the back of the bottom shelf).
Mistake #2: Over-Whisking the Pudding Mix – Whisking past 90 seconds creates pudding so thick it won’t fold smoothly with the whipped cream, leaving you with grainy, uneven texture. Set a timer for 60 seconds and stop when the mixture thickens to mousse-like consistency. You want it pourable but thick—it should hold a peak when you lift the whisk but not be stiff.
Mistake #3: Slicing Bananas Hours Before Assembly – Bananas oxidize quickly when sliced, turning brown and developing an unappetizing appearance even if the flavor isn’t affected. Slice them literally 5 minutes before layering them into the pie, or arrange fresh slices on top just before serving. This single decision determines whether your pie looks restaurant-quality or like it’s been sitting in a cafeteria all day.
Mistake #4: Over-Mixing the Whipped Cream and Pudding – I see this constantly with home cooks used to standard mixing techniques. This isn’t the time for a spatula or mixer; you’re folding gently by hand, turning the bowl, and repeating. Vigorous mixing deflates all your whipped cream work, leaving you with thin, mousy filling instead of luxurious cloud-like mousse.
Seasonal Variations
This pie’s flexibility is one of its greatest strengths. Here’s how I adapt it throughout the year:
Spring/Summer Version: Reduce the sugar in the whipped cream layer to 1 tablespoon and add ½ tablespoon of lemon zest. The brightness prevents the pie from feeling heavy in warm weather. Serve with fresh berries on the side rather than baked goods. Consider using ½ teaspoon almond extract instead of vanilla in the whipped cream layer for subtle complexity.
Fall Version: Add ¼ teaspoon of cinnamon and a pinch of nutmeg to the whipped cream sugar mixture before beating. Use this spiced whipped cream as your top layer. The warmth of the spices complements bananas beautifully and makes the pie feel more seasonal. Pair with coffee or cinnamon tea.
Winter/Holiday Version: Prepare exactly as written, but add 1 tablespoon of dark rum or 1 teaspoon of rum extract to the pudding mixture (in place of the vanilla extract). Add ¼ teaspoon of vanilla extract separately. The subtle warmth is genuinely sophisticated and shifts the pie into entertaining-season territory.
Lighter Summer Version: Substitute half the heavy cream with Greek yogurt (1 cup cream + ½ cup Greek yogurt instead of 2 cups cream). Whip the cream as written, then fold in the Greek yogurt with its vanilla separately. You’ll get a slightly less rich but still creamy filling with added protein and tang—around 30% fewer calories per slice while maintaining texture.

Banana Cream Pie Graham Cracker Crust Recipe
Ingredients
Method
- This is the foundation step that separates successful whipped cream from a weeping puddle. Place your mixing bowl and beaters in the freezer for 10-15 minutes while you gather everything else. Cold equipment keeps the cream's fat molecules stable as you whip, creating those gorgeous stiff peaks. I learned this from my mother, who insisted that shortcuts on equipment setup guarantee failure—and she was absolutely right. Remove your heavy cream from the refrigerator at the same time; it needs to be genuinely cold (around 35°F) before you begin.
- Pour your cold heavy cream into the chilled bowl. Add the 2 tablespoons of granulated sugar and 1 teaspoon of vanilla extract. Begin beating on medium-high speed. You're looking for specific texture progression here: first you'll see it begin to thicken (about 1-2 minutes), then soft peaks will form (when you lift the beaters, the cream holds a shape but the peak folds over), then medium peaks (peaks stand taller but still have a slight bend), then stiff peaks (where peaks stand completely upright). Stop at medium-to-stiff peaks—not beyond. Over-whipping creates grainy texture and breaks the cream structure. This takes about 3-5 minutes total depending on your mixer's power. Set this aside in your mixing bowl (don't transfer it yet) and move to the next step immediately while the cream is at peak freshness.
- In a separate large bowl, combine 1 cup of cold whole milk with ½ teaspoon vanilla extract and the entire 3.4-ounce box of instant pudding mix. Whisk by hand for about 60 seconds—you're looking for the mixture to thicken and become smooth. This happens faster than you'd expect; instant pudding sets almost immediately when whisked with cold liquid. The pudding should be uniform in color with no white streaks of unmixed powder remaining. Here's a critical detail: if you whisk for longer than 90 seconds, the pudding becomes too thick to fold gracefully. It'll still taste wonderful, but it's harder to incorporate the whipped cream evenly. Conversely, if you whisk for only 30 seconds, it stays too thin and won't hold its structure in the pie. Aim for that 60-second sweet spot where everything thickens into mousse-like consistency.
- Gently fold approximately 3 cups of your whipped cream into the pudding mixture using a rubber spatula. Folding isn't stirring—it's a specific technique that preserves the whipped cream's airiness while combining it with the pudding. Here's exactly how: cut down the center of the bowl with your spatula, sweep along the bottom, and fold the pudding mixture over the whipped cream. Rotate the bowl slightly and repeat until no white streaks of whipped cream remain visible, about 8-10 folds total. You're building what I call a "cloud-like mousse"—it should be pale, fluffy, and hold its shape when you scoop it. Do not beat or over-mix, as this deflates all your hard work whipping the cream. This folding process takes maybe 30 seconds of gentle, deliberate movement. If you rushed the whipped cream too far (to stiff peaks that are grainy), this folding step is more forgiving. If you under-whipped, the mixture stays a bit thinner but still works.
- Spoon approximately half of your pudding-cream mixture into the 9-inch prepared graham cracker crust, spreading it gently to create an even layer across the bottom. Use the back of your spatula to level it—this helps the banana layer sit evenly. The foundation layer should be about ¾-inch thick. This base layer acts as a shock absorber, preventing the bananas from settling directly against the crust (which would make it soggy) and distributing them evenly throughout the pie.
- Slice your medium bananas just moments before this step—fresh banana slices stay bright and don't oxidize brown. Arrange them in a single, slightly overlapping layer across the pudding base. You'll fit approximately 12-15 slices depending on how thin you cut them. The bananas should cover most of the surface without stacking. This single-layer approach means every slice gets a supporting cradle of pudding underneath and above, ensuring they stay suspended rather than settling or floating.
- Spoon your remaining pudding-cream mixture evenly across the banana layer, gently spreading it to seal the bananas in place. This layer should be about ½-inch thick and completely cover the banana slices. As this layer chills and sets, it creates a protective seal around the bananas, slowing oxidation and keeping them moist and protected. The result is bananas that stay fresh and bright rather than darkening throughout storage.
- Top the entire pie with your reserved whipped cream, creating a generous, rustic layer across the surface. You can spread it smoothly with an offset spatula for a refined look, or leave it in soft, natural peaks for a homestyle appearance. Reserve any remaining whipped cream for serving—it's wonderful as an additional dollop on individual slices. If desired, slice another fresh banana and arrange thin slices around the top perimeter just before serving for a beautiful presentation.
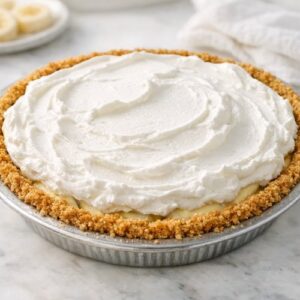
- Refrigerate the completed pie for at least 4 hours, but ideally overnight. During this time, the pudding mixture continues to set slightly, the layers meld together, and flavors deepen. The pie is technically ready to serve after 2 hours, but the texture becomes noticeably more stable after the full overnight chill. This makes it perfect for baking the night before a gathering.
FAQs
Can I make this pie with whipped topping instead of whipped cream?
I don’t recommend it, though I understand the appeal (shelf-stable, no whipping required). The issue is texture and flavor—whipped topping is mostly air and corn syrup, lacking the richness and mouthfeel of genuine heavy cream. When you fold it into the pudding, it doesn’t integrate as smoothly, and by day two, it separates from the filling, leaving weepy liquid. The flavor also reads as noticeably artificial compared to the rest of the pie. Your 15 minutes of prep time is worth the quality upgrade to real cream. However, if dietary needs require it, use it—it’ll still taste better than no pie.
What’s the difference between instant pudding and cook-and-serve pudding?
Instant pudding sets immediately when whisked with cold liquid through modified cornstarch and thickening agents. Cook-and-serve requires heating on the stove to activate properly. For this no-bake pie, instant is non-negotiable—cook-and-serve won’t set properly with cold milk and will create a thin, soupy filling. If you only have cook-and-serve pudding, prepare it according to package directions, chill completely, then fold it into your whipped cream. It’s not ideal (requires extra steps) but does technically work.
Can I use a homemade graham cracker crust instead of store-bought?
Absolutely, though I want to be honest about reality: store-bought crusts are engineered to maintain texture and crispness, and they’re genuinely good. Homemade crusts taste wonderful but are slightly more fragile due to moisture absorption from the filling. If making from scratch, use about 2 cups of graham cracker crumbs, 6 tablespoons melted butter, and 2 tablespoons sugar, press into your pie tin firmly, and bake at 325°F for 8-10 minutes until lightly golden (don’t skip the pre-bake—it prevents sogginess). Cool completely before filling.
How do I prevent the crust from getting soggy?
The layering strategy in this recipe is specifically designed to prevent sogginess. The pudding base layer acts as a moisture barrier between the crust and the banana-pudding layers above. Additionally, the instant pudding (not thin milk) creates a thicker layer that doesn’t seep downward. Finally, serving within 3 days keeps moisture from gradually softening the crust through extended chill time. If you really prefer extra crust protection, brush the inside of the crust lightly with melted white chocolate before filling—it dries to a waterproof seal.
Can I make this pie sugar-free?
Yes, though with adjustments. Use sugar-free vanilla pudding mix (they’re widely available), reduce the granulated sugar in the whipped cream to ½ tablespoon, and consider adding ½ teaspoon of vanilla extract to compensate for the pudding’s slightly thinner texture (it lacks some of the body of full-sugar versions). The banana itself provides natural sweetness. Most people can’t detect that this version is lower-sugar—it still tastes indulgent and satisfying. Your slice count goes down to roughly 22 grams of sugar instead of 32 grams.
More Recipes You’ll Love
- these homemade cookies – Nutty, chewy cookies that pair beautifully alongside pie for texture contrast
- Bakewell Slice – A lovely almond-forward dessert that shares the same easy-assembly appeal
- Chicken Cutlet Sauce Recipe – Because after dessert comes tomorrow’s dinner, and I want to set you up for success there too
The Verdict: Why This Is The Definitive Banana Cream Pie
After years of testing, teaching, and honestly, just making pie because my family requests it, I’m convinced this is the best version for real people living real lives. It’s not the most impressive pie to describe at a dinner party—no temperamental egg cooking, no from-scratch custard drama. But it’s the pie you’ll actually make, the pie that comes out perfect every time, and the pie that tastes every bit as indulgent as methods that take three times longer.
My mother taught me that kitchen magic isn’t about complexity—it’s about understanding your ingredients, respecting your technique, and choosing methods that let you focus on flavor rather than fighting technique. This pie embodies that philosophy. The instant pudding isn’t cheating; it’s smart ingredient selection. The whipped cream isn’t less genuine than a sabayon; it’s easier to control and equally delicious. The no-bake method isn’t shortcuts; it’s acknowledging that cream, sugar, and vanilla don’t need heat to create something remarkable.
Make this pie with confidence. Layer it carefully. Chill it thoroughly. Slice those bananas at the last possible moment. And watch how something so simple creates genuine joy on the faces of everyone you serve it to. That’s the magic that matters.
Cook with confidence!