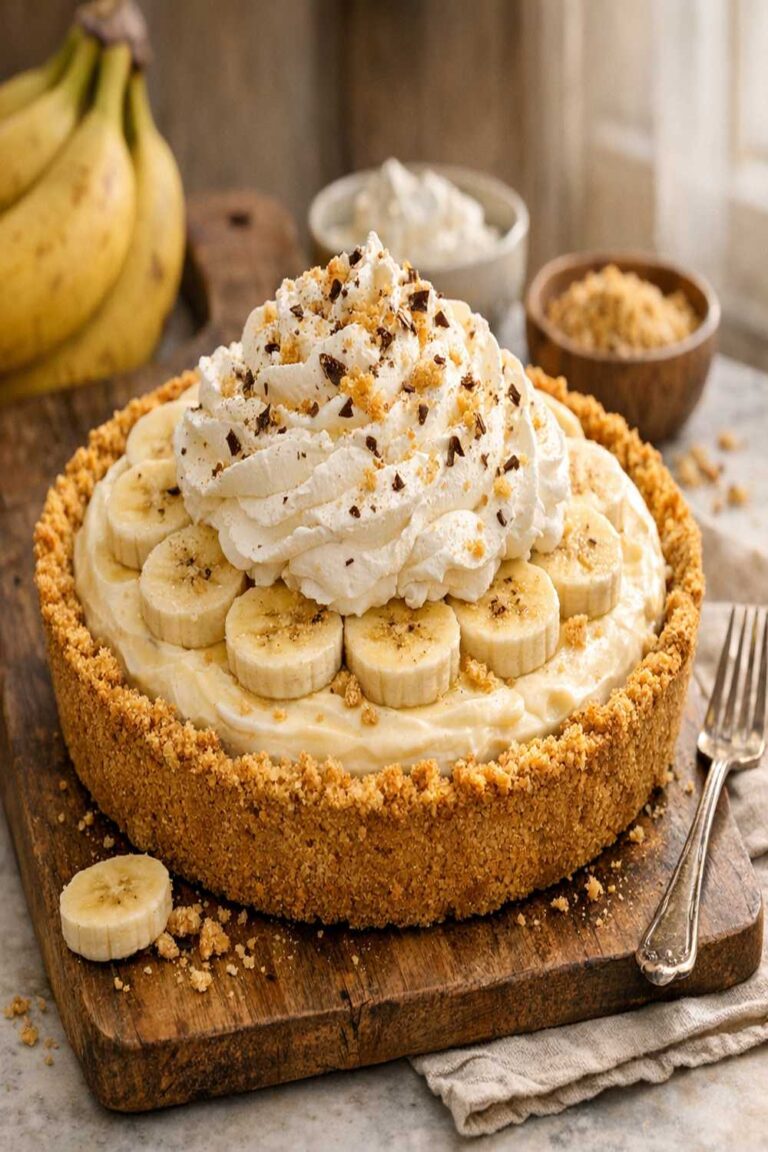
Betty Crocker Pie Crust Recipe

Last Updated on August 11, 2026
This post contains affiliate links. As an Amazon Associate I earn from qualifying purchases.
Getting kids excited about homemade pie crust feels impossible—until you realize that letting them help create something from scratch transforms the entire experience. I’ve watched countless families think store-bought is their only option, but a truly exceptional crust doesn’t require fancy equipment or intimidating techniques. When you nail this foundational recipe, you’ll unlock an entire world of pies, tarts, and galettes that your family will devour. Whether you’re filling it with fresh fruit for a summer celebration or creamy custard for a cozy winter dessert, this is the crust that will become your go-to foundation for unforgettable meals.
The Perfect Homemade Pie Crust That Actually Works (Even for Beginners)
I’ll never forget watching my grandmother work her pie magic in her Texas kitchen. Her hands would move with such confidence—mixing, folding, creating what seemed like edible architecture. What I didn’t realize then was that her secret wasn’t complexity; it was understanding the *why* behind each step. Years later, as a registered dietitian, I learned that the science behind a flaky crust is beautifully simple: cold fat creates steam pockets during baking, which separates the flour layers into those coveted flakes. When I started teaching my own children this recipe, I witnessed the exact same wonder in their eyes that I’d felt decades earlier. They weren’t just learning to bake; they were becoming part of a tradition that transforms basic pantry staples into something magical.

Why Kids Love Making Homemade Pie Crust
There’s something deeply satisfying about involving children in pie-making. Unlike many recipes where kids must wait passively, crust-making gives them tactile involvement at every stage. They can feel the transformation as the dough shifts from crumbly to cohesive. They understand cause and effect when they see how cold water makes the dough come together. Most importantly, they develop genuine investment in the final product because their hands literally shaped it.
- Hands-On Texture Play – Children engage their senses by cutting fat into flour, mixing with their fingers, and watching dough transform. This sensory experience makes them far more likely to enjoy eating something they’ve physically created.
- Age-Appropriate Success – Every age group finds success in crust-making. Toddlers can sprinkle and mix; school-age kids can measure and cut; teenagers can manage the entire process independently. This builds genuine confidence in the kitchen.
- Quick Gratification – Unlike cookies or cakes that require lengthy baking and cooling, a pie crust comes together in about 15 minutes of hands-on time. Kids see results fast, which keeps their enthusiasm high.
How to Get Kids Involved in Making This Recipe
- Ages 3-5: The Sprinkle Station – Let little ones measure the flour into the bowl and sprinkle the salt. They can pour water (you control the amount) and use a fork to toss everything together. Their job is mixing and incorporating—which they’ll feel incredibly proud of accomplishing.
- Ages 6-9: The Cutting Crew – School-age children can handle cutting the cold shortening into smaller pieces before the mixing begins. They can also manage the fork-tossing step and help gather the dough into a ball. Supervise the cold water additions to prevent oversaturation.
- Ages 10+: The Master Baker – Older kids can execute the entire recipe independently, including measuring all ingredients, cutting fat into flour (using a pastry blender or two knives), adding water methodically, and managing the refrigeration timeline. They can even handle rolling out the dough with guidance on technique.
The Ingredients—Simple Staples That Create Magic

What amazes me most about this crust is how few ingredients it requires. No eggs, no sugar, no vanilla extract—just four components that work together to create something genuinely spectacular. From a nutrition standpoint, I appreciate that this isn’t a loaded recipe; it’s a vehicle for whatever filling your family chooses. Pair it with nutrient-dense fruit fillings, and you’ve created a dessert with real nutritional value. The beauty of simplicity is that quality matters tremendously. Each ingredient should be the best version available in your kitchen.
- 1 cup plus 1 tablespoon all-purpose flour (spooned and leveled into your measuring cup, never packed down—this keeps your crust tender)
- ½ teaspoon fine sea salt (enhances flavor and strengthens gluten structure for better texture)
- 1 teaspoon fresh lemon juice (optional but highly recommended—acid tenderizes gluten and adds subtle flavor depth)
- 3 to 5 tablespoons ice-cold water (the temperature matters tremendously—warm water develops gluten and creates tough, chewy crust)
- ⅓ cup vegetable shortening or cold unsalted butter (both work beautifully; shortening creates flakier results, while butter adds incredible flavor)
Yield: One 9-inch pie crust
Expert’s Nutritional Tip
Here’s something most recipes won’t tell you: the type of fat you choose affects both nutrition and texture. Vegetable shortening creates maximally flaky crust because it has a higher melting point than butter, creating more distinct steam pockets. However, unsalted butter adds valuable fat-soluble vitamins A, D, E, and K—nutrients that support bone health and immune function in growing kids. My recommendation? Make it half shortening and half cold butter for the ultimate balance of flakiness and nutritional benefit. You’ll get superior texture *and* the nutritional advantage of real dairy.
How to Make the Perfect Pie Crust for Your Whole Family
This is where the magic happens. I’m going to walk you through every single step with specific details about what you’re looking for, what mistakes to avoid, and exactly where children can safely participate. Treat this as a family project, not a chore. The memories you create while making this together matter more than achieving absolute perfection.
Step 1: Combine Your Dry Ingredients
Start by pouring your flour into a medium-sized mixing bowl. Measure it correctly by spooning it directly from your flour container into a dry measuring cup, then level the top with a straight edge. Never scoop the measuring cup directly into the flour bag—this compacts the flour and gives you too much. Add your salt and whisk them together for about 15 seconds. This distributes the salt evenly throughout, ensuring consistent flavor in every bite. If children are helping, let them whisk; it’s excellent arm strengthening and they can’t go wrong with this step.

Step 2: Cut the Shortening Into Flour (The Most Critical Step)
This step determines whether your crust will be flaky or dense. Remove your shortening or butter from the refrigerator. If using butter, cut it into small cubes about the size of peas. Add it to your flour mixture and use either a pastry blender (a specialized tool with wire loops that’s incredibly helpful and affordable) or two dinner knives. If using knives, hold one in each hand and pull them in opposite directions through the mixture repeatedly. Work steadily for about 3-4 minutes until the mixture looks like coarse breadcrumbs with pea-sized pieces of fat throughout.
This is genuinely the most important step, so let me explain the why: those small pockets of cold fat won’t mix into the flour. During baking, they’ll melt and create steam, which pushes the flour layers apart and creates flakiness. The instant your fat becomes too warm or gets fully incorporated, you’ve lost that crucial texture. Keep everything cold. If it’s a hot day in Texas (which is most days), chill your bowl and tools in the refrigerator for 10 minutes before starting.

Step 3: Add Ice Water Gradually and Toss Intentionally
This requires patience, but it’s non-negotiable. Sprinkle exactly 1 tablespoon of ice-cold water over the flour mixture. Using a fork, toss everything together gently. Add another tablespoon of water and toss again. Continue adding water one tablespoon at a time, tossing after each addition. You’re looking for the moment when all the dry flour is moistened and the dough *almost* leaves the side of the bowl on its own. This typically happens after about 4 tablespoons of water, but the exact amount depends on humidity, flour brand, and your specific kitchen conditions.
Do not add all the water at once. Do not mix aggressively. Do not knead. The gentler you are here, the more tender your final crust will be. Kids can absolutely handle this step if you control water additions—let them toss and watch the transformation.

Step 4: Gather and Form Your Dough Ball
When the dough is ready, use your hands to gently gather it into a rough ball. It should hold together when pressed but shouldn’t feel wet or sticky. If it’s crumbly and won’t hold together, add a scant teaspoon more water. If it’s sticky to the touch, sprinkle a tiny bit of flour and work it in gently. Once gathered into a ball, shape it slightly flat (it should look like a thick hockey puck or small burger patty) on a piece of plastic wrap.

Step 5: Refrigerate Until Firm and Cold
Wrap your flattened dough round in plastic wrap and refrigerate for approximately 45 minutes. This resting period serves multiple critical purposes. The shortening or butter becomes firm again after being slightly warmed during mixing, which is essential for flakiness. The flour also hydrates more completely and evenly, making the dough easier to roll without tearing. The gluten network relaxes, which prevents shrinkage during baking. This isn’t wasted time; it’s essential preparation. If you refrigerate longer than 45 minutes—even overnight—that’s completely fine. Simply let the dough sit at room temperature for 5-10 minutes before rolling if it’s rock-hard.

Step 6: Roll Out Your Dough
Remove your chilled dough from the refrigerator and place it on a lightly floured work surface. Using a floured rolling pin, roll the dough into a circle approximately 2 inches larger in diameter than your 9-inch pie plate. Work from the center outward, rotating the dough frequently to ensure even thickness. If the dough cracks at the edges, don’t panic—simply pinch it back together. This is completely normal and won’t affect your final result.
The dough should be about ⅛-inch thick, similar to the thickness of a credit card. If you’re rolling and the dough becomes too warm (you’ll notice it sticking), slide it onto a plate and refrigerate for 5 minutes. Cold dough rolls more easily and won’t stretch excessively (stretched dough shrinks during baking).

Step 7: Transfer and Shape in Your Pie Plate
Once rolled to the proper size, fold your dough into fourths like a handkerchief. This makes it easy to transfer without stretching. Place the folded dough into your pie plate with the pointed corner at the center, then carefully unfold it. Gently ease the dough into the plate by lifting the edges slightly and letting gravity help it settle into the bottom and corners. Never stretch the dough downward or outward—this causes shrinkage during baking. Press it gently but firmly against the bottom and sides.
Trim any overhanging edges so they extend about 1 inch beyond the rim of your plate. Fold this overhang under itself, creating a doubled edge even with the plate rim. This creates a barrier that prevents burning and looks professionally finished. Now flute the edge: place your thumb and index finger on the outside of the rim and push the dough upward with your other index finger, creating a wave pattern. Continue around the entire perimeter.

Step 8: Prick and Pre-Bake Your Crust
Using a fork, prick the bottom and sides of your crust thoroughly—aim for about 20-25 small holes total. This prevents the bottom from puffing up with steam during baking and creates an even texture. Preheat your oven to 475°F. Place your prepared crust in the oven and bake for 8-10 minutes, until the bottom just turns light golden brown. The crust should be partially cooked at this point, not fully baked.
Remove it from the oven and let it cool on a wire rack for several minutes before adding your filling. If you’re making a cream pie or custard pie, you’ll want the crust fully cooled. If you’re adding a wet fruit filling, the slight residual heat will help set the crust structure.

Common Mistakes to Avoid (So Your Crust Turns Out Perfect)
- Mistake #1: Using Warm Ingredients – Room-temperature butter or shortening won’t create flakiness. The fat must stay cold throughout mixing. If your kitchen is over 72°F, chill everything in the refrigerator first, including your bowl and measuring cups. I’m not exaggerating—this single factor determines success or failure.
- Mistake #2: Adding Too Much Water – This is the most common error I see. Resist the urge to add water generously “just to be safe.” Too much water develops gluten, creating a tough, chewy crust instead of a tender, flaky one. Add water slowly, one tablespoon at a time, and stop the moment the dough holds together.
- Mistake #3: Skipping the Refrigeration Step – I understand the temptation to skip this and just roll out the dough immediately. Don’t. Those 45 minutes transform your crust from potentially problematic to reliably excellent. It’s the difference between good and genuinely exceptional.
- Mistake #4: Stretching the Dough – When transferring dough to your pie plate, avoid stretching it. Stretched dough always shrinks during baking, leaving you with a crust that no longer fits properly. Let the dough relax and settle naturally into the plate.
Customization Station: Make It Your Own
While this basic crust is absolutely perfect as written, you have flexibility for customization that makes picky eaters feel empowered. The beauty of a crust is that it’s a neutral canvas—your filling choices tell the story. Here’s how to set up a customization approach that works for your family:
- Sweet Versus Savory Decision – Make two dough batches simultaneously, adding 1 tablespoon of sugar to one batch if you’re planning sweet fillings, or 1 teaspoon of dried herbs (like thyme or oregano) to the other for savory applications. This lets family members choose their preferred flavor profile while still participating in the basic dough creation.
- Filling Variety Options – Once your pre-baked crust is ready, set up a filling station where different family members can choose their preferred combination. Fresh strawberries with vanilla custard? Spiced apples with cinnamon? Savory roasted vegetables with herb cream? Everyone gets their ideal version while working from the same foundational crust.
Seasonal Variations You’ll Love
One of my favorite aspects of this basic recipe is how beautifully it adapts to seasonal ingredients. The crust remains identical, but your filling choices celebrate what’s currently fresh and available.
Spring: Fill with fresh strawberries and rhubarb, sweetened lightly and thickened with cornstarch. The tartness of rhubarb pairs beautifully with the delicate sweetness of new-season berries.
Summer: Peaches, blueberries, and blackberries are at their absolute peak. Make a fruit filling with these beauties, using minimal added sugar so the natural flavors shine through. This is also the perfect time for cream pies filled with fresh whipped cream and berries.
Fall: This is pumpkin and apple season. Spiced apple filling with cinnamon, nutmeg, and a touch of cardamom creates incredible depth. Or embrace tradition with pumpkin custard filling elevated with fresh ginger and vanilla bean.
Winter: Citrus shines in winter months. Create a lemon curd filling, or try a chocolate-peppermint combination. Cream pies are particularly satisfying during cold months when you want something rich and comforting.
Make-Ahead Guide: Prepare for Success
As a registered dietitian and busy parent, I’ve learned that strategic make-ahead preparation removes stress from cooking. This crust is beautifully make-ahead friendly, giving you multiple time-saving options.
Prepare Up to 3 Days Ahead: Make your dough through Step 5 (after it’s been refrigerated for 45 minutes), wrap it tightly in plastic wrap, and store it in your refrigerator. When you’re ready to use it, let it sit at room temperature for 5-10 minutes before rolling. This is my favorite approach because the dough is fully ready whenever your schedule allows baking.
Freeze for Up to 3 Months: After completing Step 5, wrap your dough ball tightly in plastic wrap, then place it in a freezer-safe container. To use, transfer to your refrigerator the night before and proceed as normal. Frozen dough thaws beautifully and performs identically to fresh dough.
Pre-Baked Crusts (Up to 4 Days Refrigerated): Complete the entire recipe through Step 8. Once cooled completely, wrap the crust tightly in plastic wrap and store in your refrigerator. When ready to use, simply add your filling. This is perfect if you want to make the crust one day and assemble your pie the next.
Frozen Pre-Baked Crusts (Up to 6 Months): After the crust cools completely, wrap it carefully in plastic wrap and aluminum foil (foil protects against freezer burn). Thaw at room temperature for about 1 hour before adding your filling. These frozen crusts are literal lifesavers when you want to assemble a pie quickly without the from-scratch component.
Scaling for Different Family Sizes
This recipe creates one 9-inch pie crust, which typically serves 6-8 people as a dessert portion. But what if your family is smaller or larger? Here’s how to adjust:
For a Family of 2-3: Make a half batch of dough (½ cup plus ½ tablespoon flour, ¼ teaspoon salt, about 2½ tablespoons shortening, 1½-2½ tablespoons water) and use a 7-inch pie plate or simply make a tart in an 8-inch round tart pan. The timing remains identical; you’ll just use less dough.
For a Family of 4-5: The recipe as written is perfect. One 9-inch pie provides adequate portions with minimal leftovers.
For a Family of 6-8: Make one full batch as written, or prepare the dough and make a double-crust pie (both top and bottom), which uses the same amount of dough just divided between two crusts.
For a Family of 10+: Double the entire recipe, which yields enough dough for two 9-inch pies or one double-crust pie with extra dough for a small tart or hand pies. It’s actually easier to make two batches rather than doubling in one bowl, as the volume becomes difficult to work with.
Can I Store This Pie Crust?
Absolutely, and strategic storage means you can have homemade pie available whenever inspiration strikes. As a busy registered dietitian balancing work and family, I love knowing my crust options ahead of time.
Refrigerator Storage: An unbaked dough ball keeps for up to 3 days in the refrigerator when wrapped tightly in plastic wrap. A pre-baked crust stays fresh for up to 4 days. Always wrap tightly to prevent the dough from absorbing odors from other foods.
Freezer Storage: Unbaked dough freezes beautifully for up to 3 months. Pre-baked crusts freeze for up to 6 months. Thaw unbaked dough in the refrigerator overnight, then let it rest at room temperature for 5-10 minutes before rolling. Pre-baked crusts thaw at room temperature in about 1 hour.
Filled Pie Storage: A completed pie (crust plus filling) depends entirely on your filling choice. Cream pies keep refrigerated for 2-3 days. Fruit pies stay fresh at room temperature for 1-2 days, then should move to the refrigerator. Custard pies must be refrigerated and will keep for up to 3 days.
Lunchbox Friendly Note: Individual pie slices work beautifully for school lunches when wrapped in parchment paper and placed in an insulated lunchbox with an ice pack. The crust actually travels better than many baked goods because it’s structurally sound. Fruit-filled pieces are more portable than cream pies, which can get messy in a backpack.
Nutrition Information
Per ⅛ of pie crust (one slice of an 8-slice pie): 140 calories | 6g protein | 15g carbohydrates | 7g total fat | 0g dietary fiber | 150mg sodium. The crust itself contains no added sugar, making it nutritionally neutral. According to USDA standards, this crust provides modest amounts of B vitamins from the flour and some minerals depending on your salt choice and fat source. The real nutritional story unfolds when you combine this crust with your filling choice. Pair it with fresh fruit filling, and you’ve created a dessert containing fiber, natural vitamins, and phytonutrients. Use it with nutrient-dense custard, and you’ve added calcium and protein. This is exactly why I love this recipe—it’s a platform for nutritious choices rather than a nutritional burden.
From a childhood development perspective, the fats in this crust (whether butter or shortening) provide essential fatty acids that support brain development and hormone regulation in growing children. The carbohydrates from flour provide glucose, the brain’s preferred fuel source. When kids help make this crust and then enjoy pie made from it, they’re consuming something that literally supports their physical growth and cognitive development—and they’re doing it joyfully, with family connection as the bonus.
What to Serve Alongside for a Complete Family Meal
A slice of pie doesn’t make a complete meal—unless you build one thoughtfully. Here are my favorite companion foods that round out pie into something satisfying and nutritionally balanced, rather than purely indulgent.
- Fresh Whipped Cream or Vanilla Ice Cream – The cold richness balances a warm pie perfectly, and kids absolutely love this traditional pairing. If you’re serving a fruit pie, unsweetened whipped cream lets the fruit shine, while vanilla ice cream creates a classic combination.
- Greek Yogurt with Honey – For a lighter accompaniment that adds protein and probiotics, serve a dollop of Greek yogurt with a drizzle of raw honey. This works particularly well with fruit pies and satisfies kids who prefer tanginess over sweetness.
- Simple Grilled Cheese Sandwich – If you’re serving pie as part of dinner rather than purely dessert, pair a savory vegetable pie with a my weeknight pasta for a vegetable-forward meal that satisfies.
- Citrus Salad – For a refreshing contrast to rich pie, serve a simple salad of fresh citrus segments (oranges, grapefruits, lemons) tossed with a tiny bit of honey and fresh mint. The acidity and brightness cleanse the palate.
- Charcuterie with Fresh Fruit – Create a dessert board featuring sliced pie alongside aged cheese, cured meats, candied nuts, and fresh berries. This approach makes pie feel sophisticated and allows guests to portion-control their serving. You could even incorporate my favorite salad as part of your fruit selection for built-in flavor complexity.

Betty Crocker Pie Crust Recipe
Ingredients
Method
- Start by pouring your flour into a medium-sized mixing bowl. Measure it correctly by spooning it directly from your flour container into a dry measuring cup, then level the top with a straight edge. Never scoop the measuring cup directly into the flour bag—this compacts the flour and gives you too much. Add your salt and whisk them together for about 15 seconds. This distributes the salt evenly throughout, ensuring consistent flavor in every bite. If children are helping, let them whisk; it's excellent arm strengthening and they can't go wrong with this step.

- This step determines whether your crust will be flaky or dense. Remove your shortening or butter from the refrigerator. If using butter, cut it into small cubes about the size of peas. Add it to your flour mixture and use either a pastry blender (a specialized tool with wire loops that's incredibly helpful and affordable) or two dinner knives. If using knives, hold one in each hand and pull them in opposite directions through the mixture repeatedly. Work steadily for about 3-4 minutes until the mixture looks like coarse breadcrumbs with pea-sized pieces of fat throughout. This is genuinely the most important step, so let me explain the why: those small pockets of cold fat won't mix into the flour. During baking, they'll melt and create steam, which pushes the flour layers apart and creates flakiness. The instant your fat becomes too warm or gets fully incorporated, you've lost that crucial texture. Keep everything cold. If it's a hot day in Texas (which is most days), chill your bowl and tools in the refrigerator for 10 minutes before starting.

- This requires patience, but it's non-negotiable. Sprinkle exactly 1 tablespoon of ice-cold water over the flour mixture. Using a fork, toss everything together gently. Add another tablespoon of water and toss again. Continue adding water one tablespoon at a time, tossing after each addition. You're looking for the moment when all the dry flour is moistened and the dough *almost* leaves the side of the bowl on its own. This typically happens after about 4 tablespoons of water, but the exact amount depends on humidity, flour brand, and your specific kitchen conditions. Do not add all the water at once. Do not mix aggressively. Do not knead. The gentler you are here, the more tender your final crust will be. Kids can absolutely handle this step if you control water additions—let them toss and watch the transformation.

- When the dough is ready, use your hands to gently gather it into a rough ball. It should hold together when pressed but shouldn't feel wet or sticky. If it's crumbly and won't hold together, add a scant teaspoon more water. If it's sticky to the touch, sprinkle a tiny bit of flour and work it in gently. Once gathered into a ball, shape it slightly flat (it should look like a thick hockey puck or small burger patty) on a piece of plastic wrap.

- Wrap your flattened dough round in plastic wrap and refrigerate for approximately 45 minutes. This resting period serves multiple critical purposes. The shortening or butter becomes firm again after being slightly warmed during mixing, which is essential for flakiness. The flour also hydrates more completely and evenly, making the dough easier to roll without tearing. The gluten network relaxes, which prevents shrinkage during baking. This isn't wasted time; it's essential preparation. If you refrigerate longer than 45 minutes—even overnight—that's completely fine. Simply let the dough sit at room temperature for 5-10 minutes before rolling if it's rock-hard.

- Remove your chilled dough from the refrigerator and place it on a lightly floured work surface. Using a floured rolling pin, roll the dough into a circle approximately 2 inches larger in diameter than your 9-inch pie plate. Work from the center outward, rotating the dough frequently to ensure even thickness. If the dough cracks at the edges, don't panic—simply pinch it back together. This is completely normal and won't affect your final result. The dough should be about ⅛-inch thick, similar to the thickness of a credit card. If you're rolling and the dough becomes too warm (you'll notice it sticking), slide it onto a plate and refrigerate for 5 minutes. Cold dough rolls more easily and won't stretch excessively (stretched dough shrinks during baking).

- Once rolled to the proper size, fold your dough into fourths like a handkerchief. This makes it easy to transfer without stretching. Place the folded dough into your pie plate with the pointed corner at the center, then carefully unfold it. Gently ease the dough into the plate by lifting the edges slightly and letting gravity help it settle into the bottom and corners. Never stretch the dough downward or outward—this causes shrinkage during baking. Press it gently but firmly against the bottom and sides. Trim any overhanging edges so they extend about 1 inch beyond the rim of your plate. Fold this overhang under itself, creating a doubled edge even with the plate rim. This creates a barrier that prevents burning and looks professionally finished. Now flute the edge: place your thumb and index finger on the outside of the rim and push the dough upward with your other index finger, creating a wave pattern. Continue around the entire perimeter.

- Using a fork, prick the bottom and sides of your crust thoroughly—aim for about 20-25 small holes total. This prevents the bottom from puffing up with steam during baking and creates an even texture. Preheat your oven to 475°F. Place your prepared crust in the oven and bake for 8-10 minutes, until the bottom just turns light golden brown. The crust should be partially cooked at this point, not fully baked. Remove it from the oven and let it cool on a wire rack for several minutes before adding your filling. If you're making a cream pie or custard pie, you'll want the crust fully cooled. If you're adding a wet fruit filling, the slight residual heat will help set the crust structure.

Notes
FAQs About Homemade Pie Crust
Why is my crust shrinking during baking?
Shrinkage usually indicates two things: either the dough was stretched when transferring to your pie plate (always let it settle naturally) or you skipped the refrigeration step. The refrigeration allows gluten to relax; without it, the gluten remains tight and contracts aggressively when heat hits it. Additionally, ensure you’re pricking the bottom thoroughly with a fork—puffing dough rises upward and can pull the sides down. If you’re experiencing consistent shrinkage, try pre-baking your crust for the full 10 minutes until it’s light golden, then let it cool completely before adding filling.
Can I make this crust without shortening? I prefer butter.
Absolutely! Use ⅓ cup cold unsalted butter cut into small cubes instead of shortening. Butter creates a slightly less flaky crust but with superior flavor that many people prefer. The technique remains identical. Keep the butter very cold throughout, and if your kitchen is warm, chill your bowl and utensils before starting. Some bakers use half butter and half shortening to get the flakiness of shortening with the flavor of butter—this is genuinely my preferred method.
My dough is too sticky to work with. What do I do?
First, don’t panic—this is fixable. If your dough is sticky immediately after mixing, you likely added too much water. Sprinkle in a tiny bit of flour (a teaspoon at a time) and work it in gently until the dough becomes less sticky. Let it chill in the refrigerator for 45 minutes; cold dough is always easier to handle than warm dough. If it remains sticky even after chilling, it’s overhydrated, and you’ll need to make a new batch. Next time, add water even more slowly and stop the moment the dough just barely holds together. In very humid climates, you may need only 3 tablespoons total water instead of 4-5.
How do I prevent a soggy bottom crust with wet fillings?
This is a genuinely important question for fruit pie success. First, pre-bake your crust for the full 8-10 minutes until it’s light golden. Second, once you remove the crust from the oven and let it cool briefly, brush the entire bottom and sides with a thin layer of melted white chocolate or a beaten egg white. This creates a moisture barrier. Third, thicken your fruit filling appropriately—fruit pies need thickener (usually cornstarch or tapioca starch) to prevent excessive liquid from seeping into the crust. Use about 1 tablespoon of cornstarch per cup of fruit filling. Finally, don’t assemble the pie too far ahead; fill it within 30 minutes of serving if possible.
Can I use a food processor to cut in the shortening?
Yes, and I actually recommend it if you’re comfortable with food processors. Pulse the flour and salt, add cold shortening cut into small pieces, and pulse 4-5 times until the mixture resembles breadcrumbs. Then transfer to a bowl and add water by hand, one tablespoon at a time, tossing with a fork. The food processor works quickly and keeps everything cold because there’s minimal hand contact. The only caution: it’s easy to overprocess and create a paste rather than a crumbly mixture, so pulse conservatively.
What’s the difference between this recipe and those fancy all-butter crusts?
All-butter crusts taste undeniably delicious but create a tender, more biscuit-like texture rather than the dramatic flakiness that this recipe achieves. Shortening has a higher melting point than butter, so it creates more distinct steam pockets during baking. All-butter crusts are also more challenging to roll because butter is softer. The ideal balance, in my professional opinion, is 50-50 shortening and butter: you get exceptional flakiness plus that magnificent butter flavor. This recipe prioritizes texture and reliability, but you should absolutely experiment to find your family’s preference.
More Family-Friendly Recipes
- Chicken Alfredo Bake Recipe – A creamy, comforting main course that pairs beautifully with a side salad and transforms your homemade pie crust knowledge into savory applications
- Catfish Bites Recipe – Crispy, kid-approved protein that works perfectly alongside vegetable-filled pies or as part of a casual family dinner
- Chicken Kabob Marinade Recipe – Perfect for grilling season alongside fruit pies or as part of your seasonal entertaining when you’ve already prepared your crust
Making homemade pie crust from scratch is one of those kitchen skills that transforms your entire confidence level. You stop believing that baking is something that happens in commercial kitchens and start recognizing it as an accessible art form you can absolutely master. Beyond the technical skills, though, this recipe creates moments. It creates the memory of your child’s hands mixing flour, the particular smell of butter melting in your oven, the pride everyone feels when a beautiful golden crust emerges and becomes the foundation for a pie that your family created together. Those moments, far more than the crust itself, are what stay with people for decades. I still remember my grandmother’s hands, still smell that Texas kitchen, still feel that sense of magic when flour transformed into something edible and beautiful. You’re creating those same memories for your family right now. Cook with confidence!