Bisquick Impossible Quiche Recipe

Last Updated on August 27, 2026
This post contains affiliate links. As an Amazon Associate I earn from qualifying purchases.
If you’ve always wanted to make a Bisquick Impossible Quiche but felt intimidated, this is your starting point. I’m Mary Siegel, and I’ve watched thousands of home cooks discover that this isn’t just easy—it’s genuinely foolproof. The magic happens because the Bisquick forms its own crust as it bakes, creating what feels like a fancy, from-scratch quiche without any of the fuss. Whether you’re planning a weekend brunch, feeding your family on a busy weeknight, or impressing guests at a potluck, this recipe delivers restaurant-quality results in under an hour. If you’re looking for other brunch showstoppers, I also love pairing this with Pineapple Mimosa Recipe for a complete celebration spread. Let’s build your confidence in the kitchen, one perfectly golden quiche at a time.
How to Make Bisquick Impossible Quiche for the First Time (You’ve Got This!)
I remember the first time I made an impossible quiche—I was in my early twenties, still learning to cook beyond the basics my family had taught me. My grandmother had mentioned this recipe in passing, and I was terrified I’d mess it up. I pictured a sunken middle, rubbery edges, and disappointment. But I gathered my courage, pulled out that pie plate, and followed the steps exactly. When I pulled it from the oven forty minutes later and watched that quiche rise with a beautiful golden top, something clicked for me. I realized that recipes with this kind of built-in success were my gateway to cooking with real confidence.
That’s exactly where you are right now. This impossible quiche is the recipe that teaches you that you can trust yourself in the kitchen. Every single step is designed to work in your favor, and I’m going to walk you through it like you’re standing right beside me at the stove.
What to Expect Before You Start
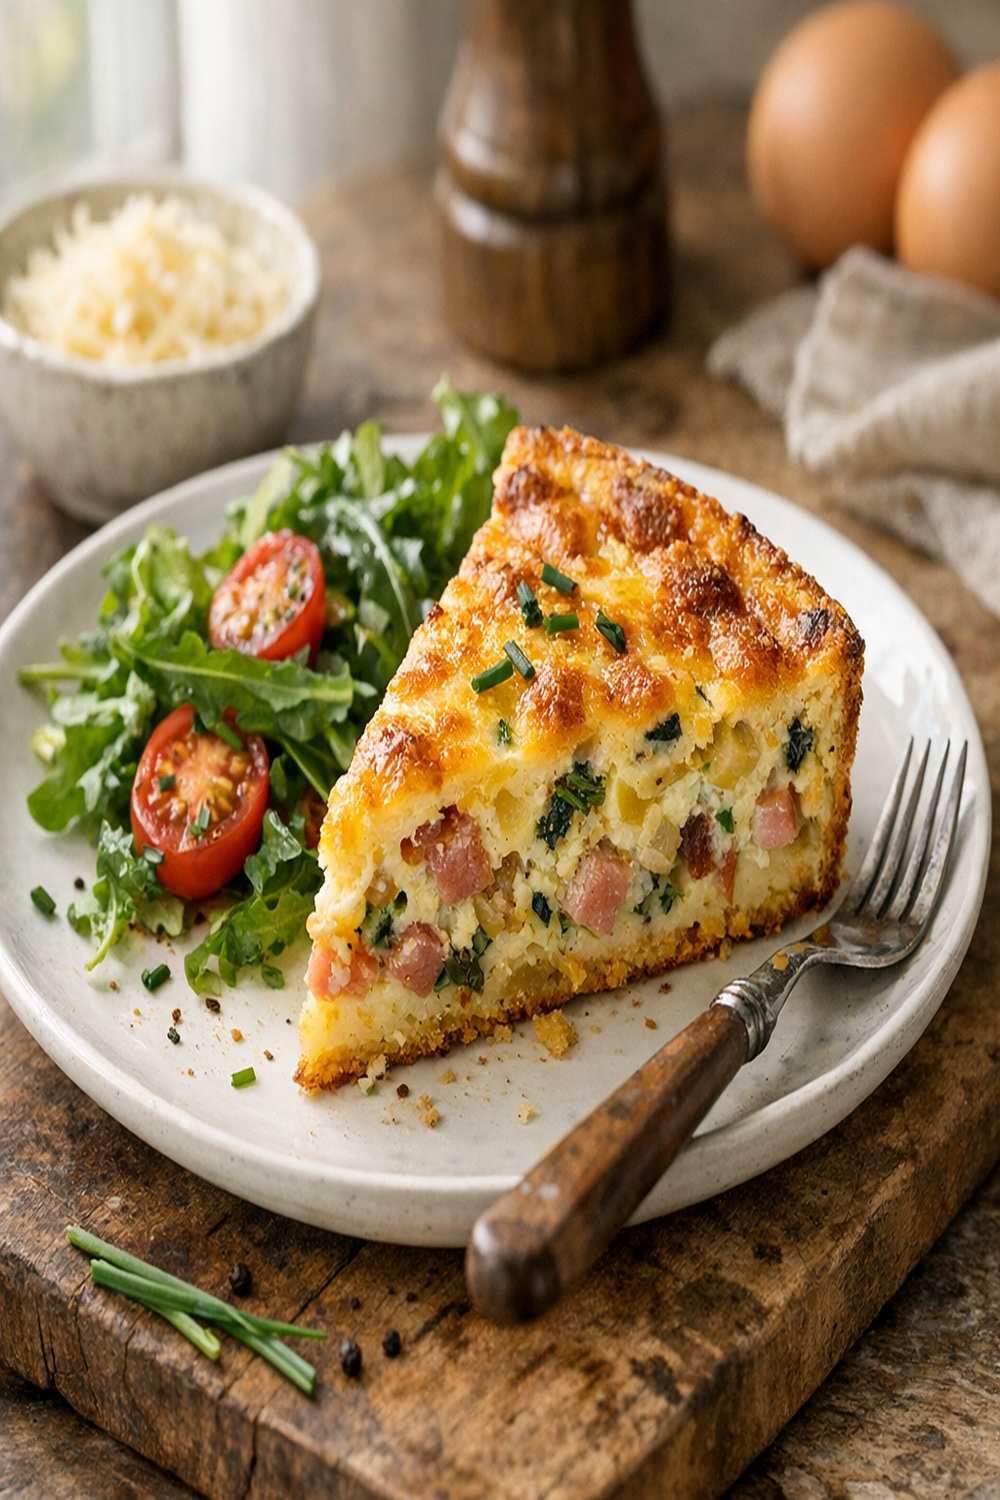
Before you turn on the oven, let’s set realistic expectations so you feel completely prepared. This recipe takes about 55 minutes total—roughly 10 minutes to assemble ingredients and prepare your pie plate, 35 minutes of hands-off baking time, and 10 minutes of cooling before you slice. The actual difficulty level is beginner-friendly, meaning you need basic kitchen skills (cracking eggs, shredding cheese, basic measuring) but absolutely nothing advanced.
- The mixing part is genuinely simple – You’re just combining ingredients in a bowl and pouring them into a pie plate. The Bisquick does the heavy lifting by creating the crust automatically as it bakes. Many beginners worry they’ll mess up the batter, but this recipe is forgiving because the mixture is thick and stable.
- The oven part feels magical, not scary – Unlike delicate soufflés or temperamental pastry crusts, this quiche doesn’t require you to watch it constantly or open the oven door repeatedly. You’ll slide it in, set a timer, and trust the process. The only thing you’re watching for is the golden-brown top and a clean toothpick inserted in the center.
Equipment You’ll Need (And What You Can Skip)
I’m a big believer that fancy equipment doesn’t make better home cooks—good technique and confidence do. For this recipe, you need only a few basics, and I’m guessing you already have most of them in your kitchen right now.
- A 10-inch pie plate – This is your non-negotiable essential. A standard ceramic, glass, or metal pie plate works perfectly. If you only have a 9-inch, your quiche will be slightly taller and may need an extra 5 minutes of baking time. Budget alternative: a round cake pan works fine in a pinch.
- A large mixing bowl – Any bowl you have will work. Stainless steel or glass heats slightly less quickly than ceramic, which is actually helpful when you’re beating in eggs and milk.
- A whisk or fork – For beating the eggs with salt and pepper, then stirring in the milk and Bisquick. A whisk is nice because it incorporates air and prevents lumps, but a fork does the job perfectly well.
- Measuring cups and spoons – Standard kitchen measuring cups and spoons. Dry measuring cups (the ones you can level off) are technically more accurate for the Bisquick, but liquid measuring cups work too.
- A toothpick or cake tester – This tells you when your quiche is cooked through. I keep a box of regular toothpicks in my kitchen because they’re cheap and multipurpose.
- A wire cooling rack (optional) – This helps cool your quiche evenly, but a cutting board or even a clean kitchen towel works if you don’t have one.
The Ingredients – A Beginner’s Shopping Guide
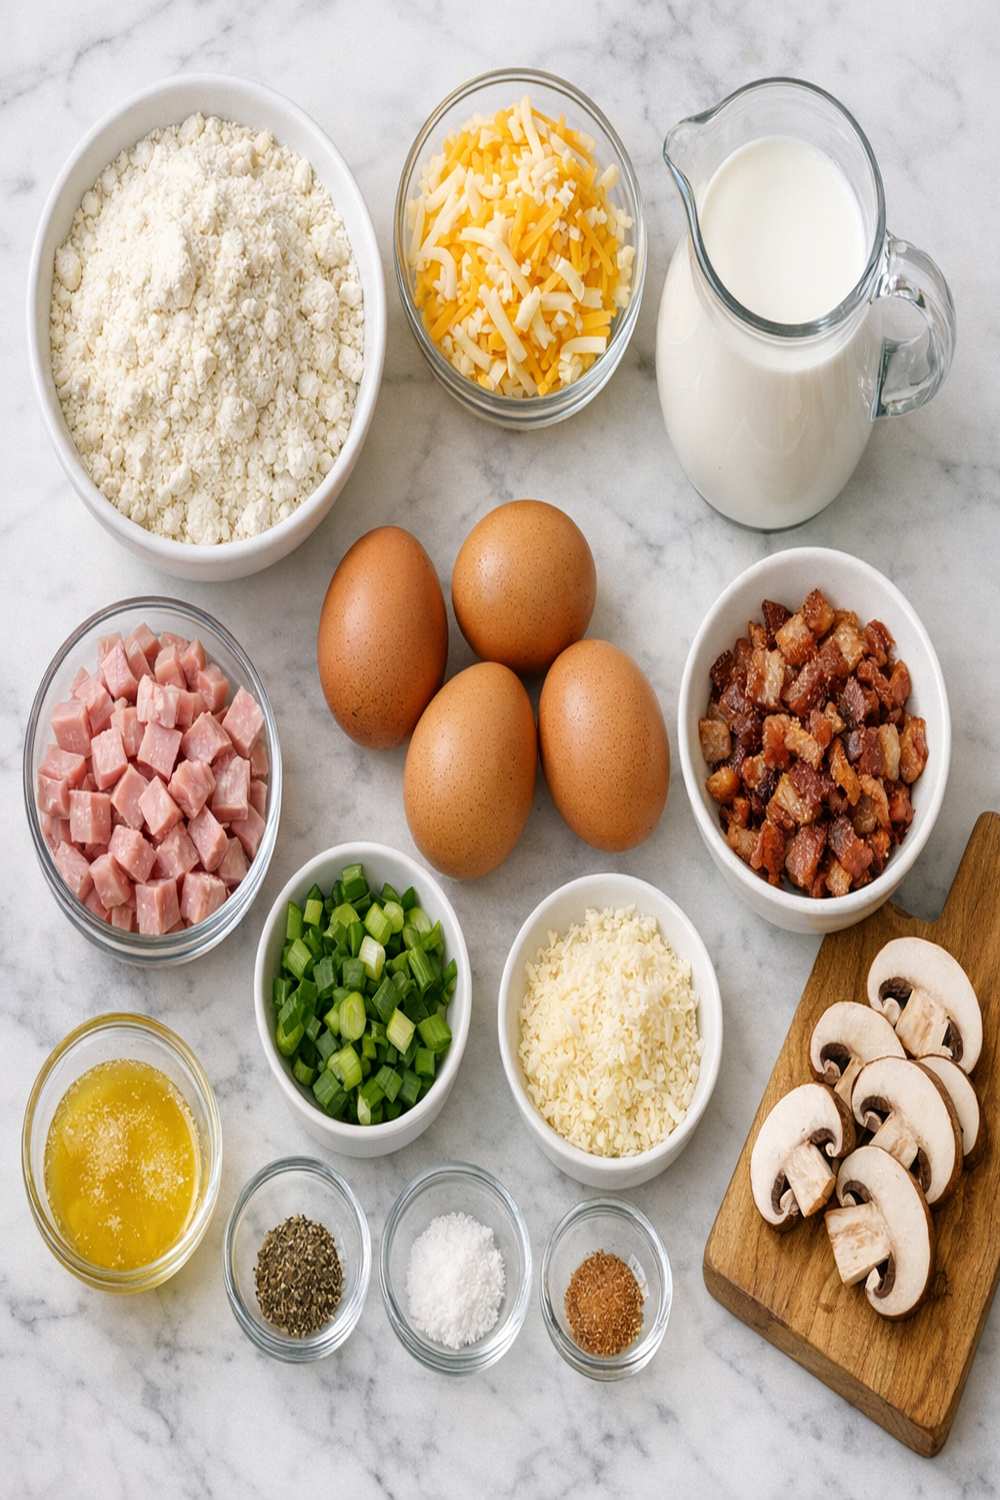
Shopping for this recipe is refreshingly straightforward. Everything here is a standard supermarket item you can find in your regular grocery trip. I’m going to walk you through exactly what to look for and where to find each ingredient, plus some beginner-friendly substitutions that work beautifully if you need them.
- 12 slices of bacon (choose thick-cut or regular, both work equally well; cook it until it’s crispy and the fat is rendered, then drain on paper towels before crumbling)
- 1 cup Swiss cheese, shredded (about 4 ounces; freshly shredded is ideal, but pre-shredded from the dairy section works fine)
- ⅛ teaspoon ground black pepper (freshly cracked is wonderful, but pre-ground is perfectly fine)
- ½ teaspoon salt (kosher or table salt; if using kosher, you might need slightly more due to larger crystals)
- 4 large eggs (room temperature works best for smoother mixing, but cold eggs work too)
- 1 tablespoon butter or cooking spray (for greasing your pie plate lightly)
- ⅓ cup yellow onion, diced finely (one small onion; sweet onions like Vidalia are milder if you’re sensitive to onion flavor)
- 1 cup Bisquick (the standard original formula; do not use Heart Smart or other specialty versions for this recipe)
- 2 cups whole milk (full-fat or 2% milk; avoid skim because the quiche needs the richness for proper texture)
Step-by-Step: Your First Bisquick Impossible Quiche
Here we go. I’m going to break this down into the most detailed, beginner-friendly steps possible. Read through each step completely before you do it, so there are no surprises. You’ve absolutely got this, and I’m walking you through every single moment.
Step 1: Preheat Your Oven and Prep Your Pie Plate
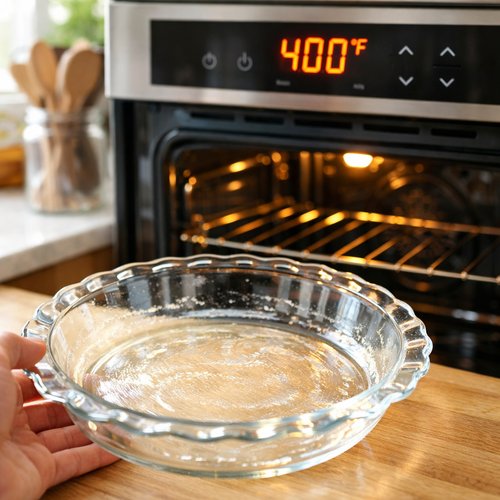
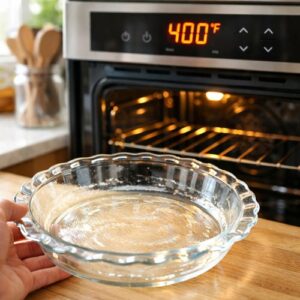
Turn your oven on to 400 degrees Fahrenheit right now—even before you gather your other ingredients. Ovens take time to reach full temperature, and you want it ready when your mixture is ready to bake. While the oven is heating, take your 10-inch pie plate and coat it lightly with butter or cooking spray. Use a paper towel or your fingers to rub a very thin, even layer around the bottom and up the sides. This prevents sticking and makes cleanup infinitely easier. Don’t overdo it; a light coating is all you need. Set your prepared pie plate on the counter nearby so it’s ready when you need it.
Step 2: Cook and Crumble the Bacon
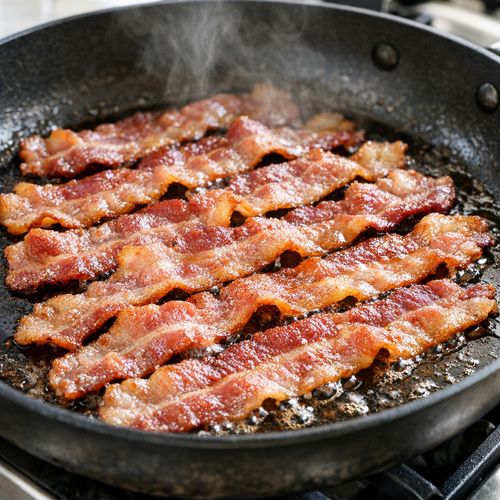
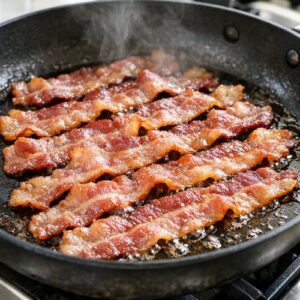
If you haven’t already cooked your bacon, do that now in a large skillet over medium heat. Lay the 12 slices in the pan—they can overlap slightly—and cook until the edges are deeply browned and crispy, about 8 to 10 minutes total. The goal is crispy, not just cooked through, because bacon releases more flavor and texture when it’s fully crisped. Once it’s done, transfer the bacon to a plate lined with paper towels. Let it cool for a couple of minutes, then use your fingers to crumble it into bite-sized pieces. You should end up with roughly a cup of crumbled bacon. Don’t stress about exact measurement here—more bacon is never wrong in this recipe.
Step 3: Layer Your Filling Ingredients in the Pie Plate
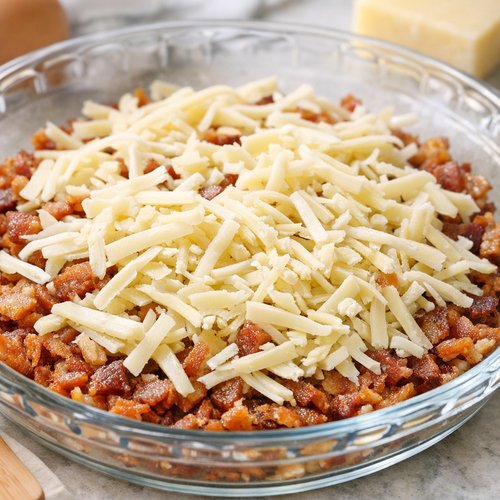
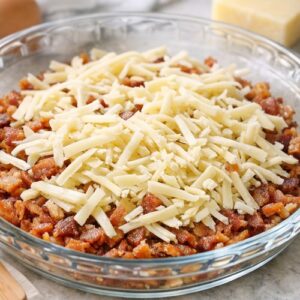
This is where the magic starts to happen. Sprinkle the crumbled bacon evenly over the bottom of your prepared pie plate. Then scatter the shredded Swiss cheese evenly over the bacon. Finally, distribute the diced onion across the cheese layer. Don’t worry about being perfectly precise with these layers—the batter will settle everything as it bakes. Just aim for an even distribution so every bite of quiche has bacon, cheese, and onion in it. This creates flavor in every single slice.
Step 4: Beat the Eggs with Salt and Pepper
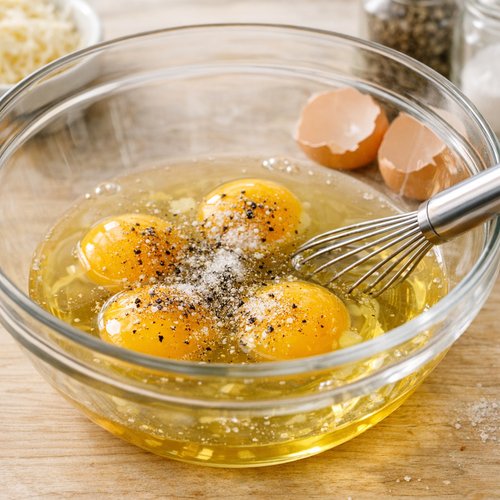
Crack all 4 eggs into your large mixing bowl. If you get any shell fragments, fish them out with a clean piece of shell—shell attracts shell. Add the ½ teaspoon of salt and the ⅛ teaspoon of ground black pepper directly to the eggs. Now beat these together vigorously using a whisk or fork. Beat for at least 30 seconds until the eggs are light yellow and slightly frothy. The yolks and whites should be completely combined with no streaks of white visible. This is important because it helps the quiche cook evenly.
Step 5: Stir in the Milk
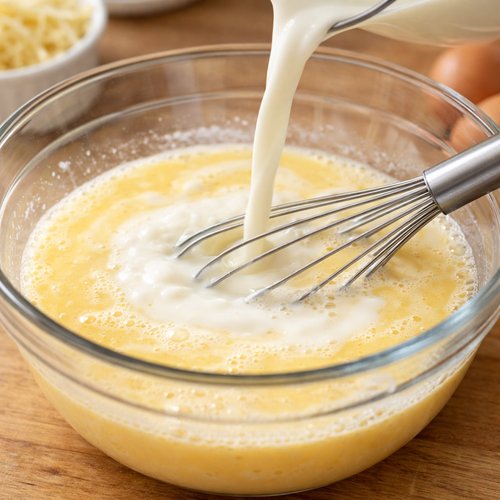
Pour the 2 cups of whole milk directly into your beaten eggs. Stir gently but thoroughly until the milk and eggs are completely combined. You’re looking for a uniform, pale yellow mixture with no milk streaks visible. This mixture is now your custard base, and it’s what will set as it bakes to create that creamy interior.
Step 6: Add the Bisquick and Beat Until Completely Smooth
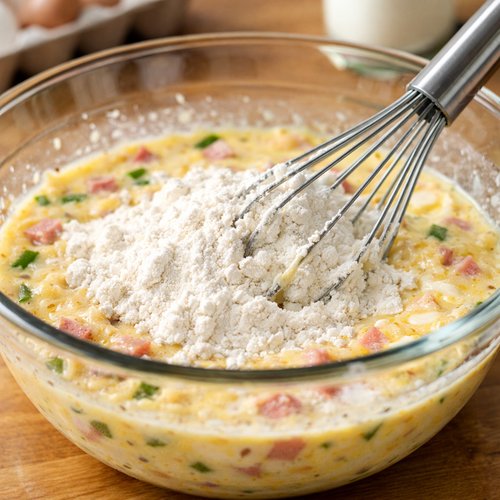
This step is absolutely critical for success. Pour in the entire 1 cup of Bisquick and beat the mixture with your whisk or fork until it is completely smooth. No lumps. None. This is the one step where you cannot cut corners, because lumps of dry Bisquick will stay as lumps in your finished quiche. Beat for at least a minute, scraping the sides and bottom of the bowl as you go. The mixture should look like thick pancake batter—smooth, pourable, but with body. If you see any little specks of Bisquick, keep beating.
Step 7: Pour the Batter Over Your Fillings
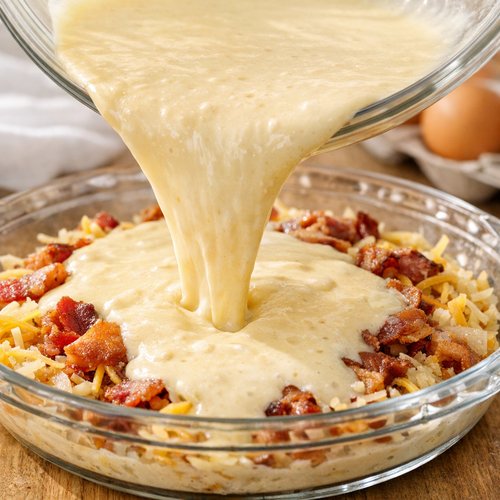
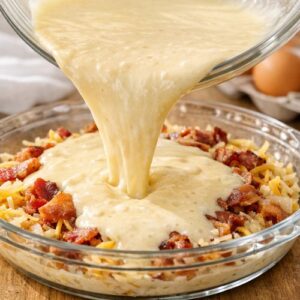
Carefully pour your smooth batter mixture over the bacon, cheese, and onion layer in your prepared pie plate. Pour slowly and steadily so the filling ingredients don’t float up and shift around. The batter will distribute them as it cooks. Pour until everything is covered, but don’t worry if a few bacon bits poke through the top—that’s actually nice because it adds texture and visual appeal.
Step 8: Bake Until Golden and Set
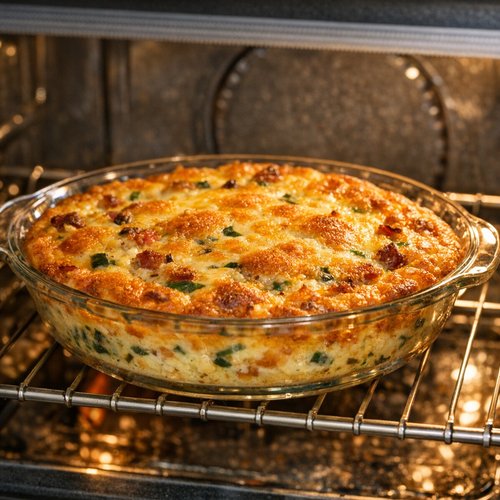
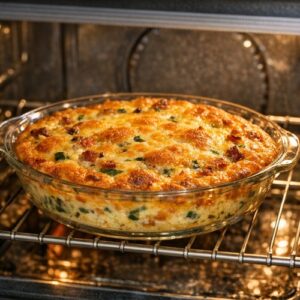
Place your pie plate into your preheated 400-degree oven. Set a timer for 35 minutes. Do not open the oven door before 30 minutes have passed—this is important because the quiche needs uninterrupted heat to rise and cook through. After 30 minutes, you can carefully peek. You’re looking for the top to be golden brown and a toothpick inserted into the center to come out clean with no wet batter clinging to it.
If the top is browning too quickly but the center still seems wet, you can cover the top loosely with aluminum foil for the last few minutes to prevent over-browning while the center finishes cooking. This is a professional trick that prevents the outer edges from getting too dark.
Step 9: Cool Before Slicing
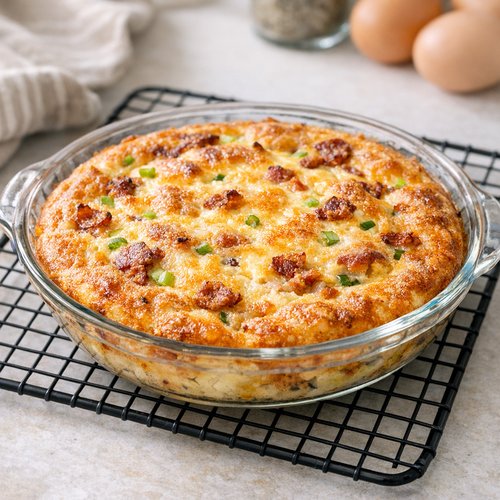
When your quiche is perfectly golden and set, remove it from the oven using oven mitts—that pie plate is very hot. Place it on a wire cooling rack or a clean kitchen towel on your counter. Let it cool for at least 15 minutes before slicing. This cooling time allows the quiche to set properly so it slices cleanly instead of falling apart. You can serve it warm, at room temperature, or even chilled later.
How to Tell If You Did It Right
Success in cooking is about recognizing the signs that tell you everything worked perfectly. Here’s exactly what to look for at each stage so you know you’re nailing this recipe.
- The batter before baking – It should be completely smooth, pale yellow, and pourable like thick pancake batter with zero lumps visible. When you dip a spoon in, it coats the spoon smoothly and drips off slowly. This tells you the Bisquick is fully incorporated.
- The quiche while baking (after 30 minutes) – The edges should be pulling away slightly from the sides of the pie plate, and the top should have a light golden-brown color. A toothpick inserted in the center should come out completely clean or with just barely a tiny bit of moist crumb clinging to it—not wet batter.
- The quiche right out of the oven – It should jiggle slightly in the very center when you gently shake the pie plate, but the outer edges should be completely set and firm. The smell should be savory and rich from the bacon and cheese.
- The quiche after cooling – It should hold together firmly when you slice it, with clean, defined edges. Each slice should hold its shape on the plate. The center should feel creamy and custardy, never rubbery.
What Went Wrong? Beginner Fixes
Even with this foolproof recipe, things sometimes don’t go exactly as planned—and that’s completely okay. Here are the most common beginner mistakes and exactly how to fix them or prevent them next time.
- The quiche came out sunken in the middle or jiggly after cooling – This means it didn’t bake long enough. The center was still underdone. Next time, bake for the full 35 minutes and use the toothpick test religiously. If the toothpick comes out with wet batter (not just moist crumb), it needs more time. Add 5-minute increments until it’s set. Keep the oven door closed until at least 30 minutes have passed so the quiche has uninterrupted heat to rise.
- The quiche has lumps of dry Bisquick throughout – You didn’t beat the batter long enough before pouring it. Bisquick needs vigorous beating to incorporate smoothly. If this happened, you can’t fix it, but next time beat for a full minute or more, scraping the sides. If you see any specks of white or dry powder, keep beating.
- The top burned while the center was still undone – Your oven may run hot, or the top browned before the inside cooked through. Next time, cover the top loosely with foil after 25 minutes to slow browning. You want that golden color, but not dark brown or burnt. If it happens, the quiche is still fine to eat; just trim away the very darkest bits.
- The quiche came out watery or didn’t set properly – You may have used skim milk instead of whole or 2% milk, or your eggs weren’t fully beaten before adding the milk. Full-fat milk is essential because it provides richness and helps the custard set. Make sure eggs are well combined with the salt and pepper before adding milk.
- The bacon, cheese, and onion all sank to the bottom – This actually happens sometimes, and it’s not a problem. The fillings are heavier and gravity pulls them down. You still get flavor in every bite, and it’s delicious. If you prefer them more distributed, you can slightly thicken the batter by reducing the milk to 1¾ cups next time, which makes them float more evenly.
Your Next Steps After Mastering This
Congratulations—you’ve just mastered one of the most versatile recipes in the kitchen. This impossible quiche teaches you crucial skills that translate to so many other dishes. You’ve learned how to properly incorporate dry ingredients into wet mixtures without lumps, how to trust your oven timer, how to use a toothpick test for doneness, and how to understand what properly set eggs should look and feel like.
These exact skills help you make Panera Bread Souffle Recipe, which uses similar egg-based custard techniques. You can also start experimenting with variations on this quiche—swap the Swiss for sharp cheddar, add spinach, try different meats, incorporate roasted vegetables. Each variation teaches you how ingredients work together and builds your intuition in the kitchen.
From here, you’re ready to tackle other baked egg dishes, savory pies, and custard-based recipes. You’ve proven to yourself that you can follow a recipe precisely and get restaurant-quality results. That confidence is everything.
Can I Store Bisquick Impossible Quiche?
Absolutely, and I love that you’re thinking ahead. This recipe is perfect for meal prep or feeding your family throughout the week.
Refrigerator storage: Once your quiche has cooled completely, wrap it tightly with plastic wrap or transfer it to an airtight container. It keeps for up to 4 days in the refrigerator. This is my go-to strategy for busy weeks—I make it on Sunday and have breakfast or lunch ready for several days.
Freezer storage: You can freeze a completely cooled quiche for up to 3 months. Wrap it tightly in plastic wrap, then place the entire wrapped quiche (still in the pie plate) into a freezer bag for extra protection against freezer burn. Thaw it overnight in the refrigerator and reheat in a 350-degree oven for about 20 minutes until warmed through.
Individual slices: If you want grab-and-go portions, slice your cooled quiche and wrap individual slices in plastic wrap, then place them in a freezer bag. Thaw a slice overnight in the refrigerator or reheat it directly in a 350-degree oven for 10-12 minutes.
Reheating: Reheat any stored quiche in a 350-degree oven for 15-20 minutes until warmed through. If it’s coming straight from the freezer, add another 10 minutes. You can also microwave individual slices for 1-2 minutes, though oven reheating keeps the texture better.
Nutrition Information
I’m always interested in the nutritional story of the food we eat, and this quiche tells an interesting one. Based on USDA nutritional data, one slice of this Bisquick Impossible Quiche (assuming 8 slices per quiche) contains approximately 320 calories, 18 grams of protein, 22 grams of fat, and 13 grams of carbohydrates.
The protein comes primarily from the eggs, bacon, and milk—this is genuinely a high-protein meal that keeps you satisfied for hours. The carbohydrates come from the Bisquick, which also provides some structure and helps create that signature crust. The fat is primarily from the bacon, cheese, and whole milk, which aren’t the enemy despite what outdated nutrition messaging might suggest—these are the fats that help your body absorb fat-soluble vitamins and provide satiety.
What I love about this recipe from a nutritional standpoint is that it’s a complete protein package. The eggs provide all nine essential amino acids, the bacon adds B vitamins and minerals like selenium, and the Swiss cheese provides bioavailable calcium. For a lighter version, you can use turkey bacon (saves about 40 calories and 3 grams of fat per slice) or even skip the bacon entirely and add mushrooms and spinach instead.
Expert’s Nutritional Tip
As a registered dietitian, I often recommend thinking about quiche not just as breakfast food but as a complete, balanced meal. The key is the egg component—eggs contain choline, which supports brain health and memory, and lutein and zeaxanthin, which protect your eyes. The Swiss cheese here (versus American cheese in many traditional recipes) contains more conjugated linoleic acid (CLA), a fatty acid linked to better body composition in some research. And bacon, when cooked to crispiness, concentrates its flavor so you can use less salt overall while maintaining that savory satisfaction that makes this dish so crave-able. This is how you make comfort food that genuinely works for your body.
Make-Ahead Guide
My professional philosophy is that great home cooking isn’t about rushing through steps—it’s about being strategic so you can actually enjoy the process. This quiche is incredibly make-ahead friendly, and I want to give you every option.
24 hours ahead: You can cook the bacon and store it in an airtight container in the refrigerator. You can also prep the onion (dice it and store in a covered container), and you can shred the cheese ahead of time. Just don’t mix everything together yet.
2 hours ahead: Assemble the filling in your pie plate (bacon, cheese, onion layered in), cover it loosely with foil, and store it in the refrigerator. When you’re ready to bake, make your egg mixture fresh and pour it over the cold fillings. The baking time may increase by 3-5 minutes since you’re starting with a cold pie plate, so just add a couple minutes to your timer.
The morning of: This is my favorite strategy. Prepare everything the night before, cover your assembled (unfilled) pie plate with foil, and refrigerate it. In the morning, preheat your oven, make the egg mixture, and pour it over the fillings. Bake as directed. This takes only about 15 minutes of active work in the morning, and you have a hot, fresh quiche ready by 9 AM.
Fully baked ahead: Bake it completely one or two days ahead, cool it completely, wrap it, and refrigerate it. Reheat in a 350-degree oven for 15-20 minutes. This is perfect for potlucks, brunches, or when you want to minimize morning cooking.
Common Mistakes to Avoid
Learning from what goes wrong is just as valuable as learning what goes right. Here are the specific mistakes I see beginners make, so you can skip right over them.
Using the wrong type of Bisquick: There are now several varieties of Bisquick on the market—Heart Smart, whole wheat, gluten-free, etc. For this recipe, you need the classic original Bisquick formula. The substitutes have different protein structures and won’t rise the same way. It’s a five-second label check that prevents disappointment.
Not rendering the bacon fully: Undercooked bacon releases moisture as the quiche bakes, which can make the texture soggy. Cook it until it’s truly crispy and browned. You want the fat rendered out and some of that rich, concentrated bacon flavor concentrated in the meat.
Crowding the quiche in the oven: If you have a smaller or oddly shaped oven, resist the urge to put other items in there while the quiche bakes. Hot air needs to circulate freely around the pie plate for even cooking. An empty oven is your friend here.
Opening the oven door before 30 minutes: Every time you open that door, you release heat and disrupt the quiche’s rise. Resist the urge to peek until at least 30 minutes have passed. Your patience pays off with better results.
Seasonal Variations
One of my favorite things about impossible quiche is how adaptable it is. You can keep the foundational technique (eggs, milk, Bisquick) and swap the fillings to match what’s fresh and seasonal. Here are my favorite variations throughout the year.
Spring: Replace the bacon with diced ham, add fresh dill (½ teaspoon dried or 1½ teaspoons fresh), and incorporate lightly sautéed asparagus pieces. The fresh herbs and spring vegetables feel bright and seasonal while the ham provides salty richness.
Summer: Use crumbled breakfast sausage instead of bacon, add fresh basil and diced fresh tomatoes, and use mozzarella instead of Swiss cheese. Drain the tomatoes well so they don’t release excess moisture. This tastes like a Caprese salad in quiche form.
Fall: Sauté diced apple with the onion, use crumbled cooked sausage, and add a pinch of sage. The apples add subtle sweetness and pair beautifully with sausage and sage. Use sharp cheddar cheese for an extra depth of flavor.
Winter: Use bacon and add sautéed mushrooms and kale that’s been squeezed dry. Add a pinch of nutmeg and thyme. This feels hearty and warming, perfect for cold mornings and paired with hot coffee.
What Can I Serve With Bisquick Impossible Quiche?
A slice of quiche is genuinely a complete meal, but I love building a simple spread around it that makes the whole occasion feel special. Here are my go-to pairings that transform a simple quiche into a memorable brunch or dinner.
- Fresh green salad with a light vinaigrette – The acidity and fresh vegetables balance the richness of the quiche perfectly. Serve it on the side and let people make their own plate.
- Fruit in season – Strawberries in spring, berries in summer, sliced apples in fall, citrus in winter. Fresh fruit provides brightness and natural sweetness without feeling heavy.
- Warm crusty bread or rolls – If you want carbs on the plate, keep them simple. A good bread with butter is all you need. Homemade Bread Machine Cinnamon Bun Recipe is lovely for slightly sweeter brunch occasions.
- Roasted vegetables – Roasted broccoli, Brussels sprouts, or root vegetables add texture and nutrition. Season them simply with olive oil, salt, and pepper, then roast at 400 degrees while your quiche bakes.
- A simple beverage spread – Coffee, tea, fresh-squeezed orange juice, or something special like Pineapple Mimosa Recipe for a celebratory brunch.

Bisquick Impossible Quiche Recipe
Ingredients
Method
- Turn your oven on to 400 degrees Fahrenheit right now—even before you gather your other ingredients. Ovens take time to reach full temperature, and you want it ready when your mixture is ready to bake. While the oven is heating, take your 10-inch pie plate and coat it lightly with butter or cooking spray. Use a paper towel or your fingers to rub a very thin, even layer around the bottom and up the sides. This prevents sticking and makes cleanup infinitely easier. Don't overdo it; a light coating is all you need. Set your prepared pie plate on the counter nearby so it's ready when you need it.
- If you haven't already cooked your bacon, do that now in a large skillet over medium heat. Lay the 12 slices in the pan—they can overlap slightly—and cook until the edges are deeply browned and crispy, about 8 to 10 minutes total. The goal is crispy, not just cooked through, because bacon releases more flavor and texture when it's fully crisped. Once it's done, transfer the bacon to a plate lined with paper towels. Let it cool for a couple of minutes, then use your fingers to crumble it into bite-sized pieces. You should end up with roughly a cup of crumbled bacon. Don't stress about exact measurement here—more bacon is never wrong in this recipe.
- This is where the magic starts to happen. Sprinkle the crumbled bacon evenly over the bottom of your prepared pie plate. Then scatter the shredded Swiss cheese evenly over the bacon. Finally, distribute the diced onion across the cheese layer. Don't worry about being perfectly precise with these layers—the batter will settle everything as it bakes. Just aim for an even distribution so every bite of quiche has bacon, cheese, and onion in it. This creates flavor in every single slice.
- Crack all 4 eggs into your large mixing bowl. If you get any shell fragments, fish them out with a clean piece of shell—shell attracts shell. Add the ½ teaspoon of salt and the ⅛ teaspoon of ground black pepper directly to the eggs. Now beat these together vigorously using a whisk or fork. Beat for at least 30 seconds until the eggs are light yellow and slightly frothy. The yolks and whites should be completely combined with no streaks of white visible. This is important because it helps the quiche cook evenly.

- Pour the 2 cups of whole milk directly into your beaten eggs. Stir gently but thoroughly until the milk and eggs are completely combined. You're looking for a uniform, pale yellow mixture with no milk streaks visible. This mixture is now your custard base, and it's what will set as it bakes to create that creamy interior.

- This step is absolutely critical for success. Pour in the entire 1 cup of Bisquick and beat the mixture with your whisk or fork until it is completely smooth. No lumps. None. This is the one step where you cannot cut corners, because lumps of dry Bisquick will stay as lumps in your finished quiche. Beat for at least a minute, scraping the sides and bottom of the bowl as you go. The mixture should look like thick pancake batter—smooth, pourable, but with body. If you see any little specks of Bisquick, keep beating.

- Carefully pour your smooth batter mixture over the bacon, cheese, and onion layer in your prepared pie plate. Pour slowly and steadily so the filling ingredients don't float up and shift around. The batter will distribute them as it cooks. Pour until everything is covered, but don't worry if a few bacon bits poke through the top—that's actually nice because it adds texture and visual appeal.
- Place your pie plate into your preheated 400-degree oven. Set a timer for 35 minutes. Do not open the oven door before 30 minutes have passed—this is important because the quiche needs uninterrupted heat to rise and cook through. After 30 minutes, you can carefully peek. You're looking for the top to be golden brown and a toothpick inserted into the center to come out clean with no wet batter clinging to it. If the top is browning too quickly but the center still seems wet, you can cover the top loosely with aluminum foil for the last few minutes to prevent over-browning while the center finishes cooking. This is a professional trick that prevents the outer edges from getting too dark.
- When your quiche is perfectly golden and set, remove it from the oven using oven mitts—that pie plate is very hot. Place it on a wire cooling rack or a clean kitchen towel on your counter. Let it cool for at least 15 minutes before slicing. This cooling time allows the quiche to set properly so it slices cleanly instead of falling apart. You can serve it warm, at room temperature, or even chilled later.

Notes
FAQs
Can I make this quiche without bacon?
Absolutely. The bacon is delicious, but you can replace it with diced ham, crumbled breakfast sausage, or skip it entirely for a vegetarian version. If you’re going vegetarian, I’d recommend sautéing extra vegetables like mushrooms, bell peppers, and spinach (squeezed very dry) to maintain that flavor depth. The total should still be about a cup of filling ingredients. The quiche will still bake perfectly; you’re just changing the flavor profile.
What if I don’t have Swiss cheese?
Swiss cheese is wonderful because of its mild, slightly nutty flavor and how it melts, but you have options. Sharp cheddar works beautifully and adds more assertive flavor. Gruyère is more expensive but genuinely luxurious. Mozzarella is milder and more neutral. Even a combination works—half Swiss and half cheddar is delicious. The only cheese I’d avoid is something very soft like brie or goat cheese, which won’t melt and incorporate the same way. One cup of any semi-firm cheese works.
Can I use low-fat milk instead of whole milk?
Two-percent milk works fine and will only slightly change the texture—the quiche will be marginally less rich but still delicious. I don’t recommend skim milk because it lacks the fat that helps the custard set properly and creates that creamy mouthfeel we’re after. If you’re watching fat intake, use 2%, but stick with at least that. The recipe depends on that richness to work correctly.
Why is it called “impossible” quiche?
It’s called impossible because it seems impossible that you don’t need to make a separate pie crust. The Bisquick, when combined with eggs and milk and baked, creates its own crust as it rises and sets. In the 1970s when this recipe became popular, homemade pie crusts were more common, so the idea of a quiche without one seemed impossible. Now it just feels like genius simplicity.
Can I double this recipe?
You can, but you’ll need two 10-inch pie plates. Double all the ingredients and divide the filling and batter between two pies. Bake them side by side in the oven for the same 35 minutes. Don’t try to squeeze both fillings into one deeper dish because the Bisquick mixture won’t have enough surface area to create that characteristic golden top and set properly. Two pies are actually perfect if you’re feeding a crowd because you can refrigerate one for later.
More Beginner-Friendly Recipes
- Panera Bread Souffle Recipe – Uses the same egg-custard technique to create an elegant, fluffy dish that teaches you how to properly incorporate air into eggs for rise.
- Pineapple Mimosa Recipe – The perfect brunch beverage to serve alongside your quiche, teaching you balance and flavor pairing.
- Bread Machine Cinnamon Bun Recipe – Another make-ahead, hands-off baking project that builds your confidence with yeast dough and timing.
You did it. You took a recipe that might have intimidated you, broke it down into manageable steps, and created something genuinely delicious. That’s not just cooking—that’s confidence building, and it’s the foundation for every skill you’ll learn in the kitchen moving forward. You watched your impossible quiche rise in the oven, turned golden at the edges, and proved to yourself that you can follow a recipe precisely and get professional results.
The magic of this recipe isn’t really