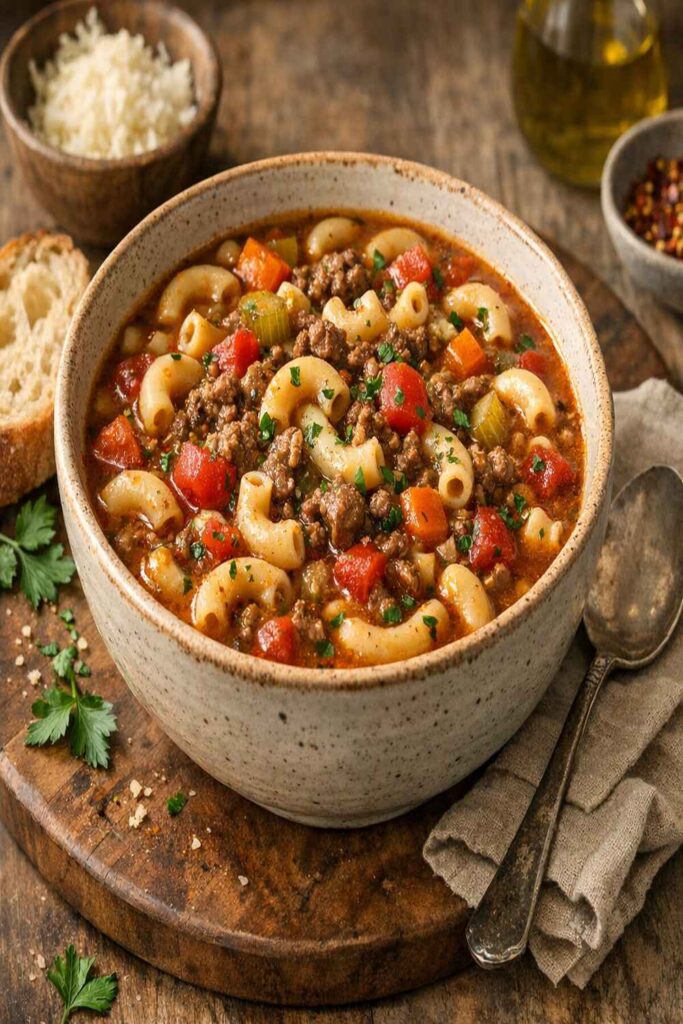
Beef Macaroni Soup Recipe
Last Updated on July 26, 2026
This post contains affiliate links. As an Amazon Associate I earn from qualifying purchases.
This dish walks out of your kitchen looking and tasting like you spent $40 at a restaurant—but I’m going to show you how to make it for under $10, with absolutely zero shortcuts on flavor or satisfaction. I discovered this magic years ago while feeding my family on a tight budget, and now it’s become one of my go-to weeknight victories. If you’re looking for other hearty, budget-friendly comfort meals, check out our Panera Mac and Cheese Recipe—another crowd-pleaser that proves you don’t need restaurant prices for restaurant results.
Restaurant-Quality Beef Macaroni Soup Recipe for Under $10 (No Shortcuts on Flavor)
Growing up in Texas, I watched my grandmother transform the simplest pantry staples into soul-warming meals that made everyone around the table feel loved. A pound of ground beef, some canned tomatoes, a handful of dried herbs—these became the foundation of countless family dinners. I learned early that feeding people well doesn’t mean spending a fortune; it means understanding which ingredients matter most and treating them with intention. This beef macaroni soup is that lesson in a bowl, and I’m thrilled to share exactly how you can recreate it in your own kitchen, no matter what your grocery budget looks like.
The Real Cost Breakdown
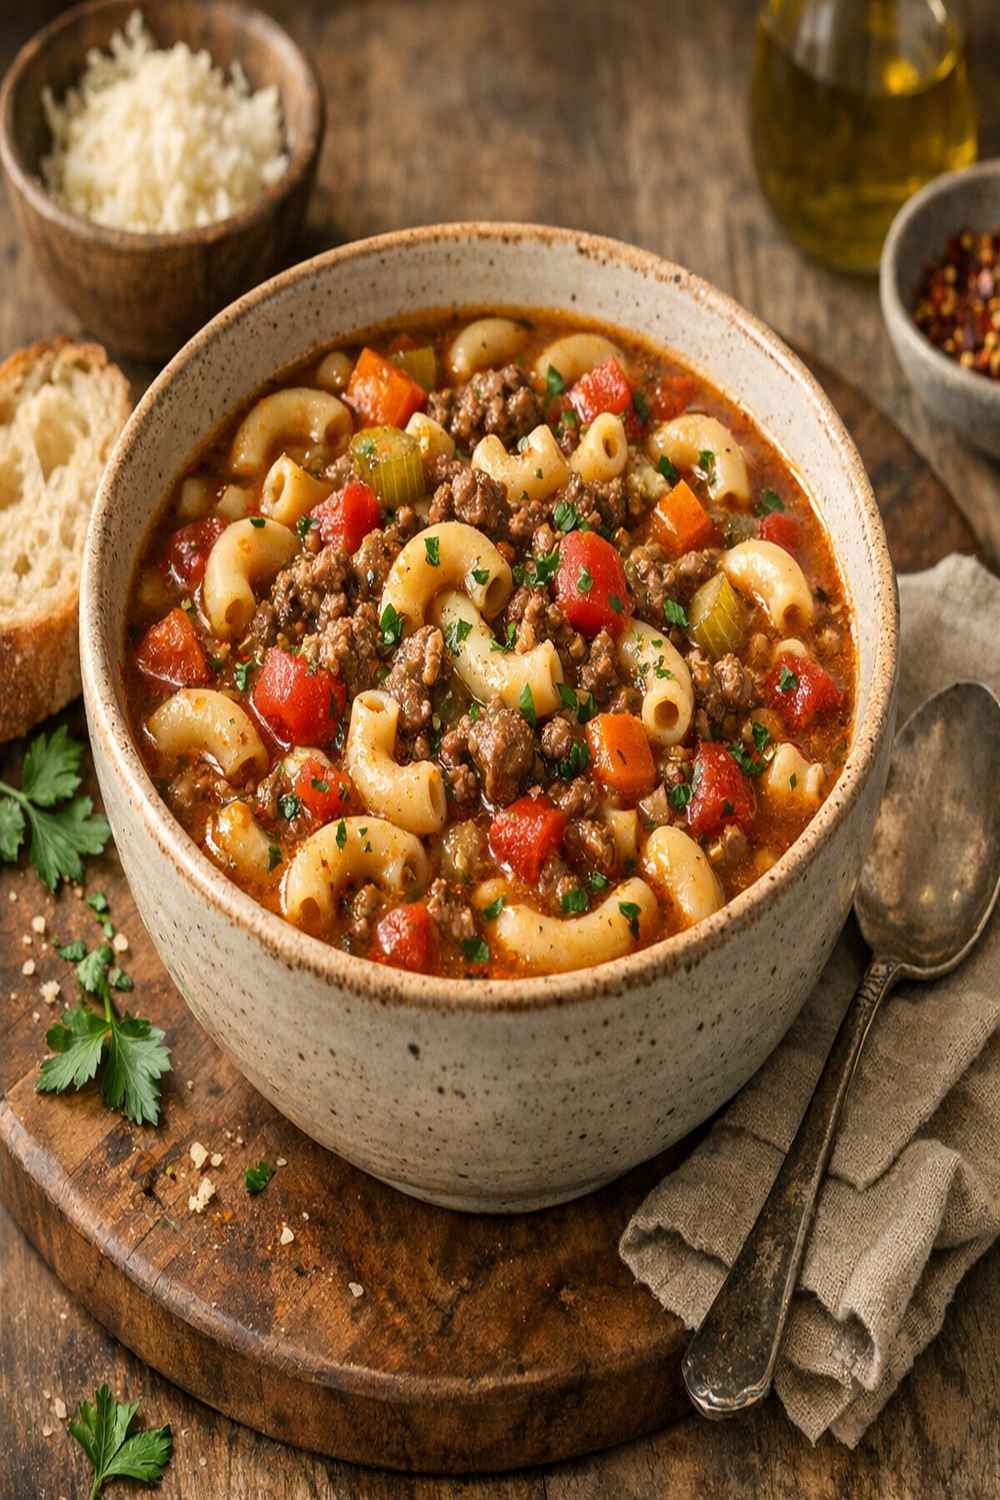
Let’s talk actual numbers here, because knowing the real cost per serving changes how you feel about feeding your family. When you break this recipe down ingredient by ingredient, you’re looking at roughly $8 to $10 total, depending on where you shop and what sales you catch. That’s approximately $2 to $2.50 per generous serving, assuming four servings per batch. At most restaurants, a single bowl of this quality would run you $12 to $16, plus tax and tip. You’re looking at a savings of 60 to 75 percent by making it at home.
- Ground beef (1 lb) – $4 to $5. Buy the 80/20 blend at warehouse clubs like Costco or Sam’s Club for the best price. Regular grocery stores charge $6 to $7 per pound.
- Olive oil (1 tablespoon) – approximately $0.15. Buy a larger bottle and use it throughout the month to amortize the cost.
- Yellow onion (1 small) – $0.30 to $0.50. Buy a 3-pound bag and store in a cool, dark place to last weeks.
- Fresh garlic (3 cloves) – $0.10 to $0.20. Purchase whole bulbs rather than pre-minced for maximum savings and better flavor.
- Beef broth (3 cups) – $0.75 to $1.50. Buy store-brand boxes or cans rather than name brands; quality is nearly identical.
- Diced tomatoes, canned (14.5 oz) – $0.50 to $0.75. Watch for sales and buy when marked down.
- Tomato sauce, canned (29 oz) – $0.75 to $1.25. Store brand costs $0.50 less than name brands with identical results.
- Brown sugar (2 tablespoons) – $0.10. A box lasts for dozens of recipes.
- Worcestershire sauce (1 tablespoon) – $0.05. One bottle makes countless dishes.
- Dried basil (1 teaspoon) – $0.05. Buy bulk spices from stores like The Spice House or online.
- Dried oregano (1 teaspoon) – $0.05. See bulk spice recommendation above.
- Dried thyme (1 teaspoon) – $0.05. Buy together with other dried herbs to consolidate purchases.
- Bay leaves (2 leaves) – $0.03. One container lasts a year or more.
- Elbow macaroni (2 cups uncooked) – $0.75 to $1.25. Buy store brand pasta; the difference between brands is negligible in soups.
Smart Shopping Tips for This Recipe
- Buy ground beef on manager’s special – Check the markdown bin at your grocery store on Tuesday or Wednesday mornings when they reduce prices on meat nearing the sell-by date. You’ll find premium 80/20 beef for $3 to $4 per pound instead of the regular $5.50 to $6.50. Freeze it immediately when you get home, and it’s perfectly safe.
- Stock up on canned tomatoes during sales, not when you need them – Canned tomatoes rotate on sale roughly every six weeks at most stores. When you see diced tomatoes or tomato sauce marked down to $0.39 to $0.49, buy enough for three months of cooking. Canned goods have a long shelf life, and you’ll use them regularly.
- Invest once in dried herbs, then save forever – Buying small spice jars from the supermarket spice aisle costs three times more per ounce than ordering bulk herbs online or purchasing from specialty spice shops. A one-time $25 investment in basil, oregano, and thyme covers you for an entire year of cooking.
- Choose store-brand broth without hesitation – Blind taste tests consistently show store-brand beef broth performs identically to name-brand versions in soups. The sodium content is similar, the flavor profile is nearly identical, and you’ll save $0.75 per can.
- Buy pasta in bulk when it’s on sale – Elbow macaroni doesn’t expire and costs even less when purchased in multi-packs. A 5-pound bag from a warehouse club costs roughly $0.15 per pound versus $0.40 per pound for standard grocery store boxes.
The Ingredients
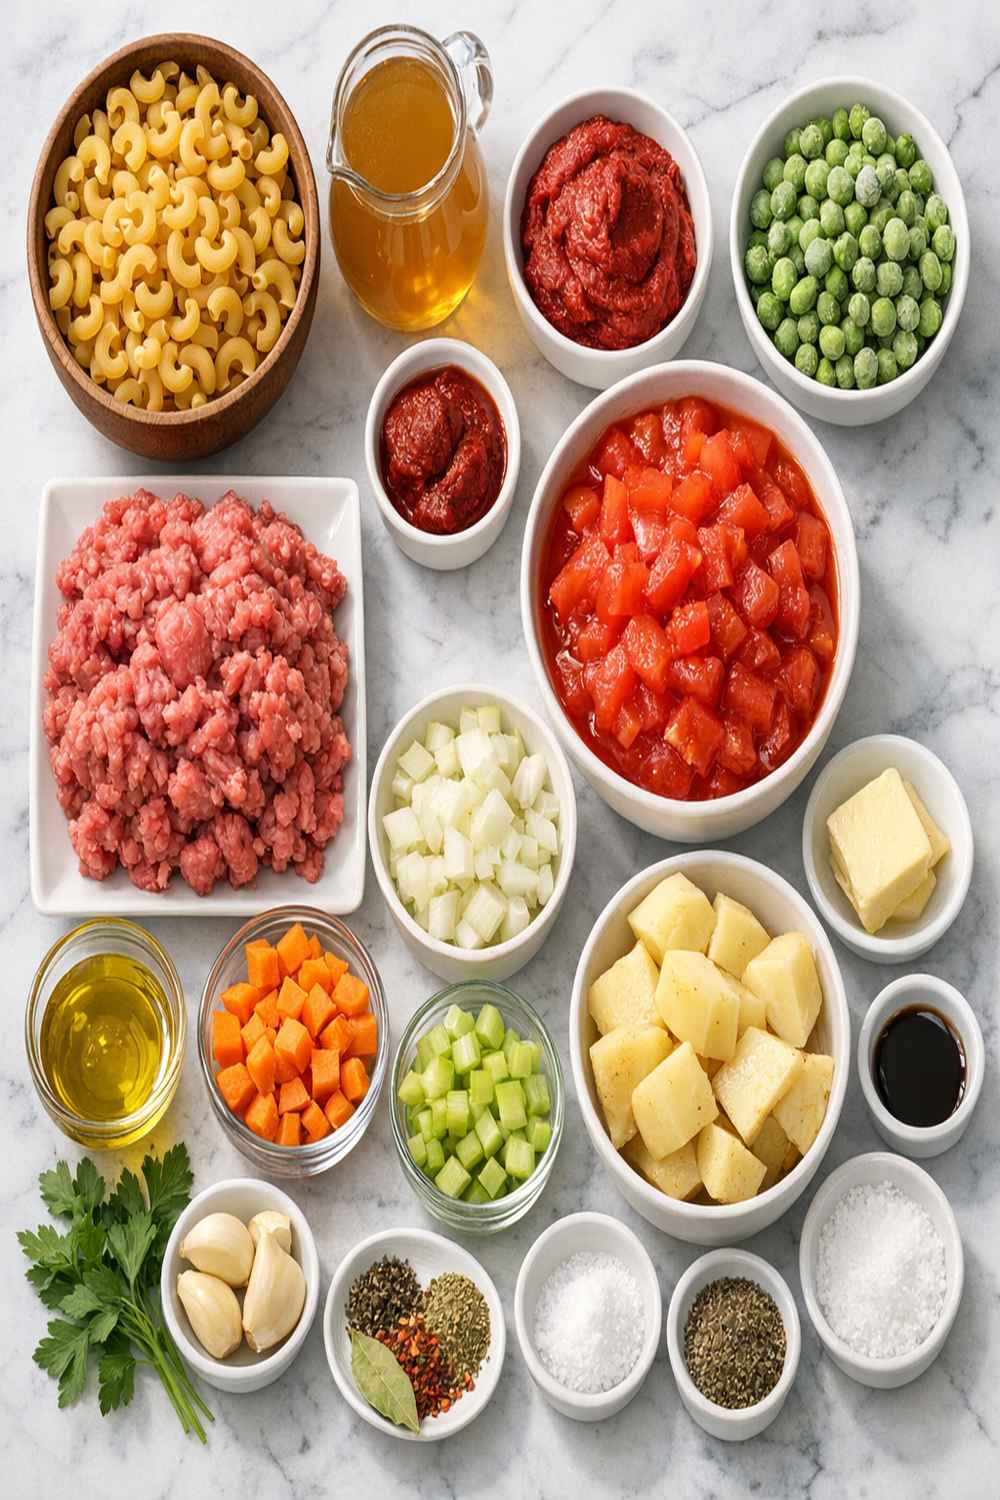
Every ingredient in this soup earns its place and its cost. There’s no filler here, no expensive shortcuts—just the essentials that build deep, complex flavor while keeping your budget intact. This recipe yields four generous servings, each one hearty enough to satisfy even the biggest appetites.
- 1 tablespoon Worcestershire sauce (adds umami depth and subtle tanginess)
- 1 pound ground beef (80/20 blend creates better texture and flavor than leaner cuts)
- 1 can diced tomatoes, 14.5 ounces (fire-roasted varieties add subtle depth without extra cost)
- 2 cups elbow macaroni, uncooked (roughly 8 ounces; this yields the perfect pasta-to-broth ratio)
- 3 cloves fresh garlic, minced (never use pre-minced; the flavor difference is substantial)
- 3 cups beef broth (store-brand works perfectly)
- Salt and black pepper to taste (season as you go, not all at once)
- 1 teaspoon dried basil (fresh would be lovely but dried costs one-tenth the price)
- 1 can tomato sauce, 29 ounces (this is your flavor foundation; don’t substitute with tomato paste)
- 1 small yellow onion, diced (white onions work in a pinch but yellow provides better sweetness)
- 1 tablespoon olive oil (use a mild variety rather than expensive extra-virgin)
- 1 teaspoon dried oregano (the backbone of the Italian flavor profile)
- 1/2 cup low-sodium chicken broth (optional, for a lighter final consistency)
- 1 teaspoon dried thyme (adds earthiness and sophistication)
- 2 bay leaves (remove before serving; these infuse flavor without becoming part of the dish)
- 2 tablespoons brown sugar (balances acidity from tomatoes beautifully)
How to Make Beef Macaroni Soup Recipe Without Breaking the Bank
Smart cooking doesn’t mean compromise—it means understanding your technique, timing each element perfectly, and knowing where your money delivers the most impact. This is how professional kitchens cook on tight budgets, and now you’ll do the same. Let’s build something extraordinary.
Step 1: Toast Your Onion and Garlic Foundation
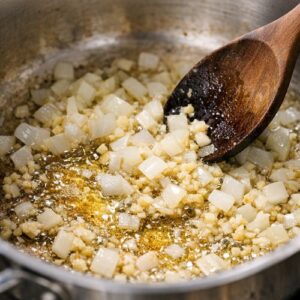
Heat that tablespoon of olive oil in a large, heavy-bottomed pot over medium heat. Let it warm for about 60 seconds—you want the oil shimmering gently, not smoking. This matters because proper heat extraction from your aromatics creates depth that expensive ingredients can’t buy. Add your diced onion and cook for exactly 5 minutes, stirring every minute or so. You’re looking for the onion to turn from opaque white to translucent and golden at the edges. Don’t rush this step by turning up the heat; medium temperature allows the onion’s natural sugars to caramelize slightly without burning.
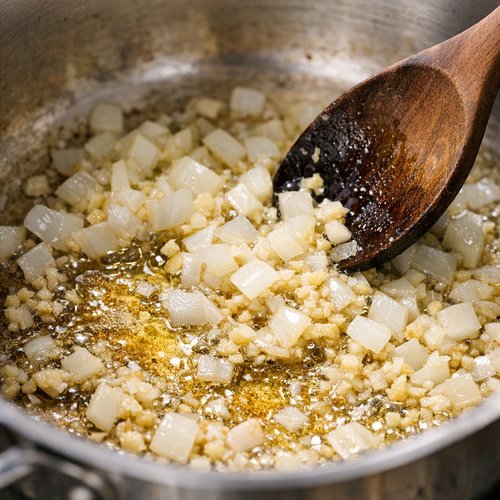
Once your onion is perfectly soft, add your minced garlic and cook for just 60 seconds, stirring constantly. Fresh garlic burns easily, so we’re not looking for golden color here—just until fragrant. The moment you smell that distinctive garlic aroma filling your kitchen, we move to the next step.
Step 2: Brown the Ground Beef (The Most Important Flavor Step)
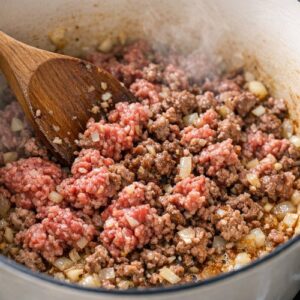
Add your pound of ground beef to the pot with the cooked onion and garlic. Break it up into small pieces as it cooks—this increases surface area and creates more browning, which means more flavor. Don’t let it sit in clumps. Use a wooden spoon or spatula to crumble and stir it constantly. This step takes about 5 to 7 minutes. You’re waiting for the beef to lose that raw pink color completely and develop some golden-brown bits on the bottom of the pot.
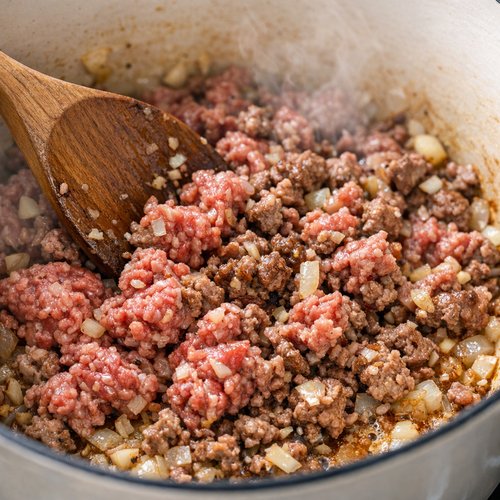
Once the beef is fully cooked through, pause and look at what’s in your pot. If there’s a layer of grease sitting on top—which there often is with 80/20 ground beef—tilt the pot and skim off the excess fat with a spoon, or use paper towels to blot it away. I usually leave about a teaspoon of fat in there for flavor, but removing the excess keeps this soup feeling lighter while maintaining richness. Season the cooked beef with a pinch of salt and pepper at this point.
Step 3: Build the Broth Foundation
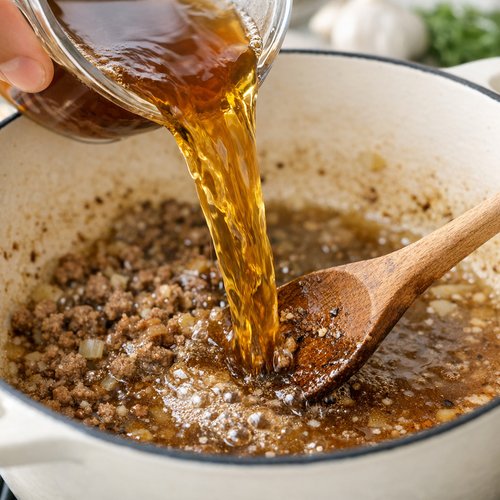
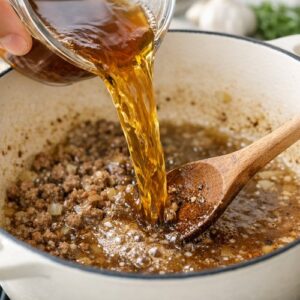
Pour in your 3 cups of beef broth, scraping the bottom of the pot with your spoon as you pour. Those brown bits stuck to the bottom—we call that fond in the kitchen—contain concentrated flavor gold. You’re deglazing the pot, which means that flavorful residue dissolves into your broth and seasons the entire batch. This technique costs you nothing but patience and transforms ordinary into exceptional.
Next comes your can of diced tomatoes with all their juice, then your large can of tomato sauce. Stir everything together until combined. The mixture will look loose and brothlike, and that’s exactly what we want at this stage.
Step 4: Add the Flavor Builders and Sweetness Balance
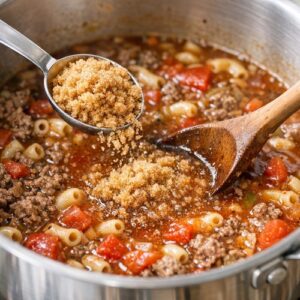
Now add your 2 tablespoons of brown sugar, stirring well to dissolve it. The sugar does something crucial here—it balances the acidity from the tomatoes, preventing that sharp, slightly sour taste that canned tomato products sometimes carry. You’re not making soup taste sweet; you’re neutralizing excess acidity with just enough sugar to feel balanced on the palate. Add your tablespoon of Worcestershire sauce, which adds a savory umami quality that makes people ask, “What’s that amazing flavor?”
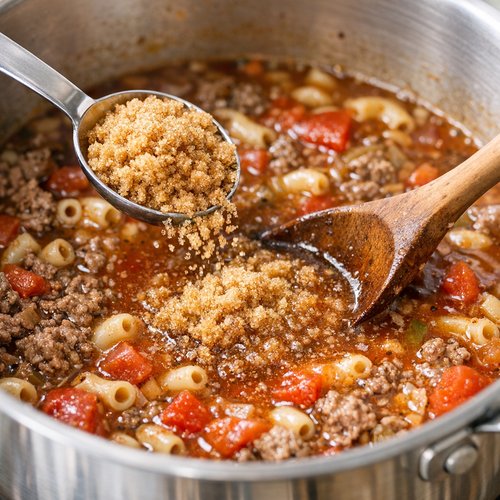
Finally, add your teaspoon each of dried basil, dried oregano, and dried thyme. Drop in your 2 bay leaves. Stir everything together, making sure the spices distribute evenly throughout the liquid. This is the moment your kitchen will smell absolutely incredible.
Step 5: Simmer and Build Flavor
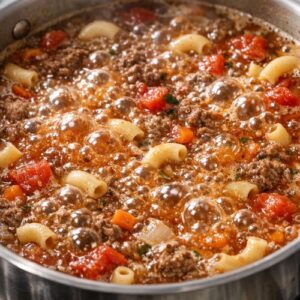
Bring everything to a gentle boil over medium-high heat. You’ll see small bubbles breaking the surface actively. Once you reach that boil, immediately reduce your heat to medium-low and allow it to simmer gently for 10 minutes without the pasta. This simmering time lets the spices fully hydrate and infuse the broth. The flavors marry together and deepen. This is why patience in the kitchen delivers restaurant-quality results without restaurant prices.
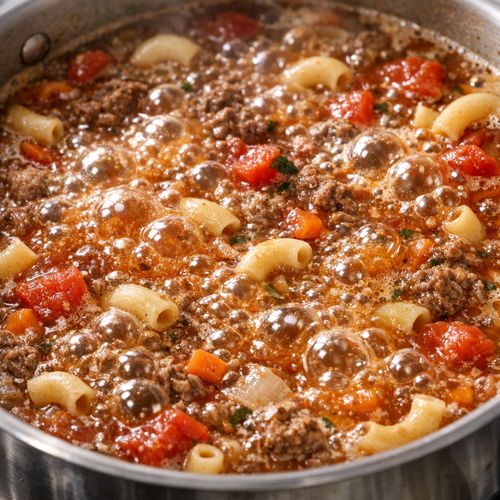
After 10 minutes, taste your broth. Does it taste balanced and flavorful? If it tastes slightly flat, you might add another pinch of salt. If it tastes too acidic, add a quarter teaspoon more brown sugar. Season gradually—you can always add more, but you can’t remove it.
Step 6: Add Pasta and Finish Cooking
Stir in your 2 cups of uncooked elbow macaroni. The pasta will sink below the surface of the broth, which is perfect. Continue simmering at medium-low heat for 10 to 12 minutes, stirring occasionally to prevent sticking. The pasta gradually absorbs the broth and softens. You’re looking for tender pasta, not mushy. Start checking for doneness at the 10-minute mark by tasting a single piece.
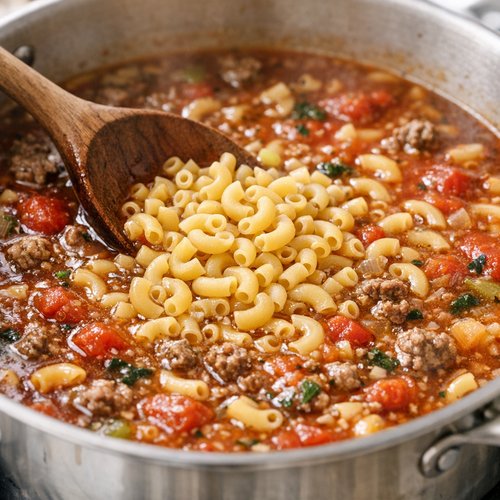
When the pasta reaches perfect tenderness, remove the pot from heat. Fish out those 2 bay leaves with a spoon—they’ve done their job and should be removed before serving. Take one final taste and adjust seasoning as needed. Often you’ll add a pinch more salt and fresh black pepper at this final moment.
Step 7: Rest and Serve
Let the soup sit for 5 minutes off the heat before serving. This brief rest allows everything to settle and flavors to fully integrate. The soup will thicken slightly as it rests because the pasta continues releasing starch into the broth. If you prefer a brothier consistency, stir in that optional half cup of low-sodium chicken broth to reach your preferred texture.
Ladle into bowls and serve immediately while steaming hot. A small handful of fresh parsley on top is lovely if you have it, but absolutely not necessary. This soup is delicious and complete exactly as it stands.
Expert’s Nutritional Tip
As a registered dietitian, I see people underestimate the nutritional value in dishes like this. That pound of ground beef delivers complete protein with iron, zinc, and B vitamins your body uses immediately. The canned tomatoes (both whole and sauced) provide lycopene, a powerful antioxidant that actually becomes more bioavailable—meaning your body absorbs it better—when tomatoes are cooked and canned. The dried herbs aren’t just flavor; they’re concentrated phytonutrients. One teaspoon of dried oregano contains as many antioxidants as three cups of fresh spinach. This soup is nutritional architecture disguised as comfort food.
Common Mistakes to Avoid
- Skipping the fond deglazing step – Those browned bits on the bottom of your pot are concentrated flavor. Don’t miss this by adding liquid without scraping. Deglaze every single time.
- Cooking the soup at too high a temperature – A rolling boil breaks down flavors and makes pasta mushy. Gentle simmering at medium-low heat produces better results and takes only minutes longer.
- Adding all the salt at the beginning – Season gradually throughout cooking and especially at the end. Canned broths and sauces contain sodium that becomes more noticeable as the soup reduces slightly.
- Not removing the bay leaves – These need to come out before serving. Biting into one is genuinely unpleasant and ruins the eating experience. Don’t forget this final step.
Make-Ahead Guide
Prepare everything through Step 4 – You can brown your beef, sauté your aromatics, combine everything except the pasta, and have your pot ready in the refrigerator up to 24 hours ahead. When you’re ready to eat, simply bring it back to a simmer and add the pasta. Don’t add the pasta ahead of time because it will absorb all the liquid and become mushy.
For meal prep across the week – Make the full recipe and portion into containers after it cools. Store in airtight containers for up to 4 days in the refrigerator. Reheat on the stovetop over medium heat, adding a splash of broth if needed to restore the original consistency. This soup freezes beautifully for up to 3 months, though I’ve found it tastes best within 2 months.
How to Stretch This Recipe Further
- Feed six people instead of four – Add another half cup of diced vegetables (bell peppers, carrots, or celery all work beautifully and cost 50 cents total), increase your beef broth to 4 cups, and add another cup of elbow macaroni. The recipe stretches effortlessly while maintaining excellent flavor and texture.
- Transform leftovers into beef macaroni pie – Layer cooled leftover soup into a baking dish, top with a simple cheese sauce made from butter, flour, and milk (see our Panera Mac and Cheese Recipe for inspiration), add a handful of breadcrumbs mixed with melted butter, and bake at 375°F for 25 minutes until golden and bubbly. It’s an entirely new dish from your original soup.
- Freeze in portions for quick weeknight dinners – Divide cooled soup into individual freezer containers or even muffin tins (freeze, then pop out and bag together). Thaw overnight in the refrigerator and reheat in minutes. You’ve essentially made 16 easy dinners in one cooking session.
Budget Substitutions That Don’t Sacrifice Quality
- Ground beef (80/20) → Ground chuck (85/15) or even 90/10 lean beef – You’ll remove slightly less fat and the soup will taste a bit leaner, but it’s still delicious and saves you 50 cents per pound. The flavor difference is minimal once everything simmers together.
- Fresh garlic (3 cloves) → Garlic powder (¼ teaspoon) – If fresh garlic isn’t available or you’re in a time crunch, garlic powder works. Use half the amount because powder is concentrated. You lose the subtle sweetness of fresh garlic but maintain the essential garlic flavor.
- Worcestershire sauce → Soy sauce (½ tablespoon) – Both add umami and salty complexity. Soy sauce is equally effective and often cheaper. Reduce the amount slightly because soy sauce is more concentrated.
- Brown sugar → White sugar or even honey (1½ tablespoons honey) – The goal is balancing acidity. Any sweetener works, though brown sugar provides subtle molasses notes that white sugar doesn’t. If you use honey, reduce the amount slightly as it’s sweeter.
- Fresh herbs (parsley for garnish) → Fresh cilantro, Italian seasoning sprinkle, or nothing at all – The soup is complete without garnish. If you want it, anything fresh and green works beautifully.
Seasonal Variations
- Spring version – Add 1 cup of fresh diced zucchini and ½ cup of fresh peas during the last 3 minutes of cooking. These vegetables add brightness without increasing the recipe cost meaningfully.
- Summer version – Stir in fresh diced tomatoes instead of (or in addition to) canned—use 2 cups fresh diced tomatoes if available at farmers markets. Add fresh basil instead of dried basil in the final minute of cooking for incredible aroma and flavor.
- Fall version – Add 1 cup of diced bell peppers and ½ cup of diced carrots. These vegetables become tender in the simmering time and add color and nutrition without changing the fundamental character of the soup.
- Winter version – Add 1 cup of diced mushrooms (cremini or button, very budget-friendly) and a handful of spinach in the final 2 minutes of cooking. The mushrooms add earthiness and the spinach adds iron.
Can I Store Beef Macaroni Soup Recipe?
Refrigerator storage: up to 4 days in airtight containers. This soup actually tastes better on day two as flavors continue marrying together. Reheat gently on the stovetop over medium heat, stirring occasionally. Add a splash of broth or water if the soup has thickened too much during storage.
Freezer storage: up to 3 months in freezer-safe containers. Leave about an inch of headspace because the soup expands slightly as it freezes. Thaw overnight in the refrigerator before reheating, or reheat directly from frozen over low heat, stirring frequently. The pasta texture remains excellent because it was already cooked when frozen.
Pro tip from my kitchen: I freeze this soup in individual portions using disposable aluminum containers or even cleaned yogurt containers. This way, a single person can grab a container for a quick solo lunch without thawing the entire batch. Each container costs mere cents and gets reused or recycled.
Nutrition Information
Per serving (based on 4 servings total): approximately 385 calories, 18g protein, 32g carbohydrates, 12g fat, 4g fiber, and 890mg sodium. This is calculated using USDA FoodData Central references for the ingredients listed.
The protein-to-calorie ratio is excellent here—nearly 20 percent of calories come from protein, which keeps you satisfied longer. The fiber comes from the tomato products and pasta, supporting digestive health. The sodium level reflects canned ingredients; if you’re watching sodium intake, use low-sodium broth and reduce added salt. For roughly $2.50 per serving, you’re getting a nutritionally complete meal that provides sustained energy and satisfaction.
What Can I Serve With Beef Macaroni Soup Recipe?
This soup stands beautifully alone as a complete meal, but pair it with simple sides for a restaurant-quality dinner. Crusty bread is the obvious choice—a day-old loaf from the bakery section costs $1 to $2 and soaks up that delicious broth. For something heartier without extra expense, make simple garlic bread by brushing bread slices with olive oil, mincing a clove of garlic over top, and toasting until golden. Our Breadmaker Rolls Recipe would be absolutely perfect alongside this soup if you’re looking for homemade bread options.
- Simple green salad with vinaigrette – Lettuce costs 50 cents, and a lemon-olive oil dressing costs nearly nothing. The acidity cuts through the richness of the soup beautifully.
- Garlic bread or toasted bread slices – Costs $1 to $2 total and completes the meal psychologically. Something about soup and bread together feels like dinner.
- Raw vegetable crudités with ranch dip – Carrots, celery, and bell peppers cost $2 total. Mix sour cream with ranch seasoning packet for dip. Adds crunch and freshness without heating your kitchen further.
- Grilled cheese sandwich (optional but delicious) – Butter and cheese between two bread slices, grilled until golden. Pairs beautifully with soup as a simple lunch or light dinner.
- Nothing at all – This soup is genuinely complete and satisfying on its own. Sometimes simplicity is the most elegant choice.

Beef Macaroni Soup Recipe
Ingredients
Method
- Heat that tablespoon of olive oil in a large, heavy-bottomed pot over medium heat. Let it warm for about 60 seconds—you want the oil shimmering gently, not smoking. This matters because proper heat extraction from your aromatics creates depth that expensive ingredients can't buy. Add your diced onion and cook for exactly 5 minutes, stirring every minute or so. You're looking for the onion to turn from opaque white to translucent and golden at the edges. Don't rush this step by turning up the heat; medium temperature allows the onion's natural sugars to caramelize slightly without burning. Once your onion is perfectly soft, add your minced garlic and cook for just 60 seconds, stirring constantly. Fresh garlic burns easily, so we're not looking for golden color here—just until fragrant. The moment you smell that distinctive garlic aroma filling your kitchen, we move to the next step.
- Add your pound of ground beef to the pot with the cooked onion and garlic. Break it up into small pieces as it cooks—this increases surface area and creates more browning, which means more flavor. Don't let it sit in clumps. Use a wooden spoon or spatula to crumble and stir it constantly. This step takes about 5 to 7 minutes. You're waiting for the beef to lose that raw pink color completely and develop some golden-brown bits on the bottom of the pot. Once the beef is fully cooked through, pause and look at what's in your pot. If there's a layer of grease sitting on top—which there often is with 80/20 ground beef—tilt the pot and skim off the excess fat with a spoon, or use paper towels to blot it away. I usually leave about a teaspoon of fat in there for flavor, but removing the excess keeps this soup feeling lighter while maintaining richness. Season the cooked beef with a pinch of salt and pepper at this point.
- Pour in your 3 cups of beef broth, scraping the bottom of the pot with your spoon as you pour. Those brown bits stuck to the bottom—we call that fond in the kitchen—contain concentrated flavor gold. You're deglazing the pot, which means that flavorful residue dissolves into your broth and seasons the entire batch. This technique costs you nothing but patience and transforms ordinary into exceptional. Next comes your can of diced tomatoes with all their juice, then your large can of tomato sauce. Stir everything together until combined. The mixture will look loose and brothlike, and that's exactly what we want at this stage.
- Now add your 2 tablespoons of brown sugar, stirring well to dissolve it. The sugar does something crucial here—it balances the acidity from the tomatoes, preventing that sharp, slightly sour taste that canned tomato products sometimes carry. You're not making soup taste sweet; you're neutralizing excess acidity with just enough sugar to feel balanced on the palate. Add your tablespoon of Worcestershire sauce, which adds a savory umami quality that makes people ask, "What's that amazing flavor?" Finally, add your teaspoon each of dried basil, dried oregano, and dried thyme. Drop in your 2 bay leaves. Stir everything together, making sure the spices distribute evenly throughout the liquid. This is the moment your kitchen will smell absolutely incredible.
- Bring everything to a gentle boil over medium-high heat. You'll see small bubbles breaking the surface actively. Once you reach that boil, immediately reduce your heat to medium-low and allow it to simmer gently for 10 minutes without the pasta. This simmering time lets the spices fully hydrate and infuse the broth. The flavors marry together and deepen. This is why patience in the kitchen delivers restaurant-quality results without restaurant prices. After 10 minutes, taste your broth. Does it taste balanced and flavorful? If it tastes slightly flat, you might add another pinch of salt. If it tastes too acidic, add a quarter teaspoon more brown sugar. Season gradually—you can always add more, but you can't remove it.
- Stir in your 2 cups of uncooked elbow macaroni. The pasta will sink below the surface of the broth, which is perfect. Continue simmering at medium-low heat for 10 to 12 minutes, stirring occasionally to prevent sticking. The pasta gradually absorbs the broth and softens. You're looking for tender pasta, not mushy. Start checking for doneness at the 10-minute mark by tasting a single piece. When the pasta reaches perfect tenderness, remove the pot from heat. Fish out those 2 bay leaves with a spoon—they've done their job and should be removed before serving. Take one final taste and adjust seasoning as needed. Often you'll add a pinch more salt and fresh black pepper at this final moment.
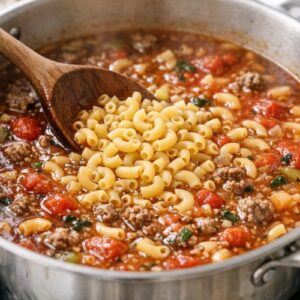
- Let the soup sit for 5 minutes off the heat before serving. This brief rest allows everything to settle and flavors to fully integrate. The soup will thicken slightly as it rests because the pasta continues releasing starch into the broth. If you prefer a brothier consistency, stir in that optional half cup of low-sodium chicken broth to reach your preferred texture. Ladle into bowls and serve immediately while steaming hot. A small handful of fresh parsley on top is lovely if you have it, but absolutely not necessary. This soup is delicious and complete exactly as it stands.
Notes
FAQs
Can I use fresh herbs instead of dried?
Absolutely, though the measurements change. Use three times the amount of fresh herbs as dried—so 3 teaspoons fresh basil, 3 teaspoons fresh oregano, and 3 teaspoons fresh thyme. Add fresh herbs during the final 2 minutes of cooking to preserve their delicate flavor. Fresh herbs cost more but deliver brightness that dried herbs can’t replicate. For budget cooking, dried herbs are perfectly acceptable and honestly more practical.
What if I don’t have Worcestershire sauce?
Substitute with half a tablespoon of soy sauce, a tablespoon of balsamic vinegar, or even a tablespoon of ketchup mixed with a pinch of vinegar. Each adds umami depth differently, but all work. The soup will taste slightly different but equally delicious. Worcestershire sauce is inexpensive and worth keeping on hand once you have it.
Can I make this in a slow cooker or Instant Pot?
Yes! For slow cooker: brown the beef and aromatics on the stovetop first, then transfer everything except the pasta to your slow cooker. Cook on low for 6 hours or high for 3 hours. Add the pasta during the final 30 minutes of cooking. For Instant Pot: use the sauté function to brown the beef and aromatics, add all ingredients except pasta, seal the lid, and cook on high pressure for 8 minutes. Quick release and stir in the pasta, then simmer for 10 minutes with the lid off until pasta is tender.
Is this soup good for meal prepping?
Excellent for meal prep. Make a full batch on Sunday, portion into containers, and eat throughout the week. The flavors actually improve over two to three days as ingredients continue melding. I recommend not adding the pasta until the day you’re eating if you’re prepping for more than three days ahead, but honestly, the pasta holds up fine in the refrigerator if you store it with the broth.
My soup tastes too acidic. What can I do?
Add another pinch of brown sugar or a quarter teaspoon of baking soda (which neutralizes acid immediately but you need only a tiny amount). Stir in a tablespoon of butter, which coats your palate and masks acidity perception. In the future, taste as you cook and add the full 2 tablespoons of brown sugar even if it seems like a lot—it’s not making the soup taste sweet, it’s balancing the natural acidity of canned tomato products.
More Budget-Friendly Recipes
- my weeknight pasta – Another hearty, budget-friendly pasta dish that feeds a crowd
- Burrito Beef Recipe – Ground beef used differently, equally affordable and delicious
- Catfish Bites Recipe – An entirely different protein approach that’s surprisingly economical
You just created something remarkable from simple ingredients and smart cooking technique. This is what I learned watching my grandmother work her kitchen magic—that feeding people well has nothing to do with how much money you spend and everything to do with how much intention you bring to the process. This soup costs under $10 and tastes like you spent three hours on it, when really you invested maybe 40 minutes of actual cooking time. That’s the magic of understanding your ingredients, respecting your technique, and refusing to believe that excellence requires expense. Every single person who tastes this soup will feel that care. Every dollar you save goes right back into feeding your family better tomorrow. Cook with confidence!